 Meta Ads MCP
Setup guide
ChatGPT desktop
Five screens. Create a mam_live_ key and connect your Facebook app first.
MCP URL
Paste this into the URL field. Type is Streamable HTTP.
Step 1
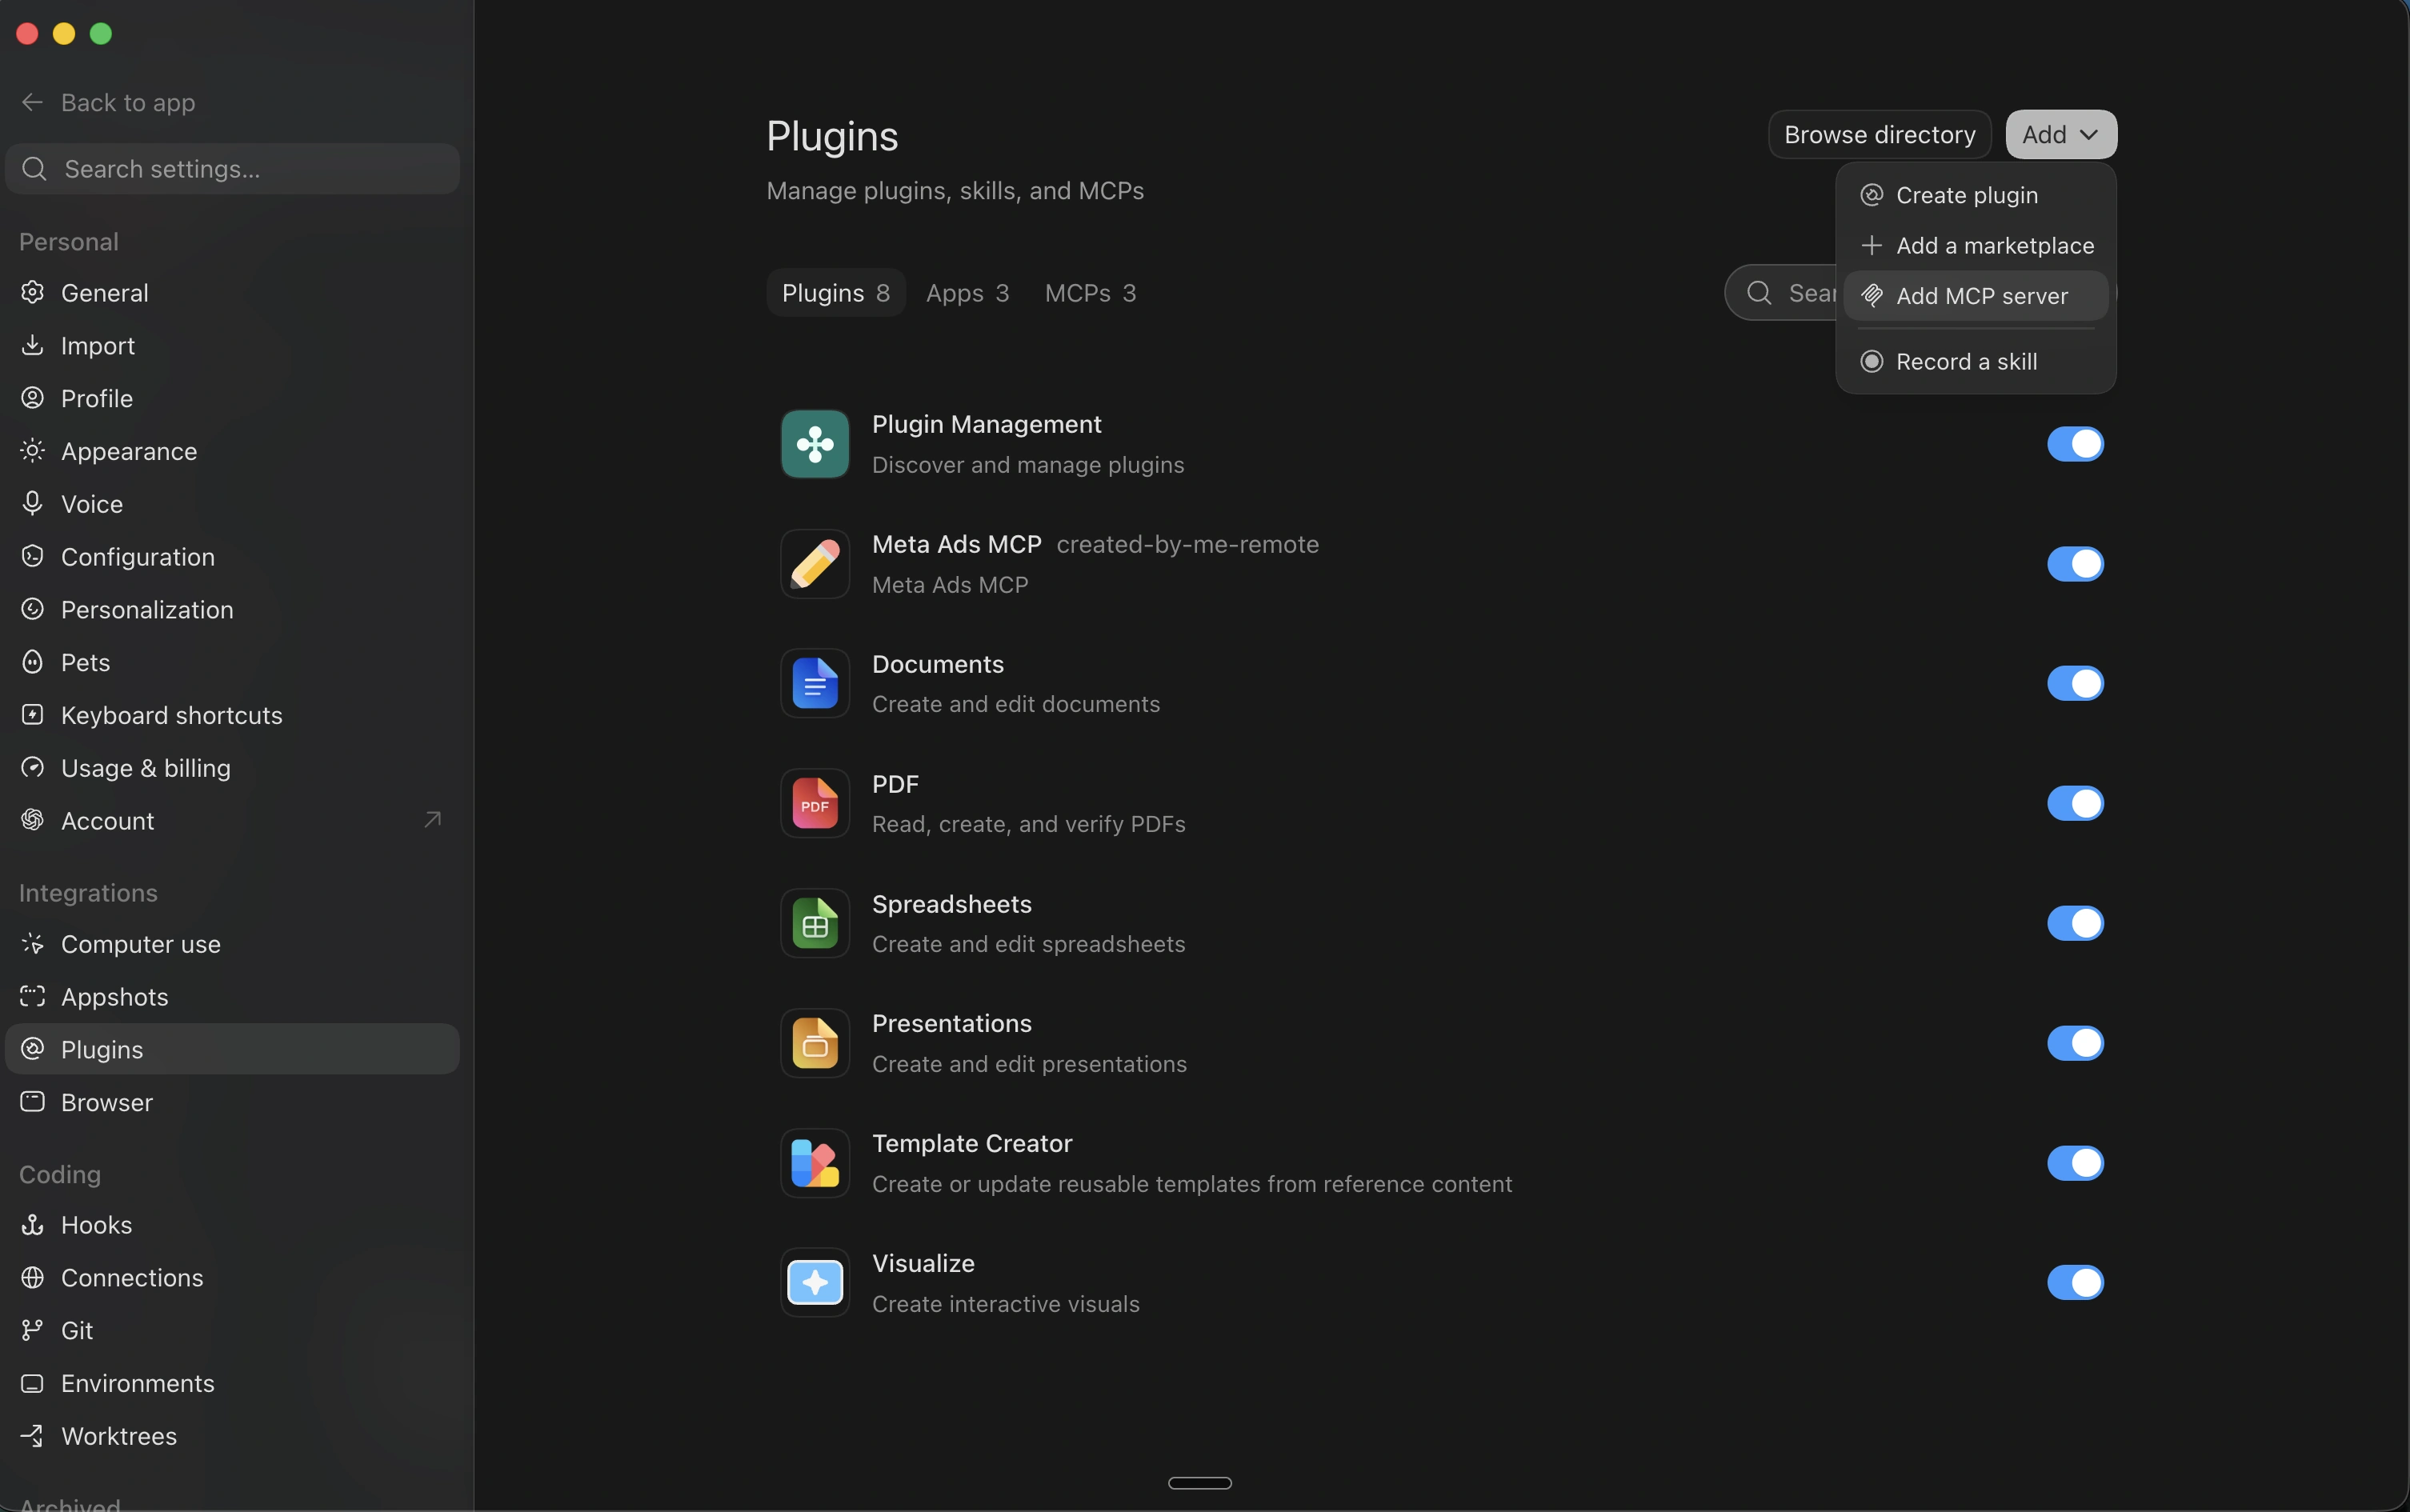
Open Settings, Plugins, then Add MCP server
In the ChatGPT desktop app, open Settings. Under Integrations, click Plugins. Click Add in the top right, then Add MCP server.
Step 2
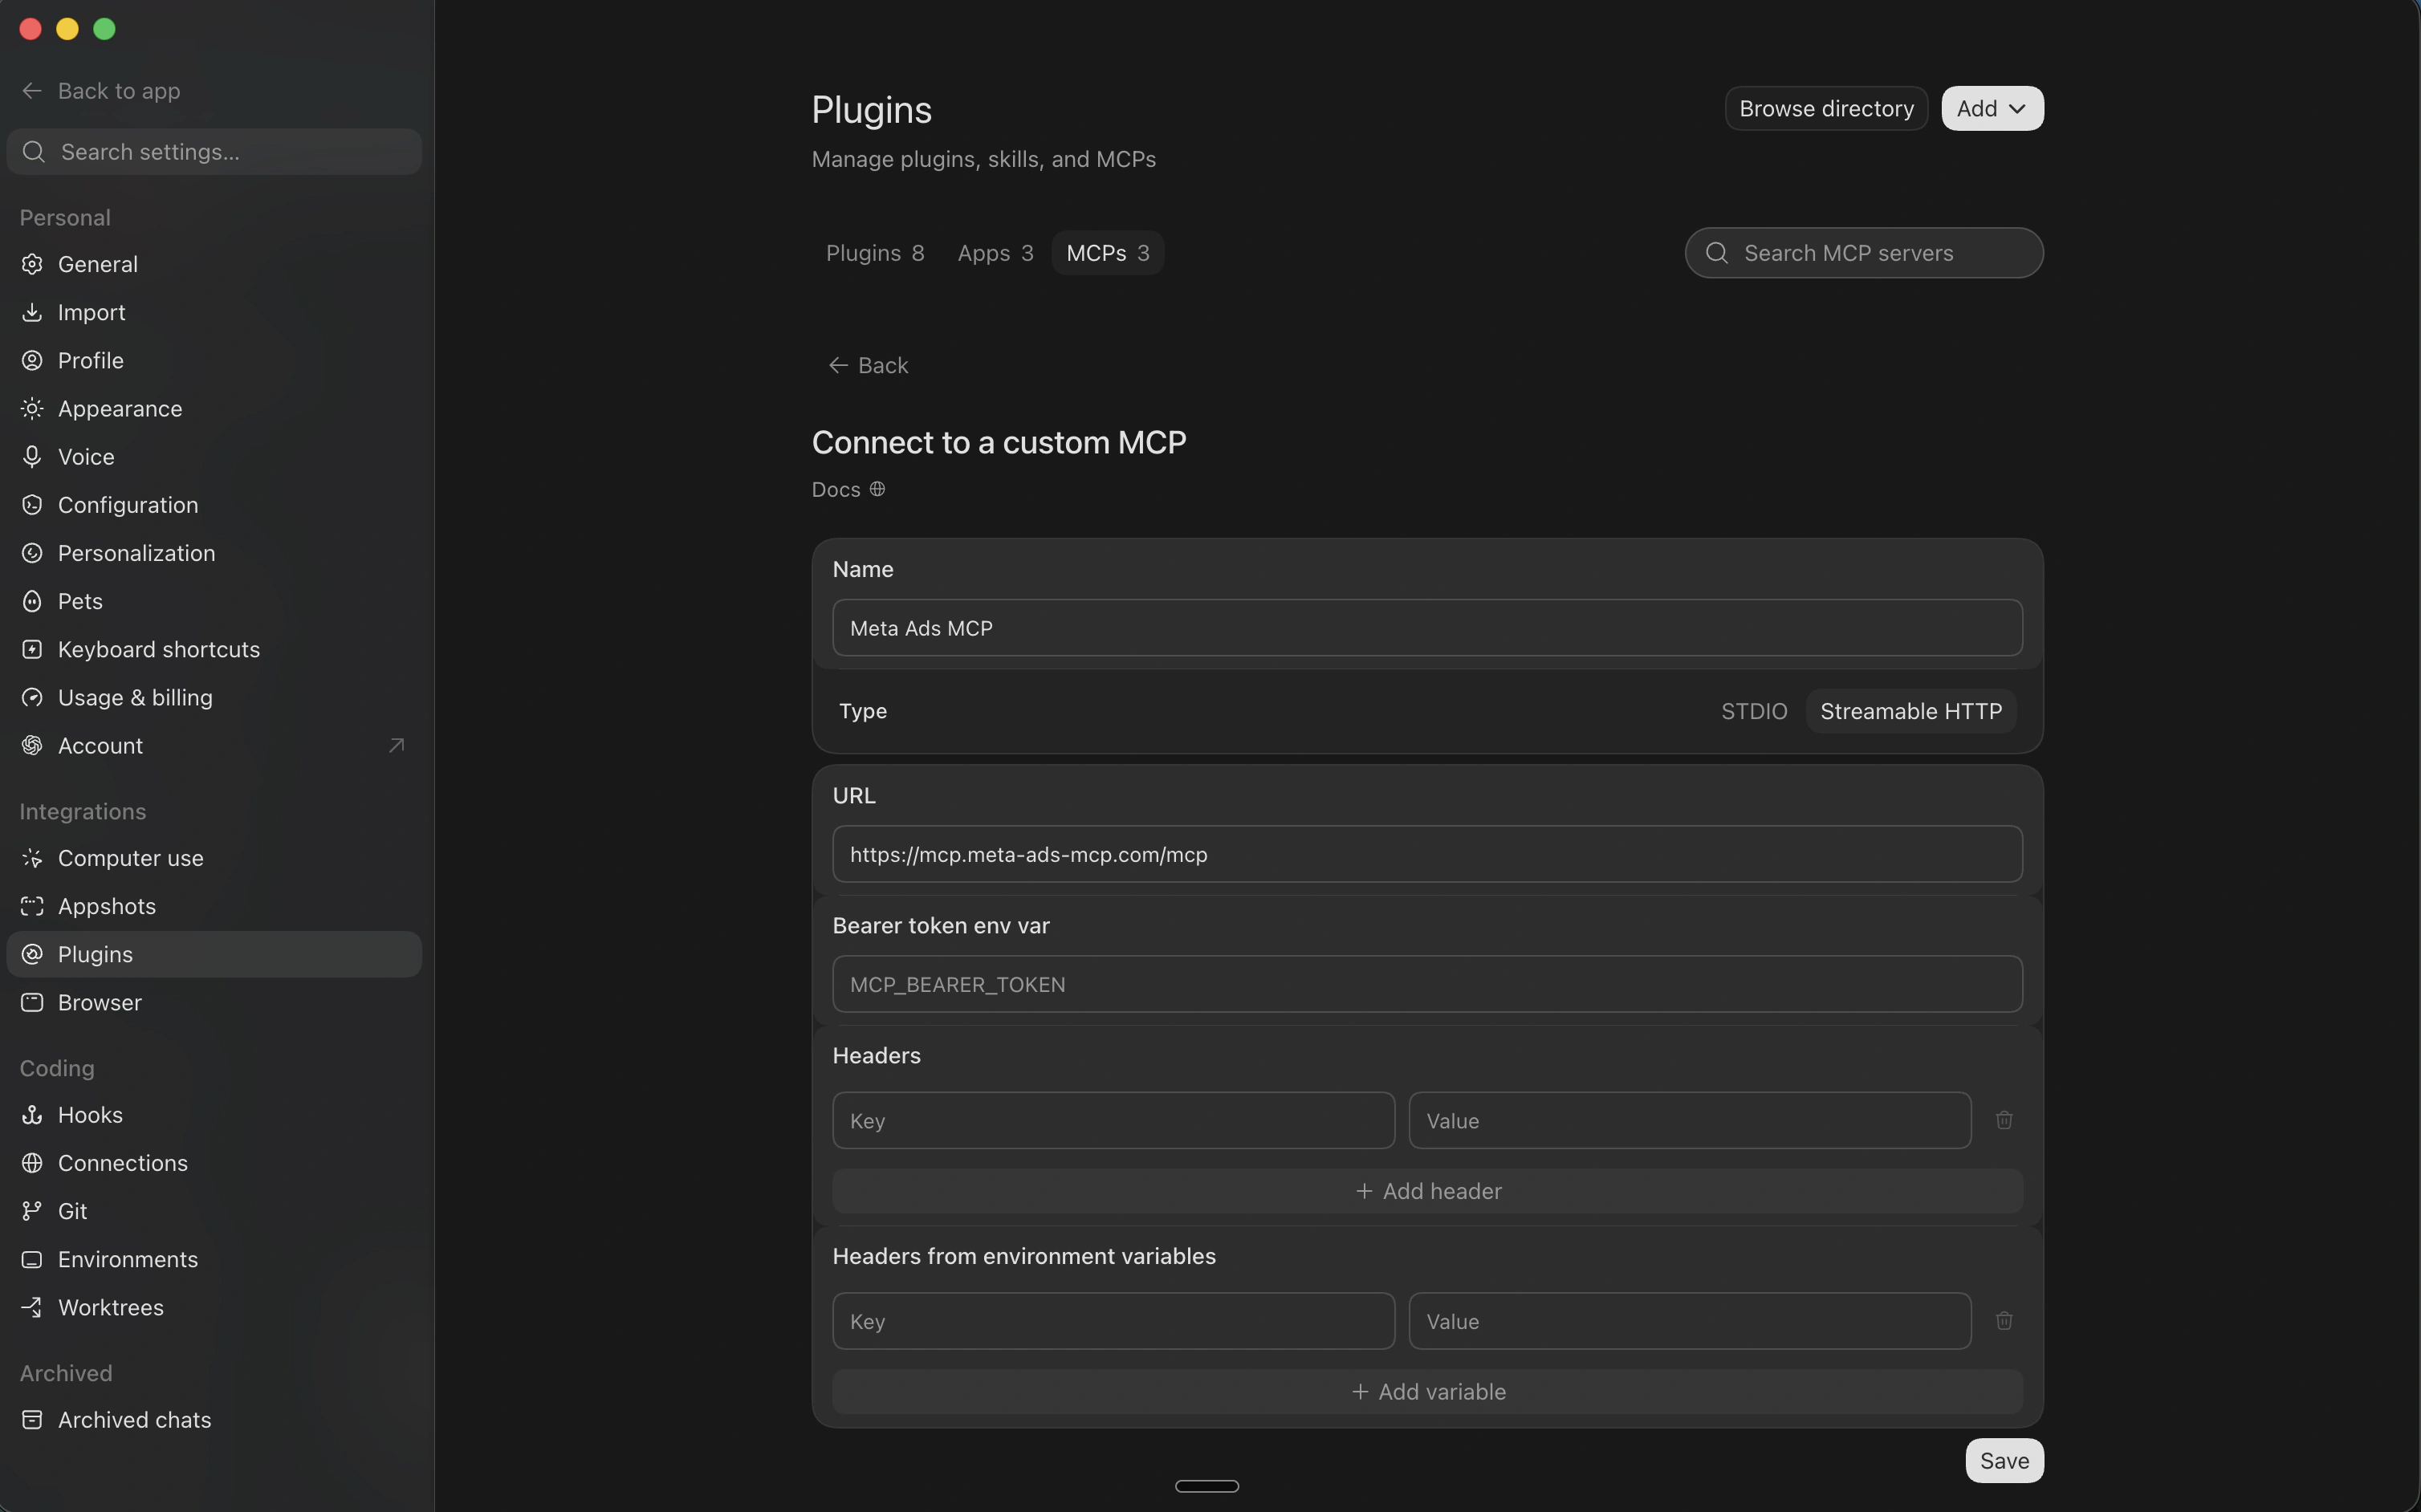
Choose Streamable HTTP and paste the URL
Name it Meta Ads MCP. Type must be Streamable HTTP, not STDIO. URL is https://mcp.meta-ads-mcp.com/mcp. Leave Bearer token env var, Headers, and Headers from environment variables blank.
If the form shows Command to launch, you are still on STDIO. Switch to Streamable HTTP.
Step 3
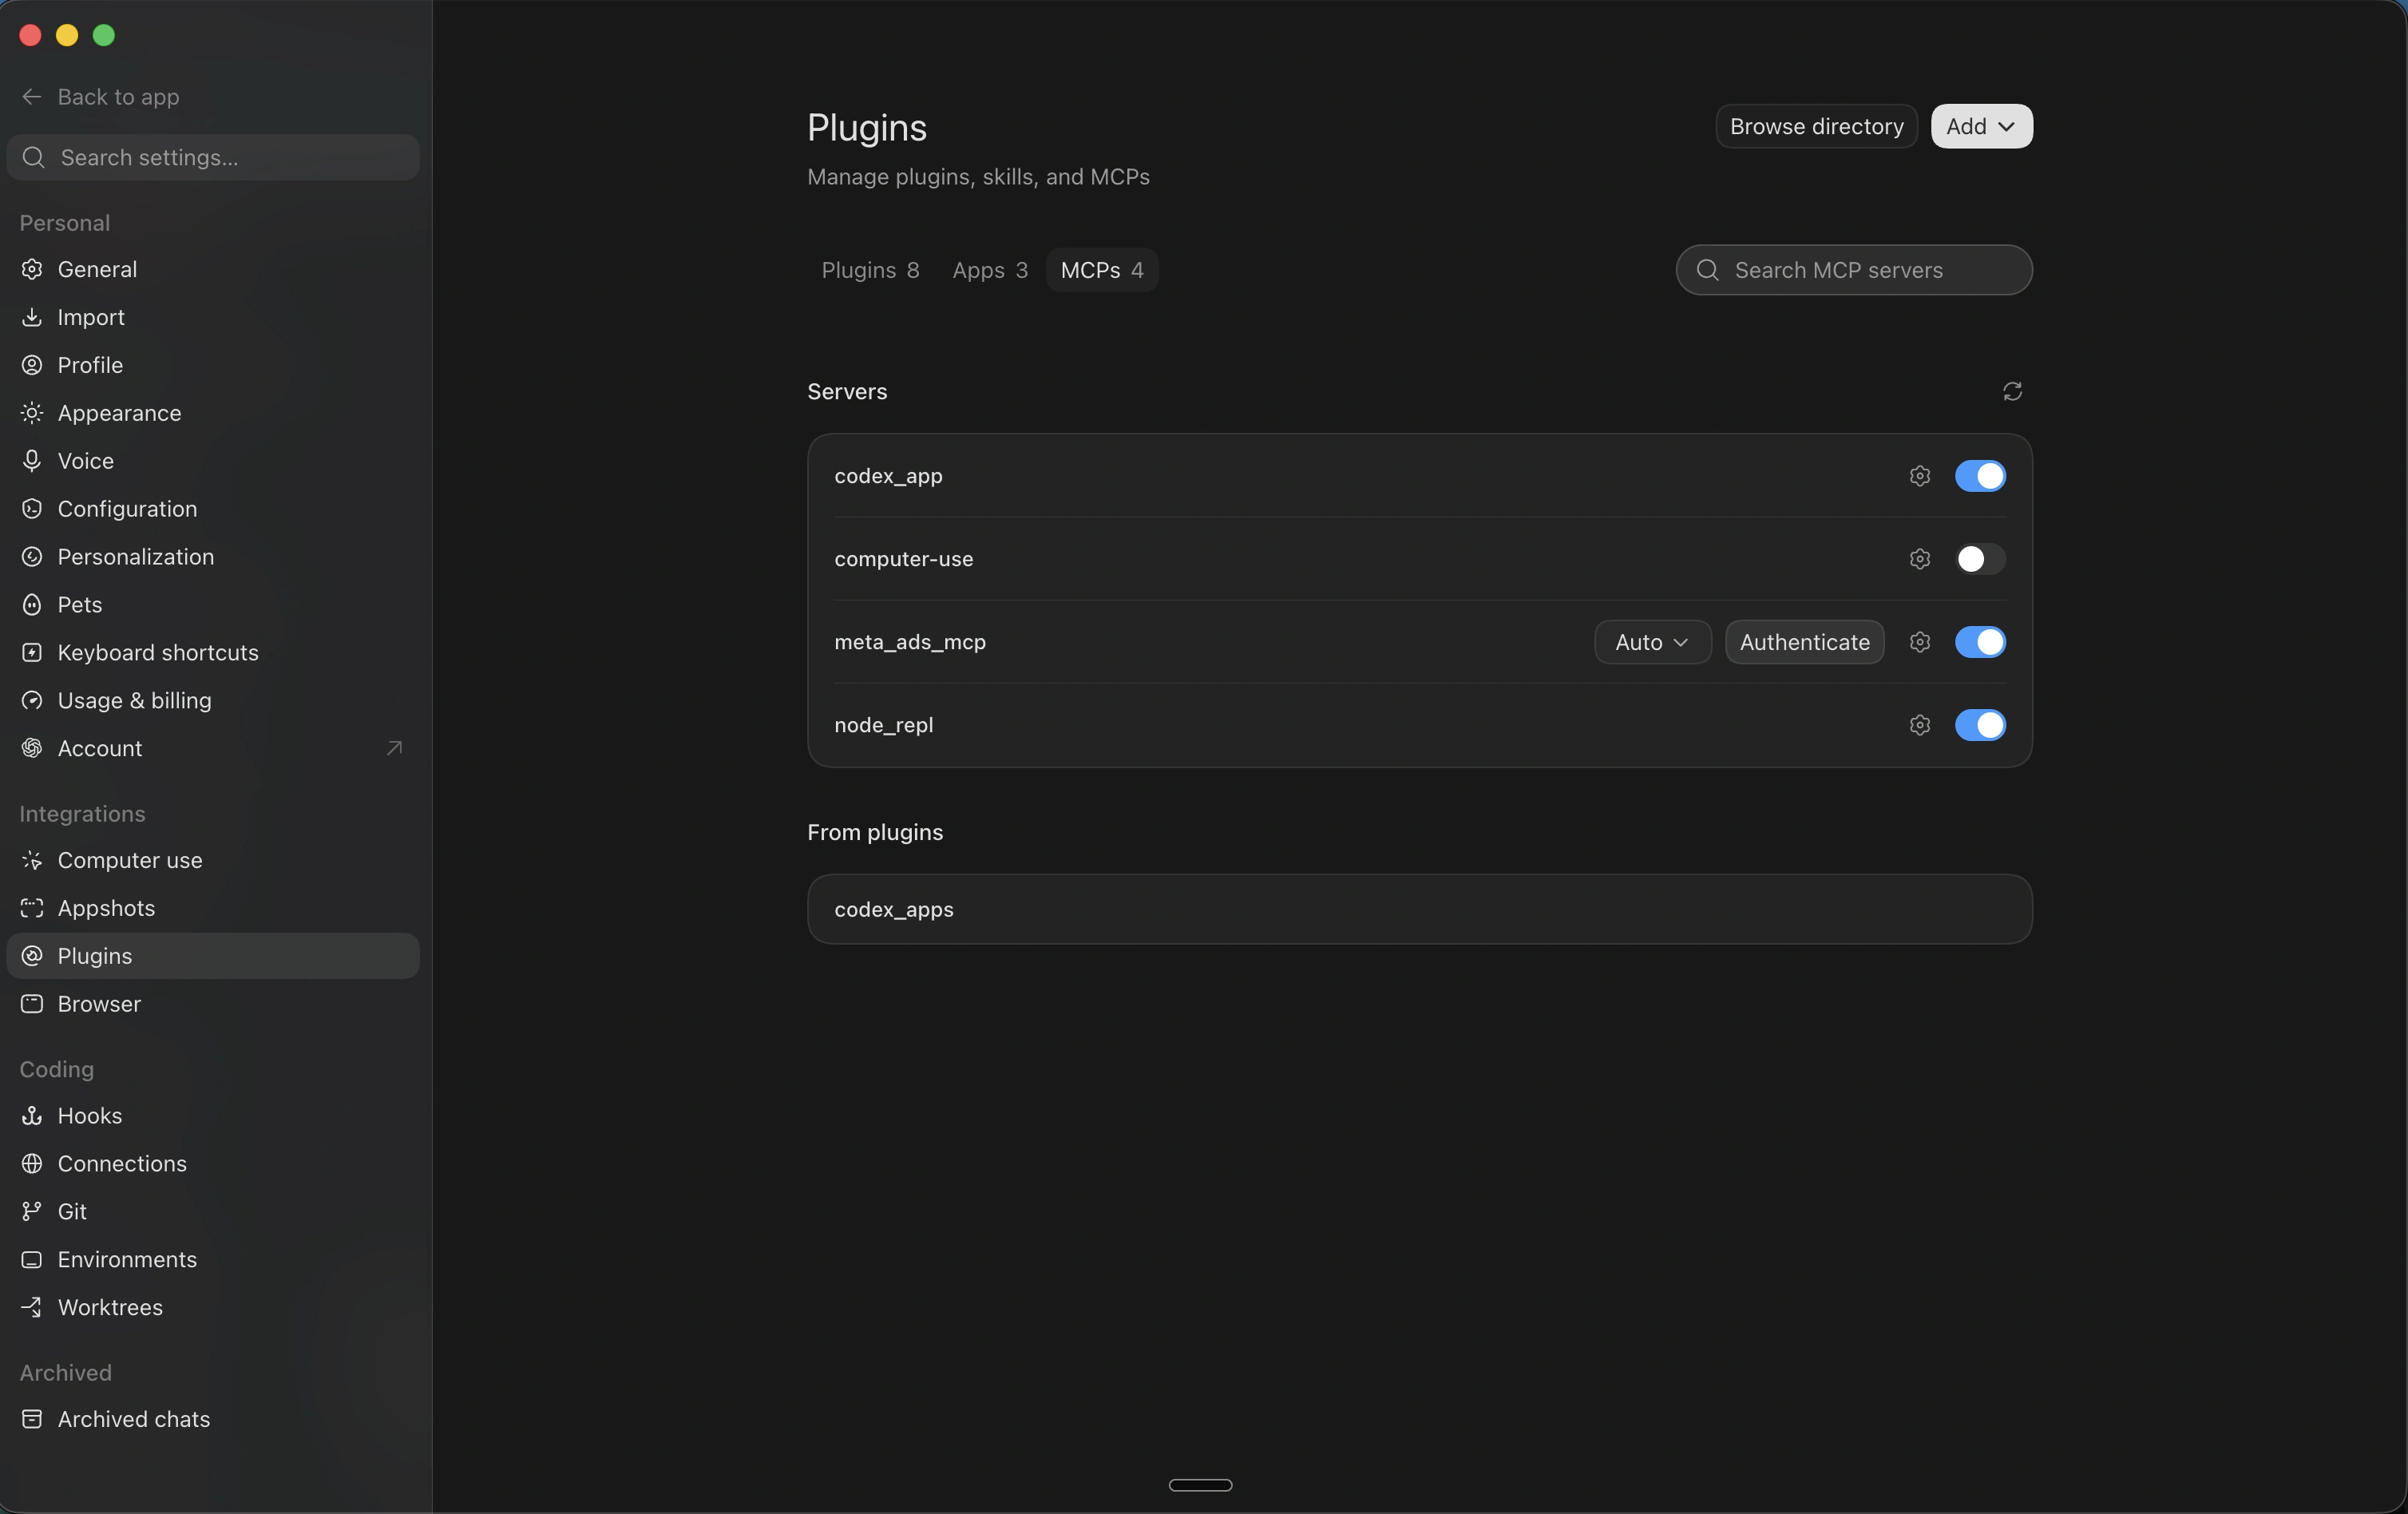
Save, then click Authenticate
After Save, open the MCPs tab. Meta Ads MCP should be in the list with a toggle on. Click Authenticate. Restart if ChatGPT asks.
Step 4
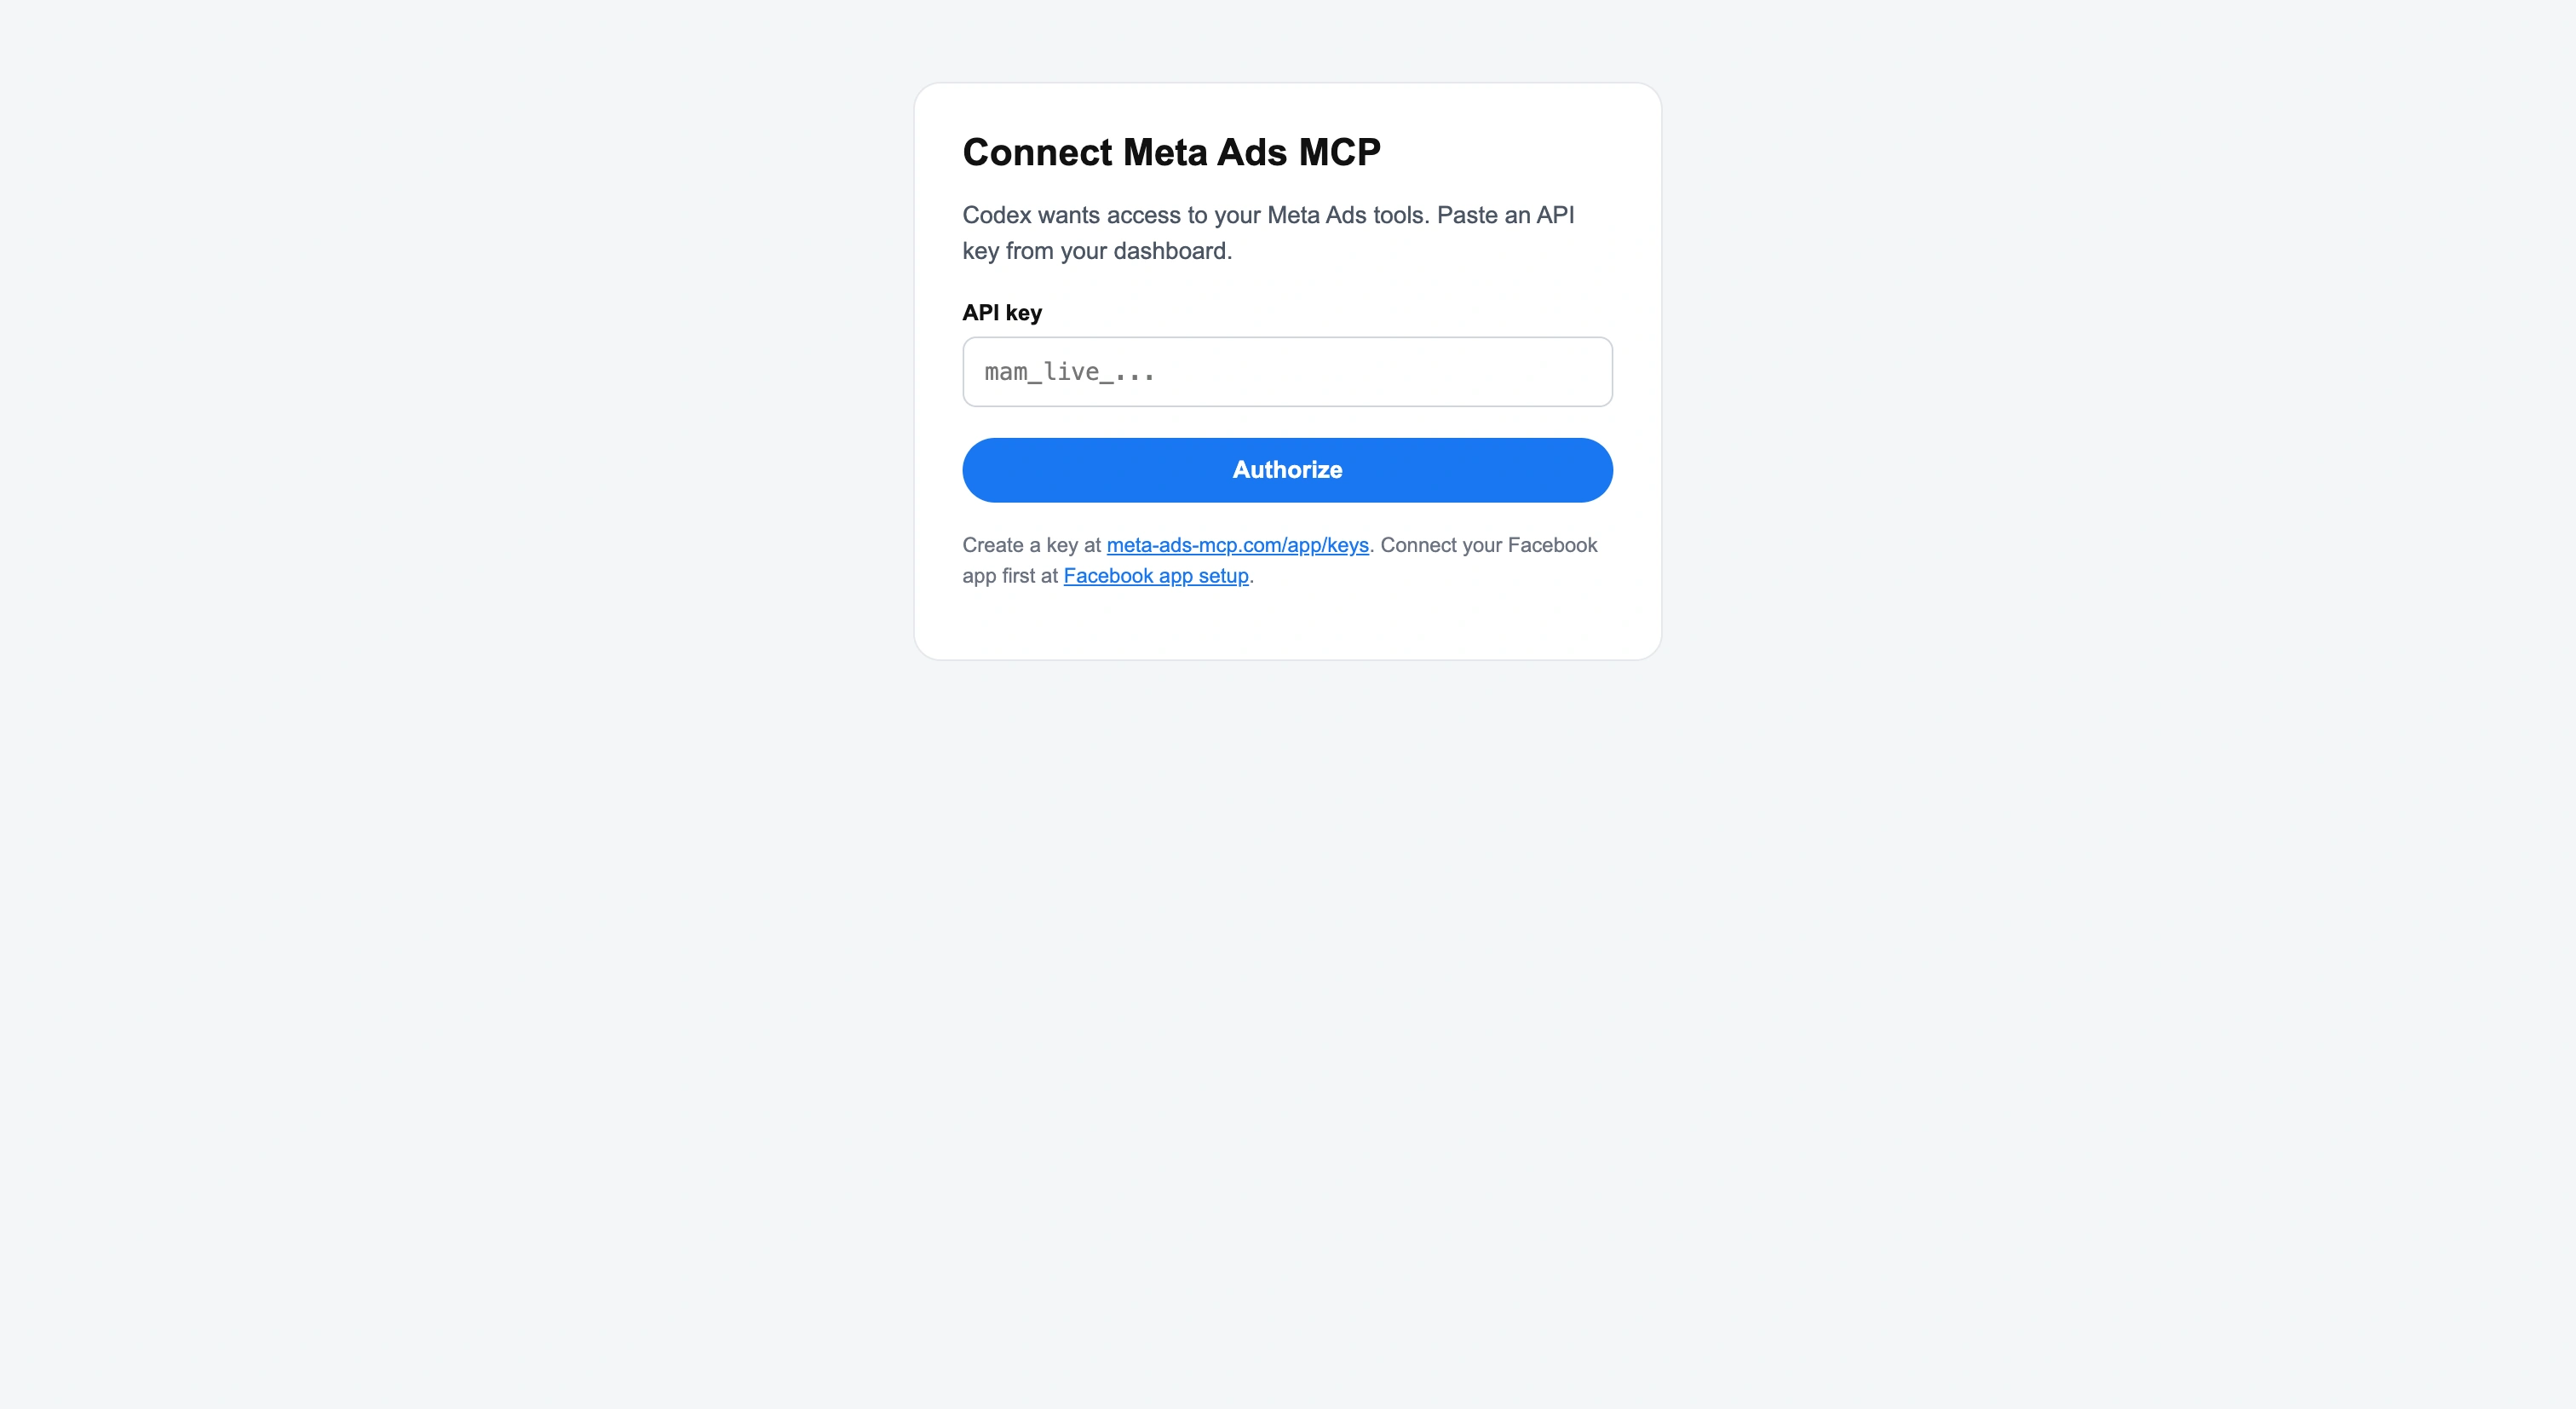
Paste your mam_live_ key
ChatGPT opens a login page. Paste an API key from your dashboard. It starts with mam_live_. Click Authorize.
Step 5
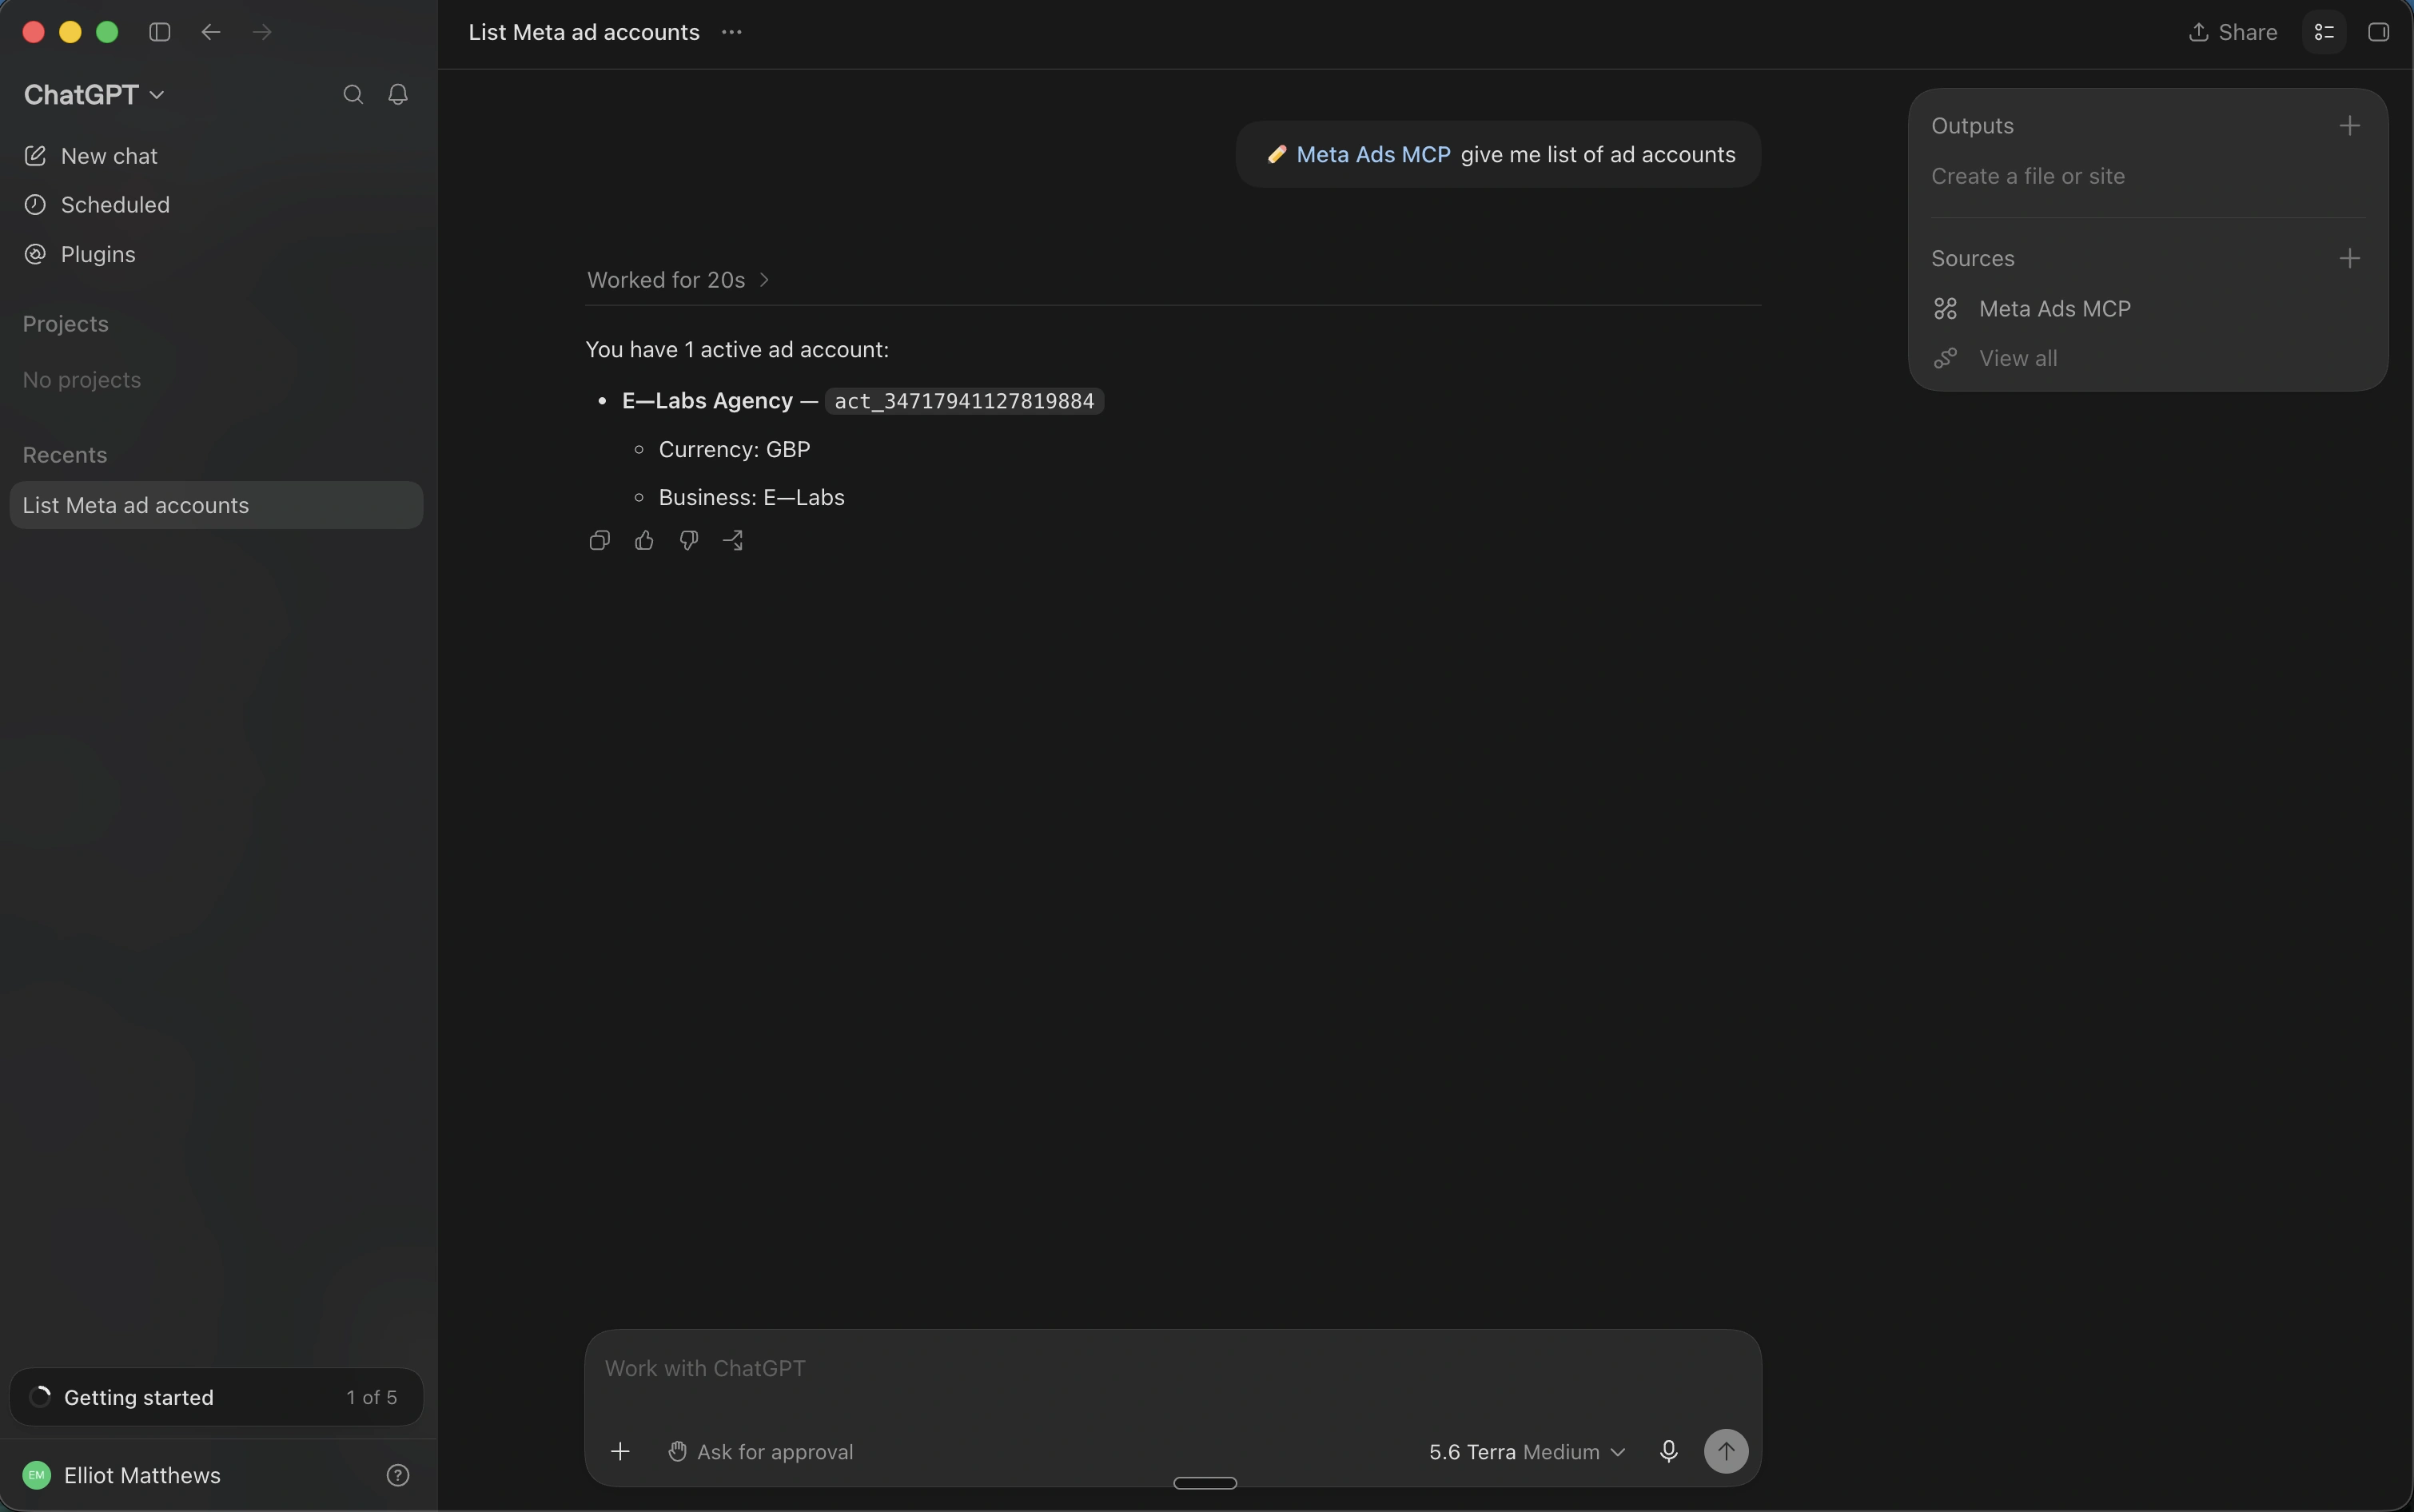
Use it in a chat
Start a new chat. Attach Meta Ads MCP under Sources, or type the name in the composer. Try: give me a list of ad accounts.
ChatGPT on the web
Web is a different screen. Plugins, +, Server URL, OAuth. Same URL, same mam_live_ key.
Open the web screenshot guide