 Meta Ads MCP
Setup guide
ChatGPT on the web
Seven screens. Create a mam_live_ key and connect your Facebook app first.
MCP URL
Paste this into Server URL. Authentication is OAuth.
Step 1
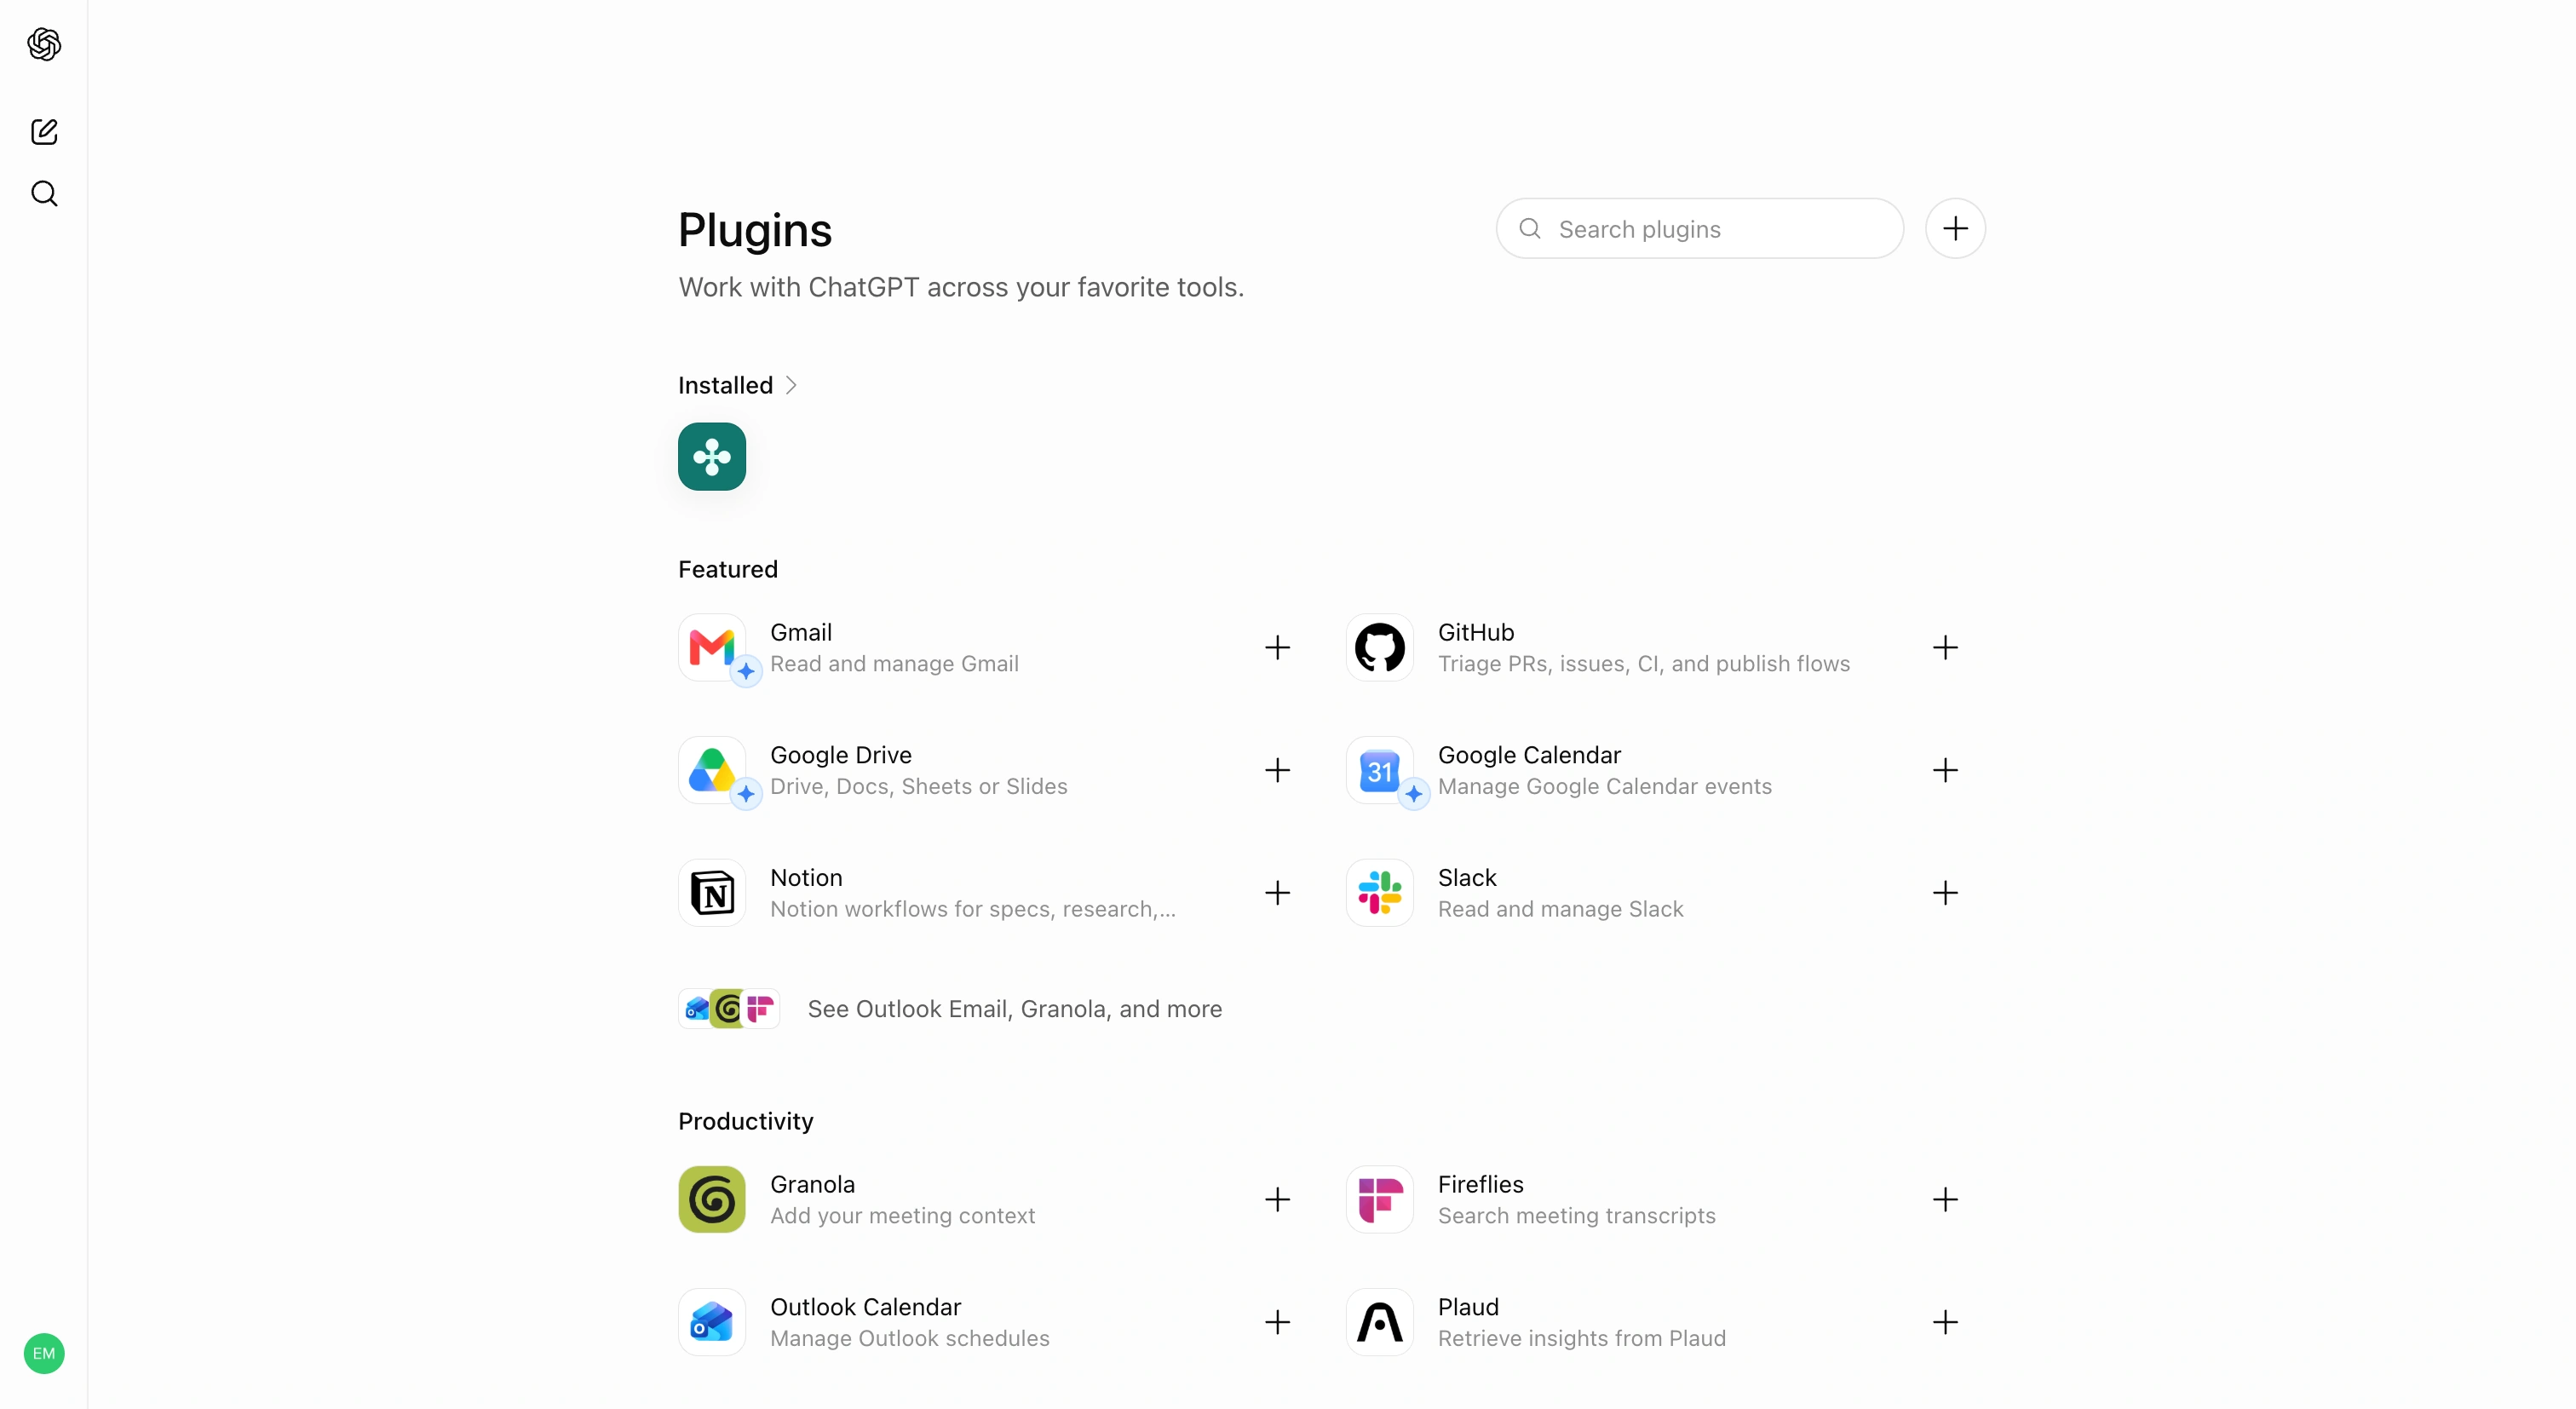
Open Plugins and click +
In ChatGPT on the web, open Plugins. Next to Search plugins, click the + button. That is how you add a custom MCP.
Step 2
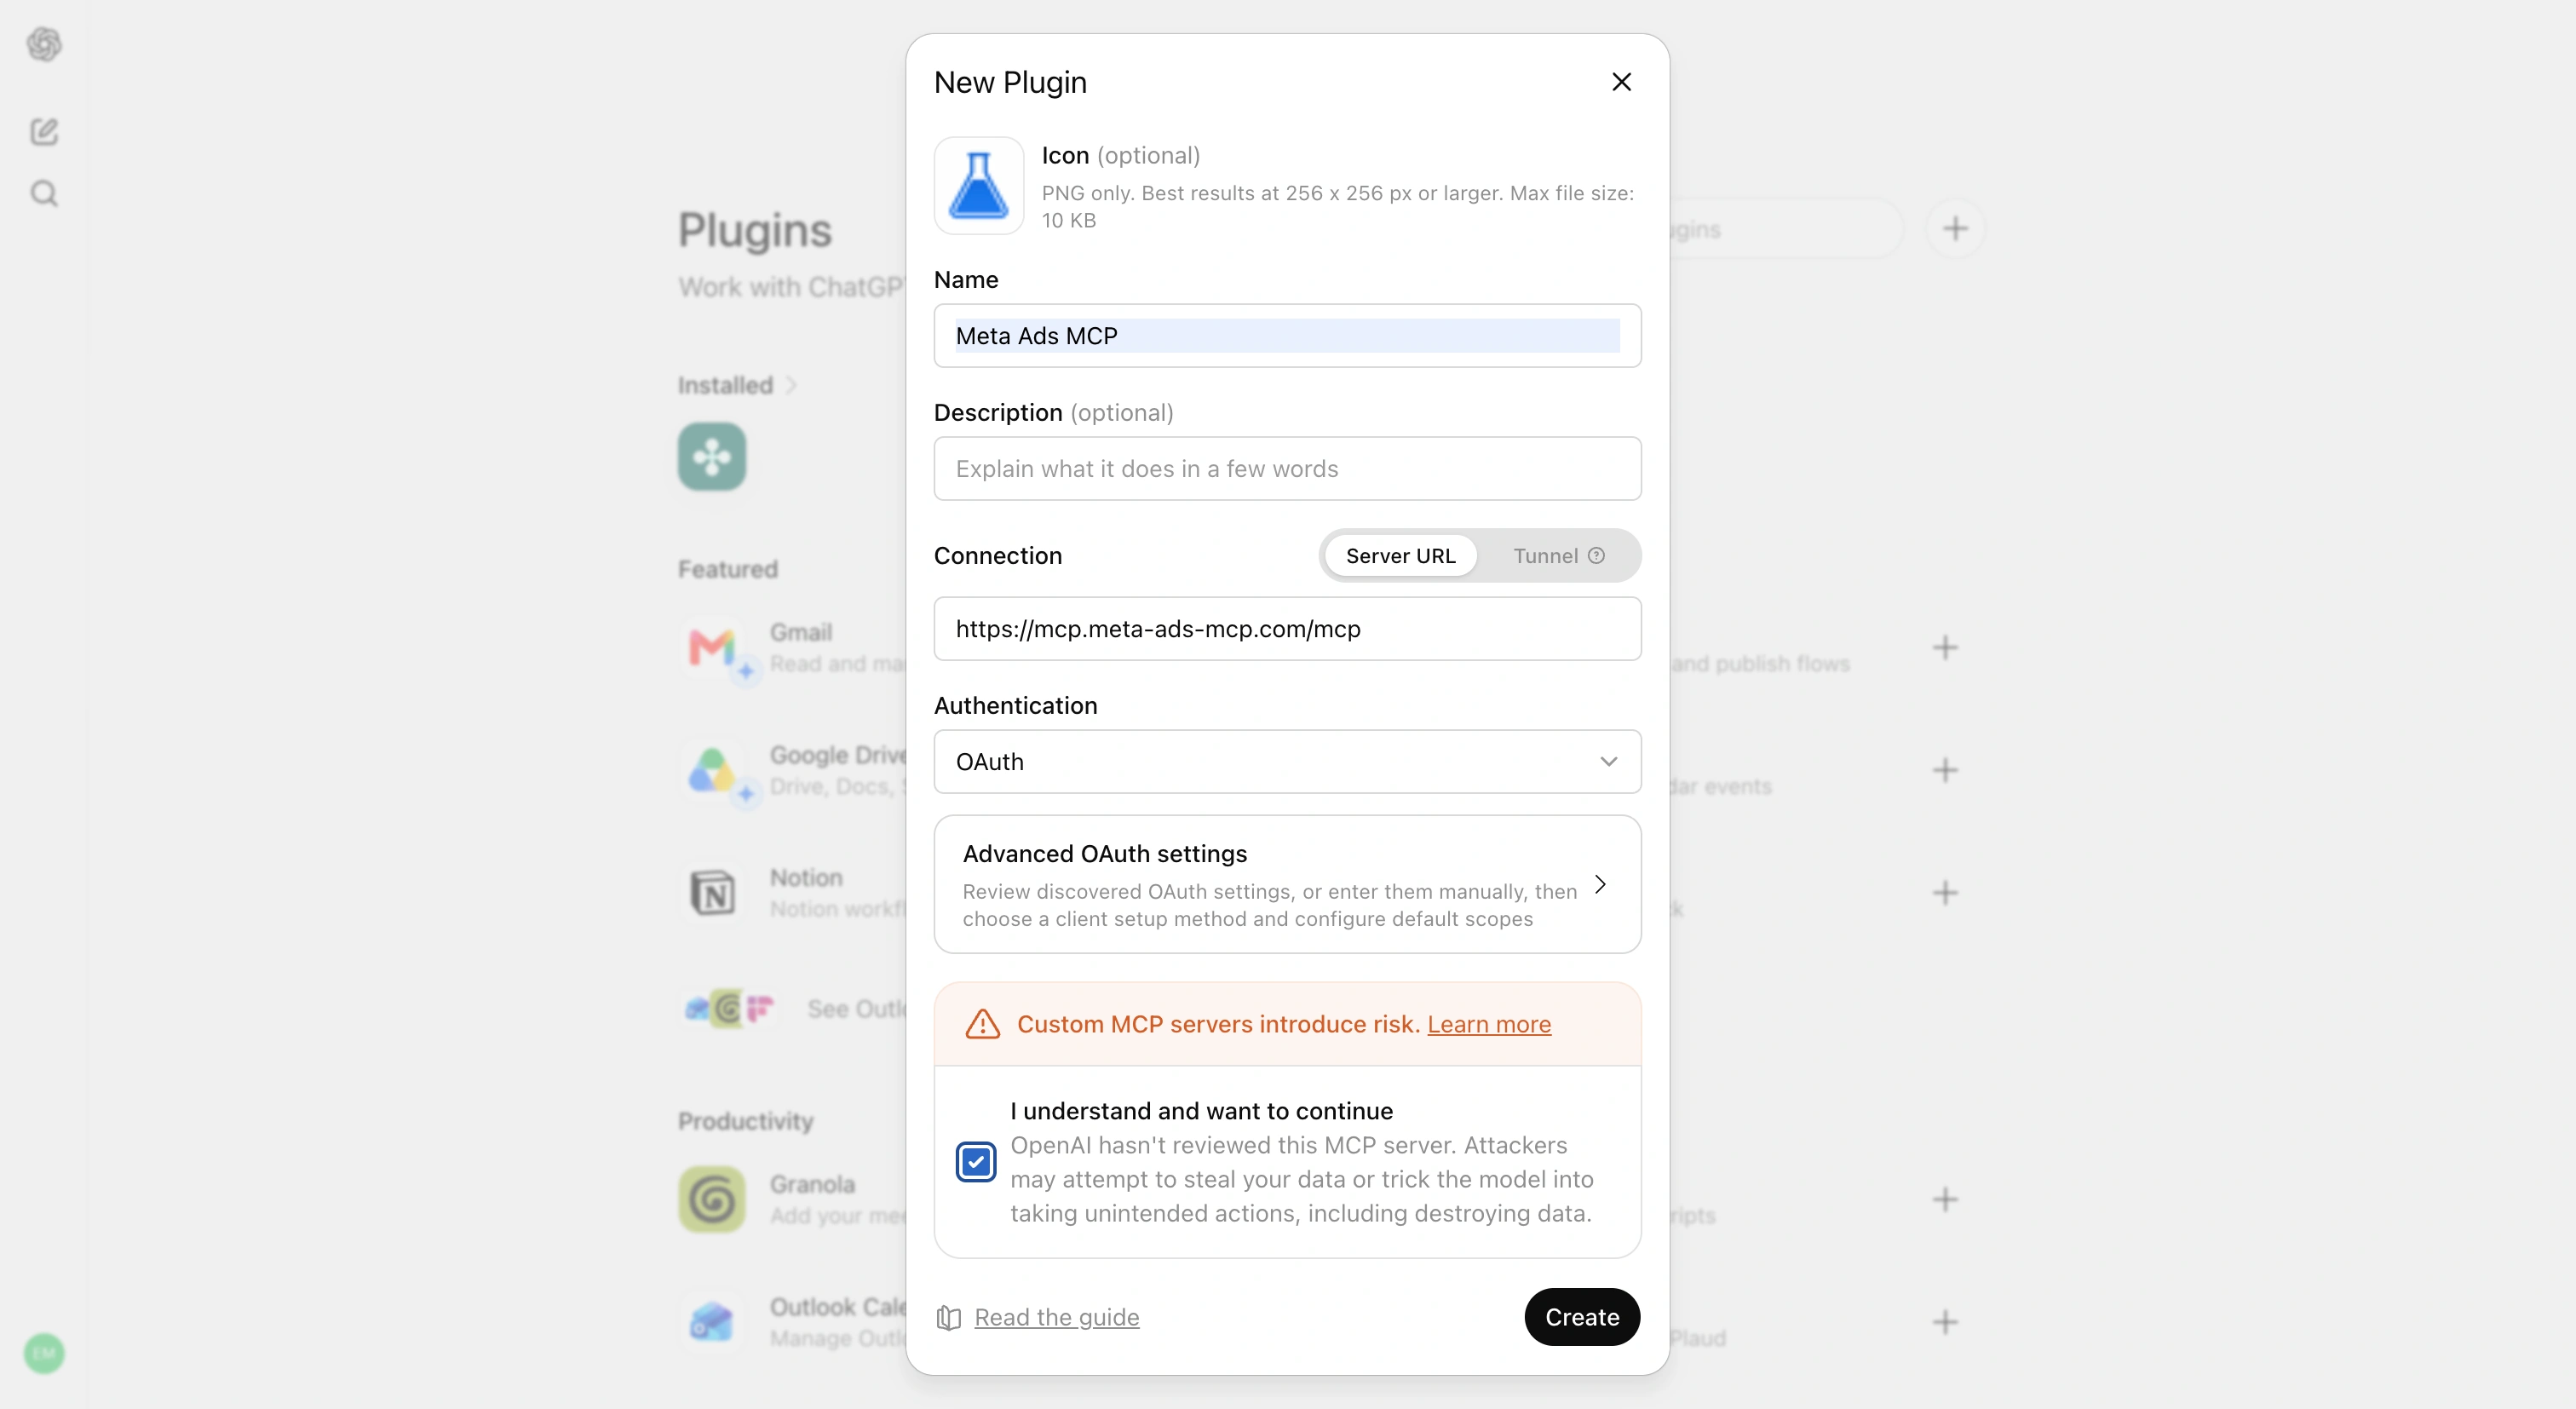
Name it, paste the URL, choose OAuth
Name: Meta Ads MCP. Connection: Server URL. URL: https://mcp.meta-ads-mcp.com/mcp. Authentication: OAuth. Tick I understand and want to continue, then Create. Leave Advanced OAuth settings alone.
Step 3
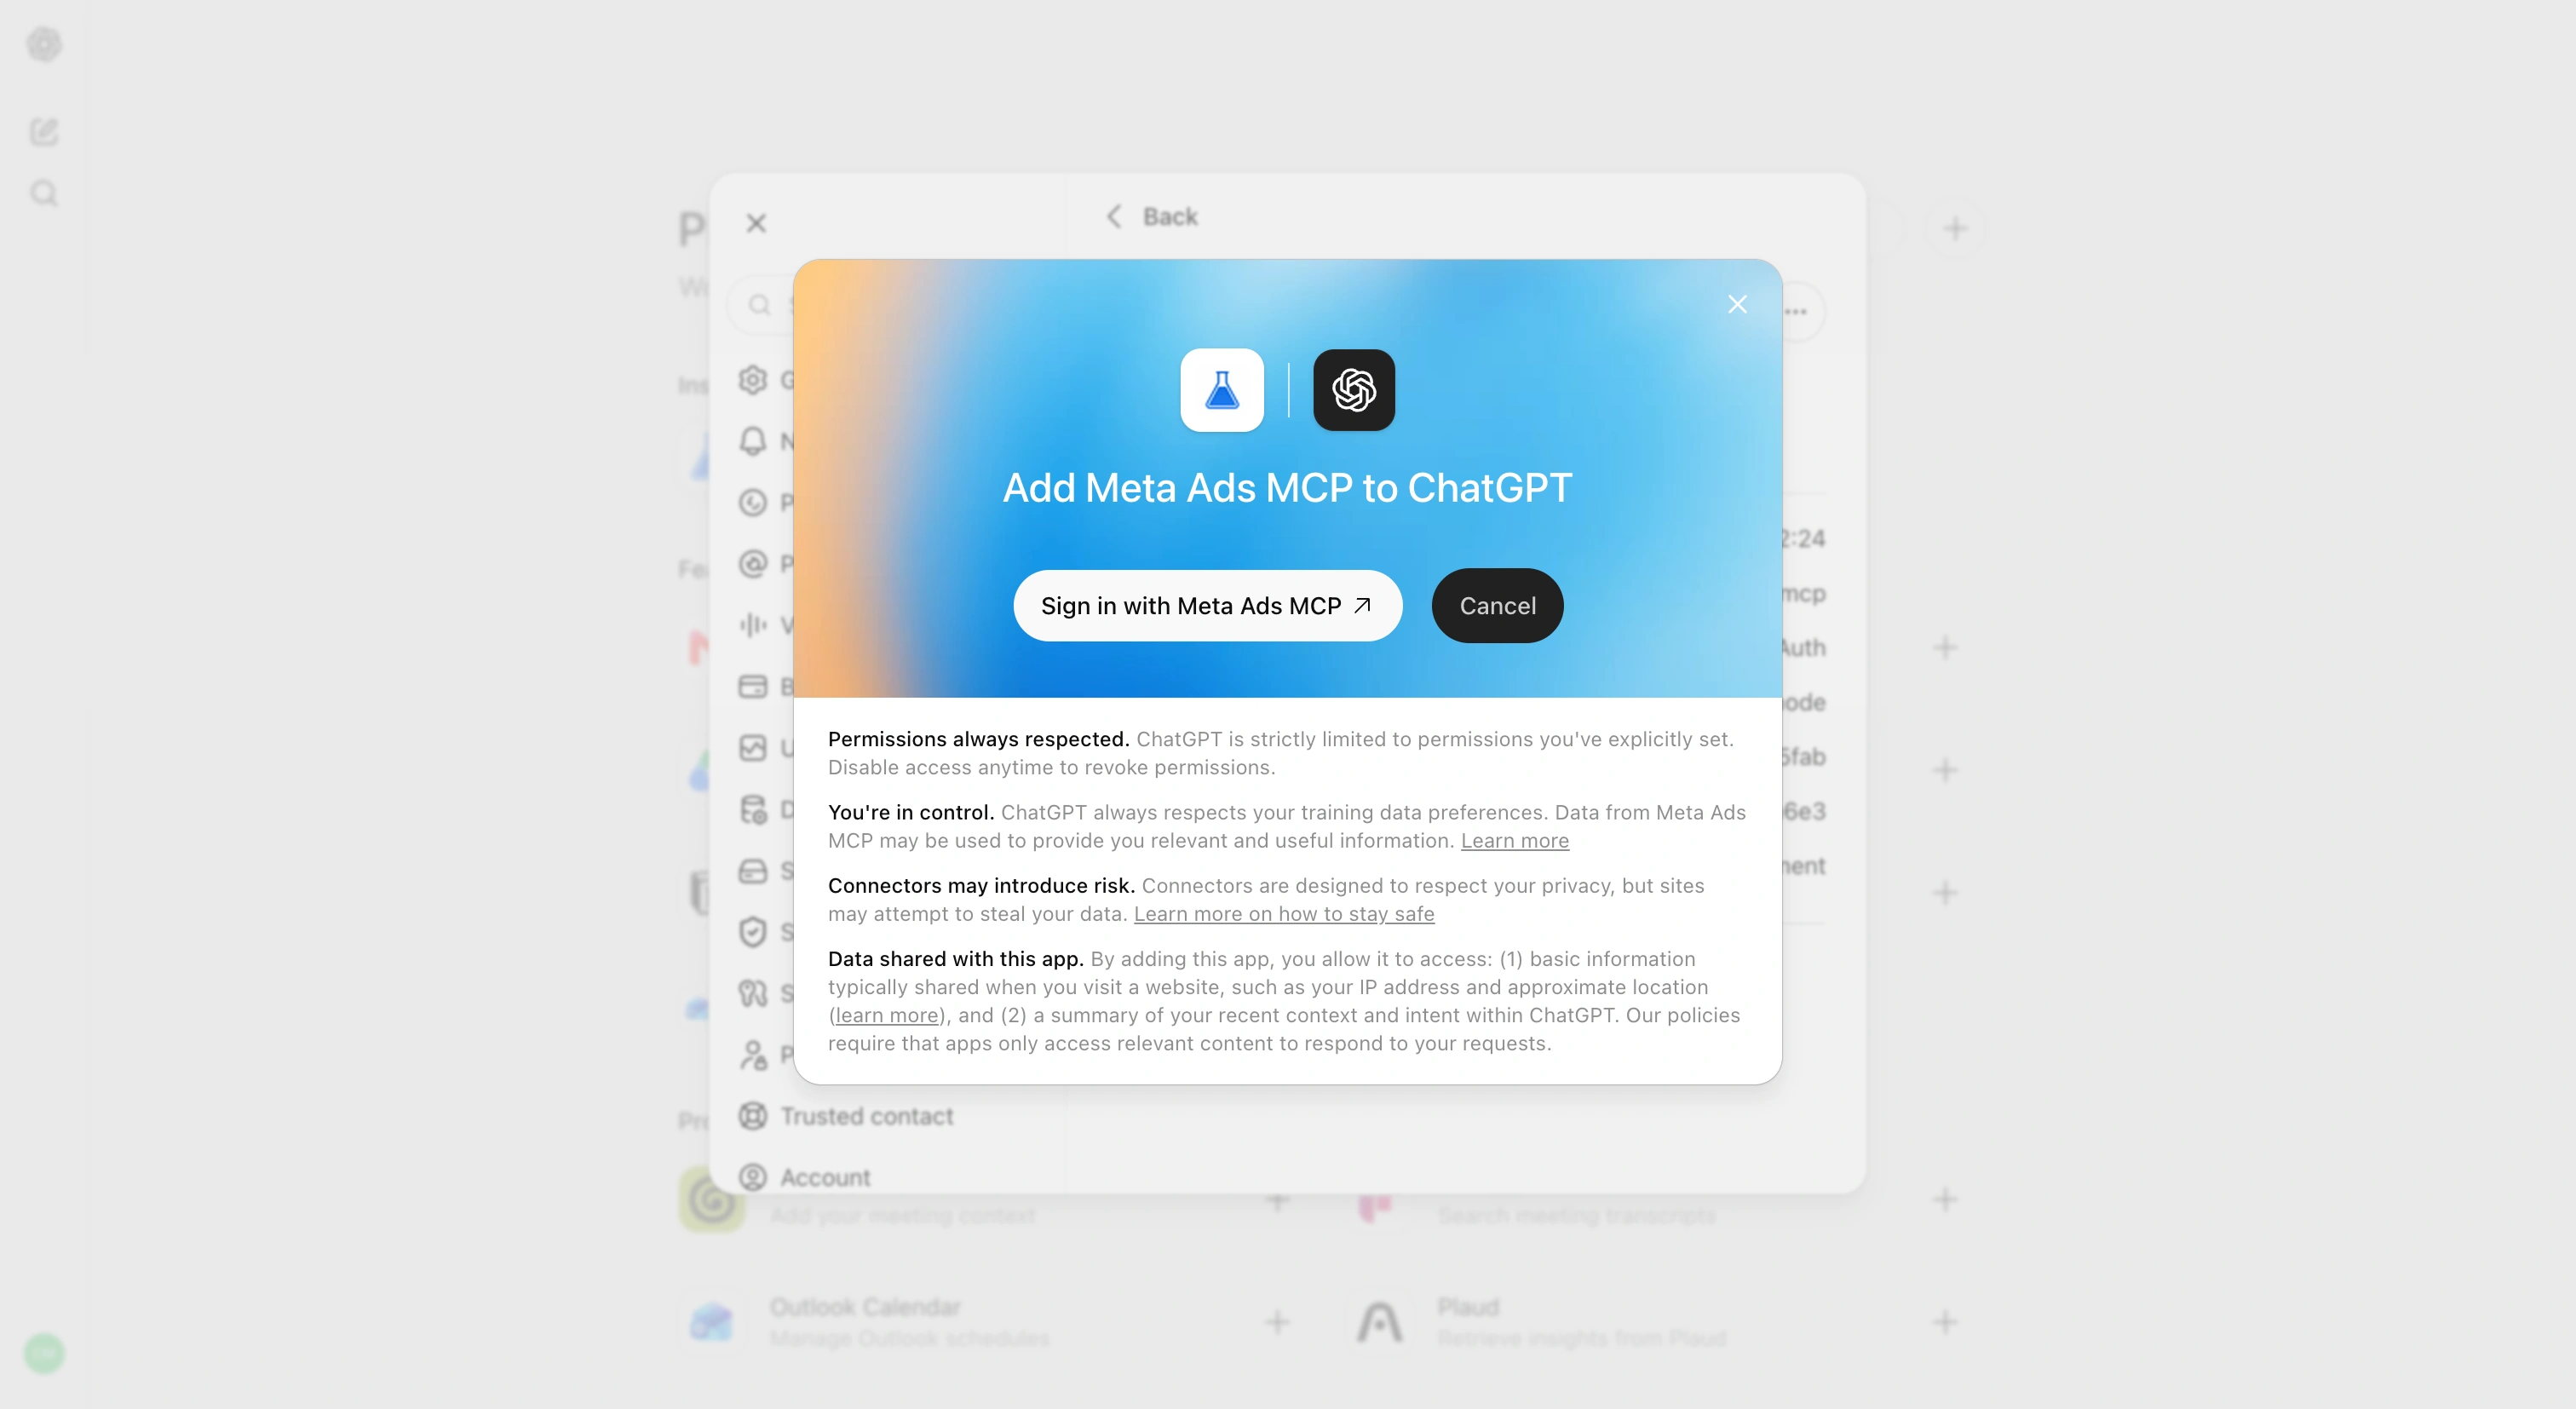
Click Sign in with Meta Ads MCP
ChatGPT shows Add Meta Ads MCP to ChatGPT. Click Sign in with Meta Ads MCP. That opens our login page.
Step 4
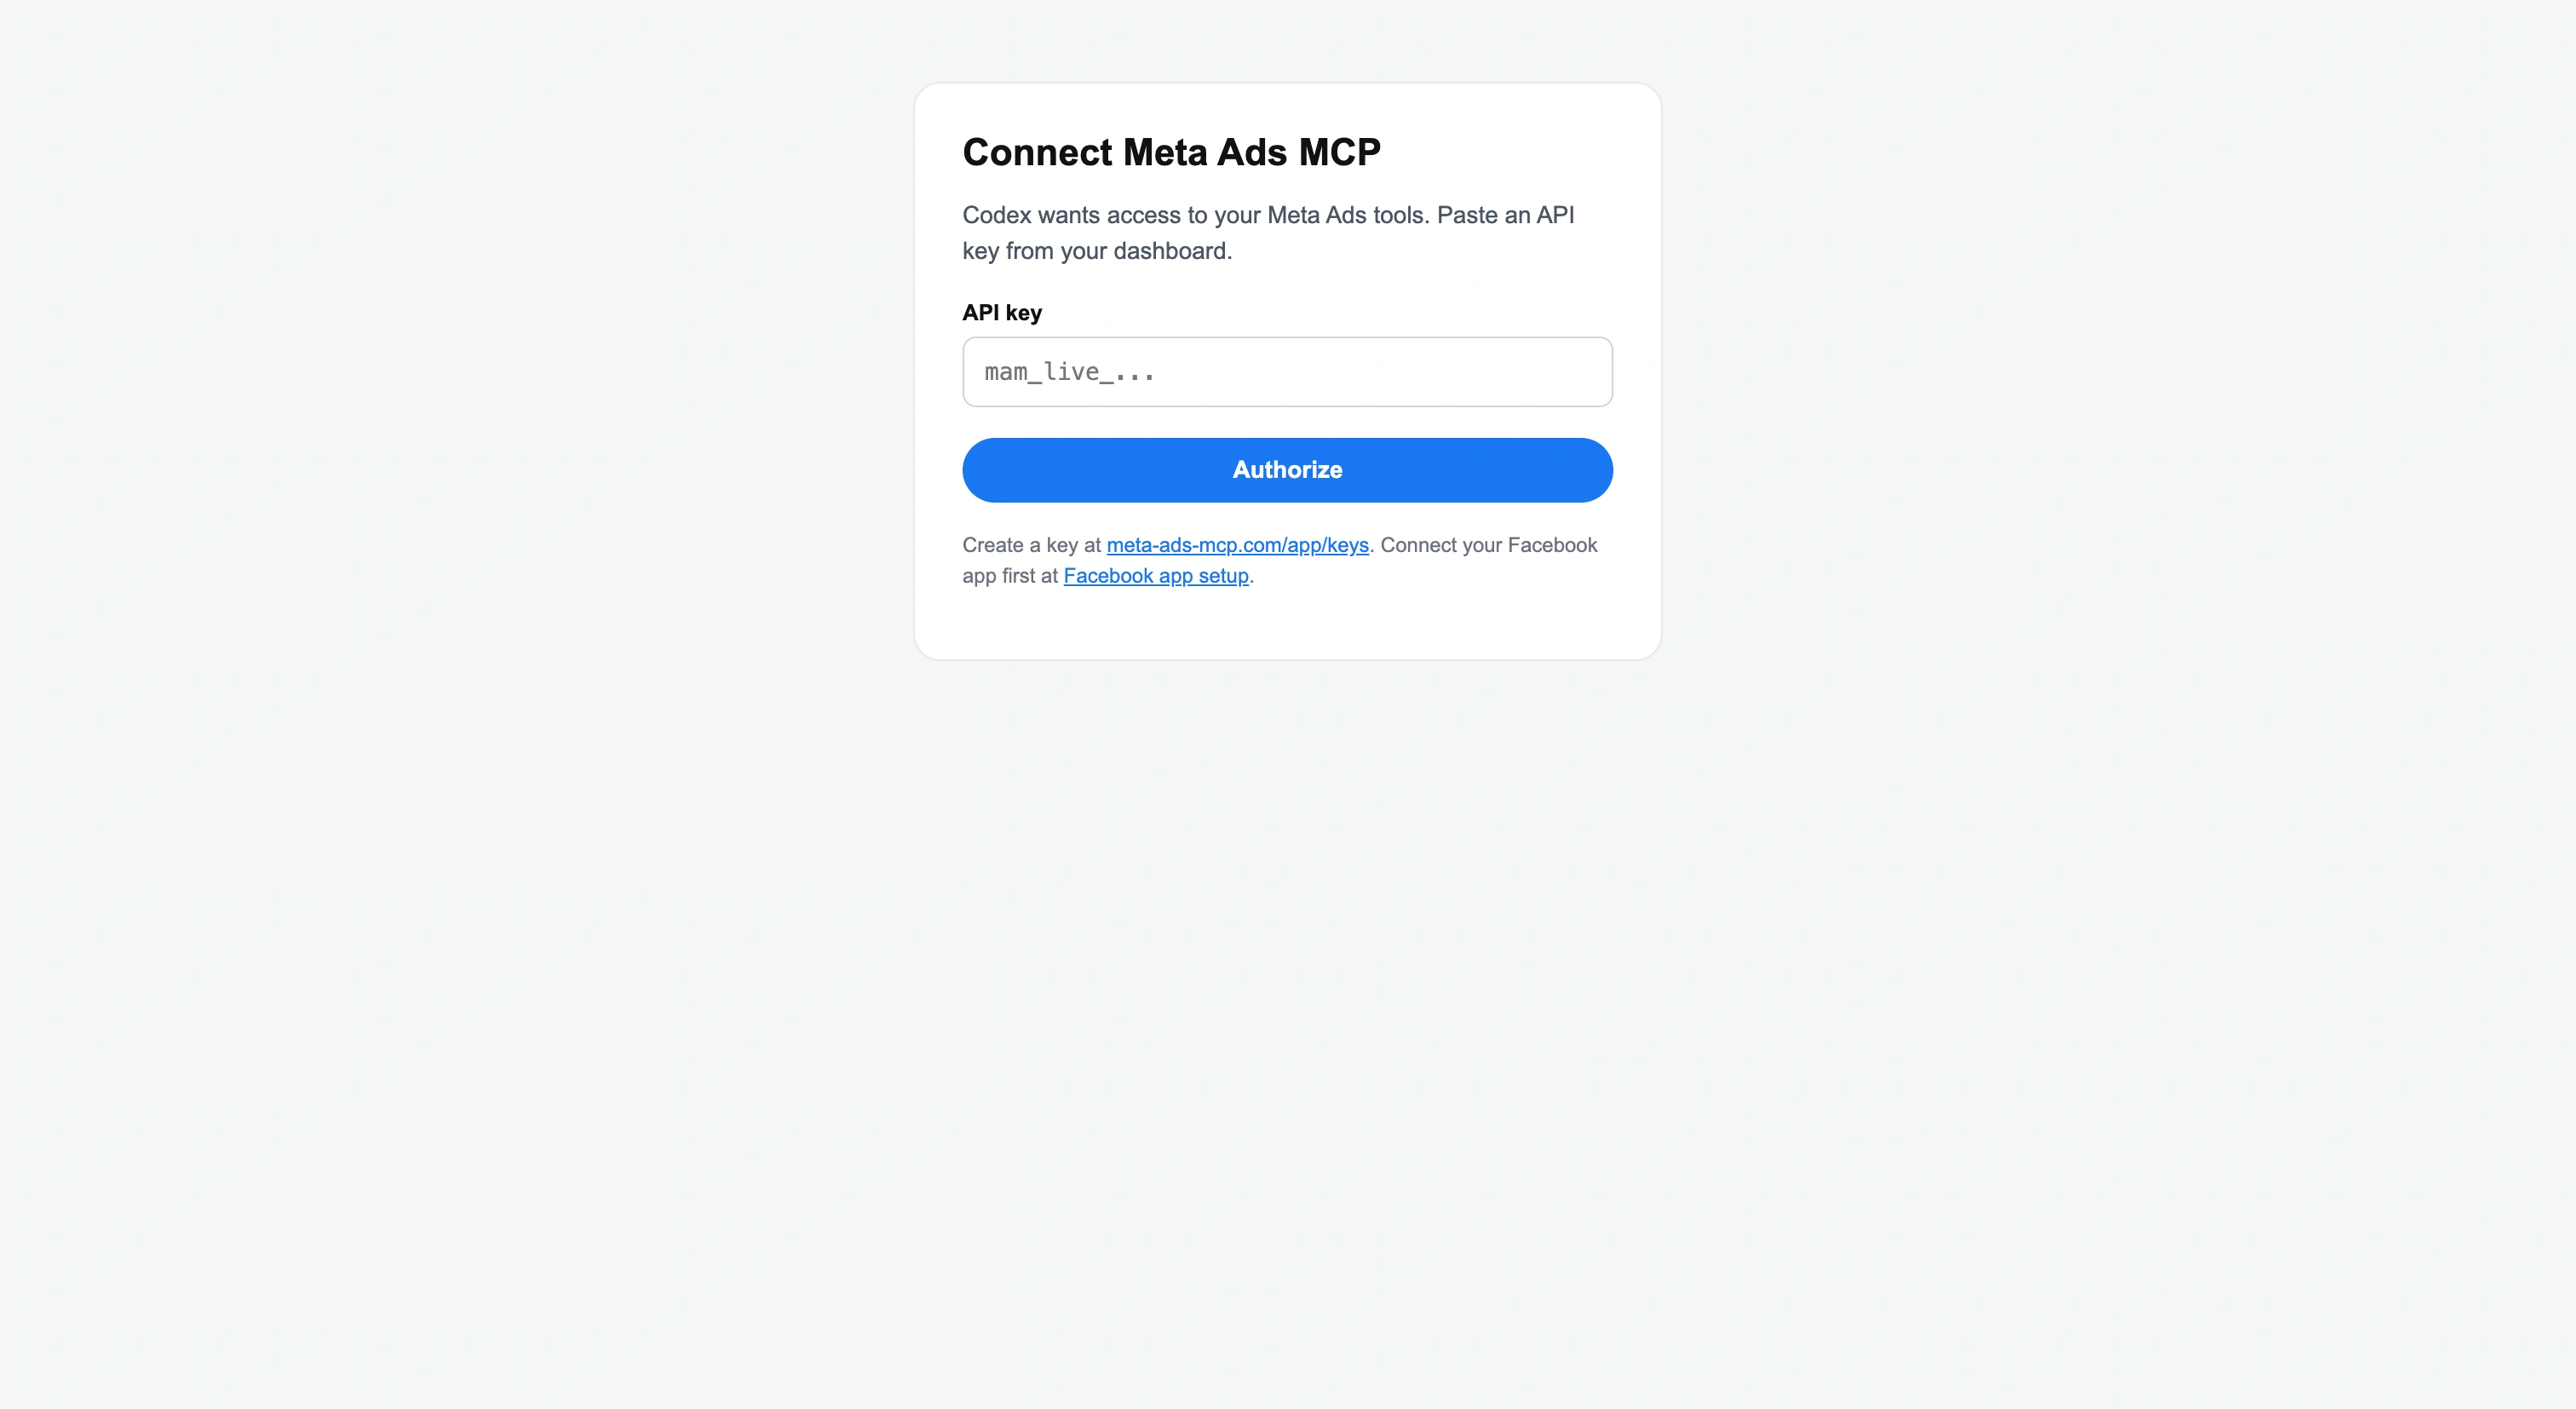
Paste your mam_live_ key
Paste an API key from your dashboard. It starts with mam_live_. Click Authorize.
Step 5
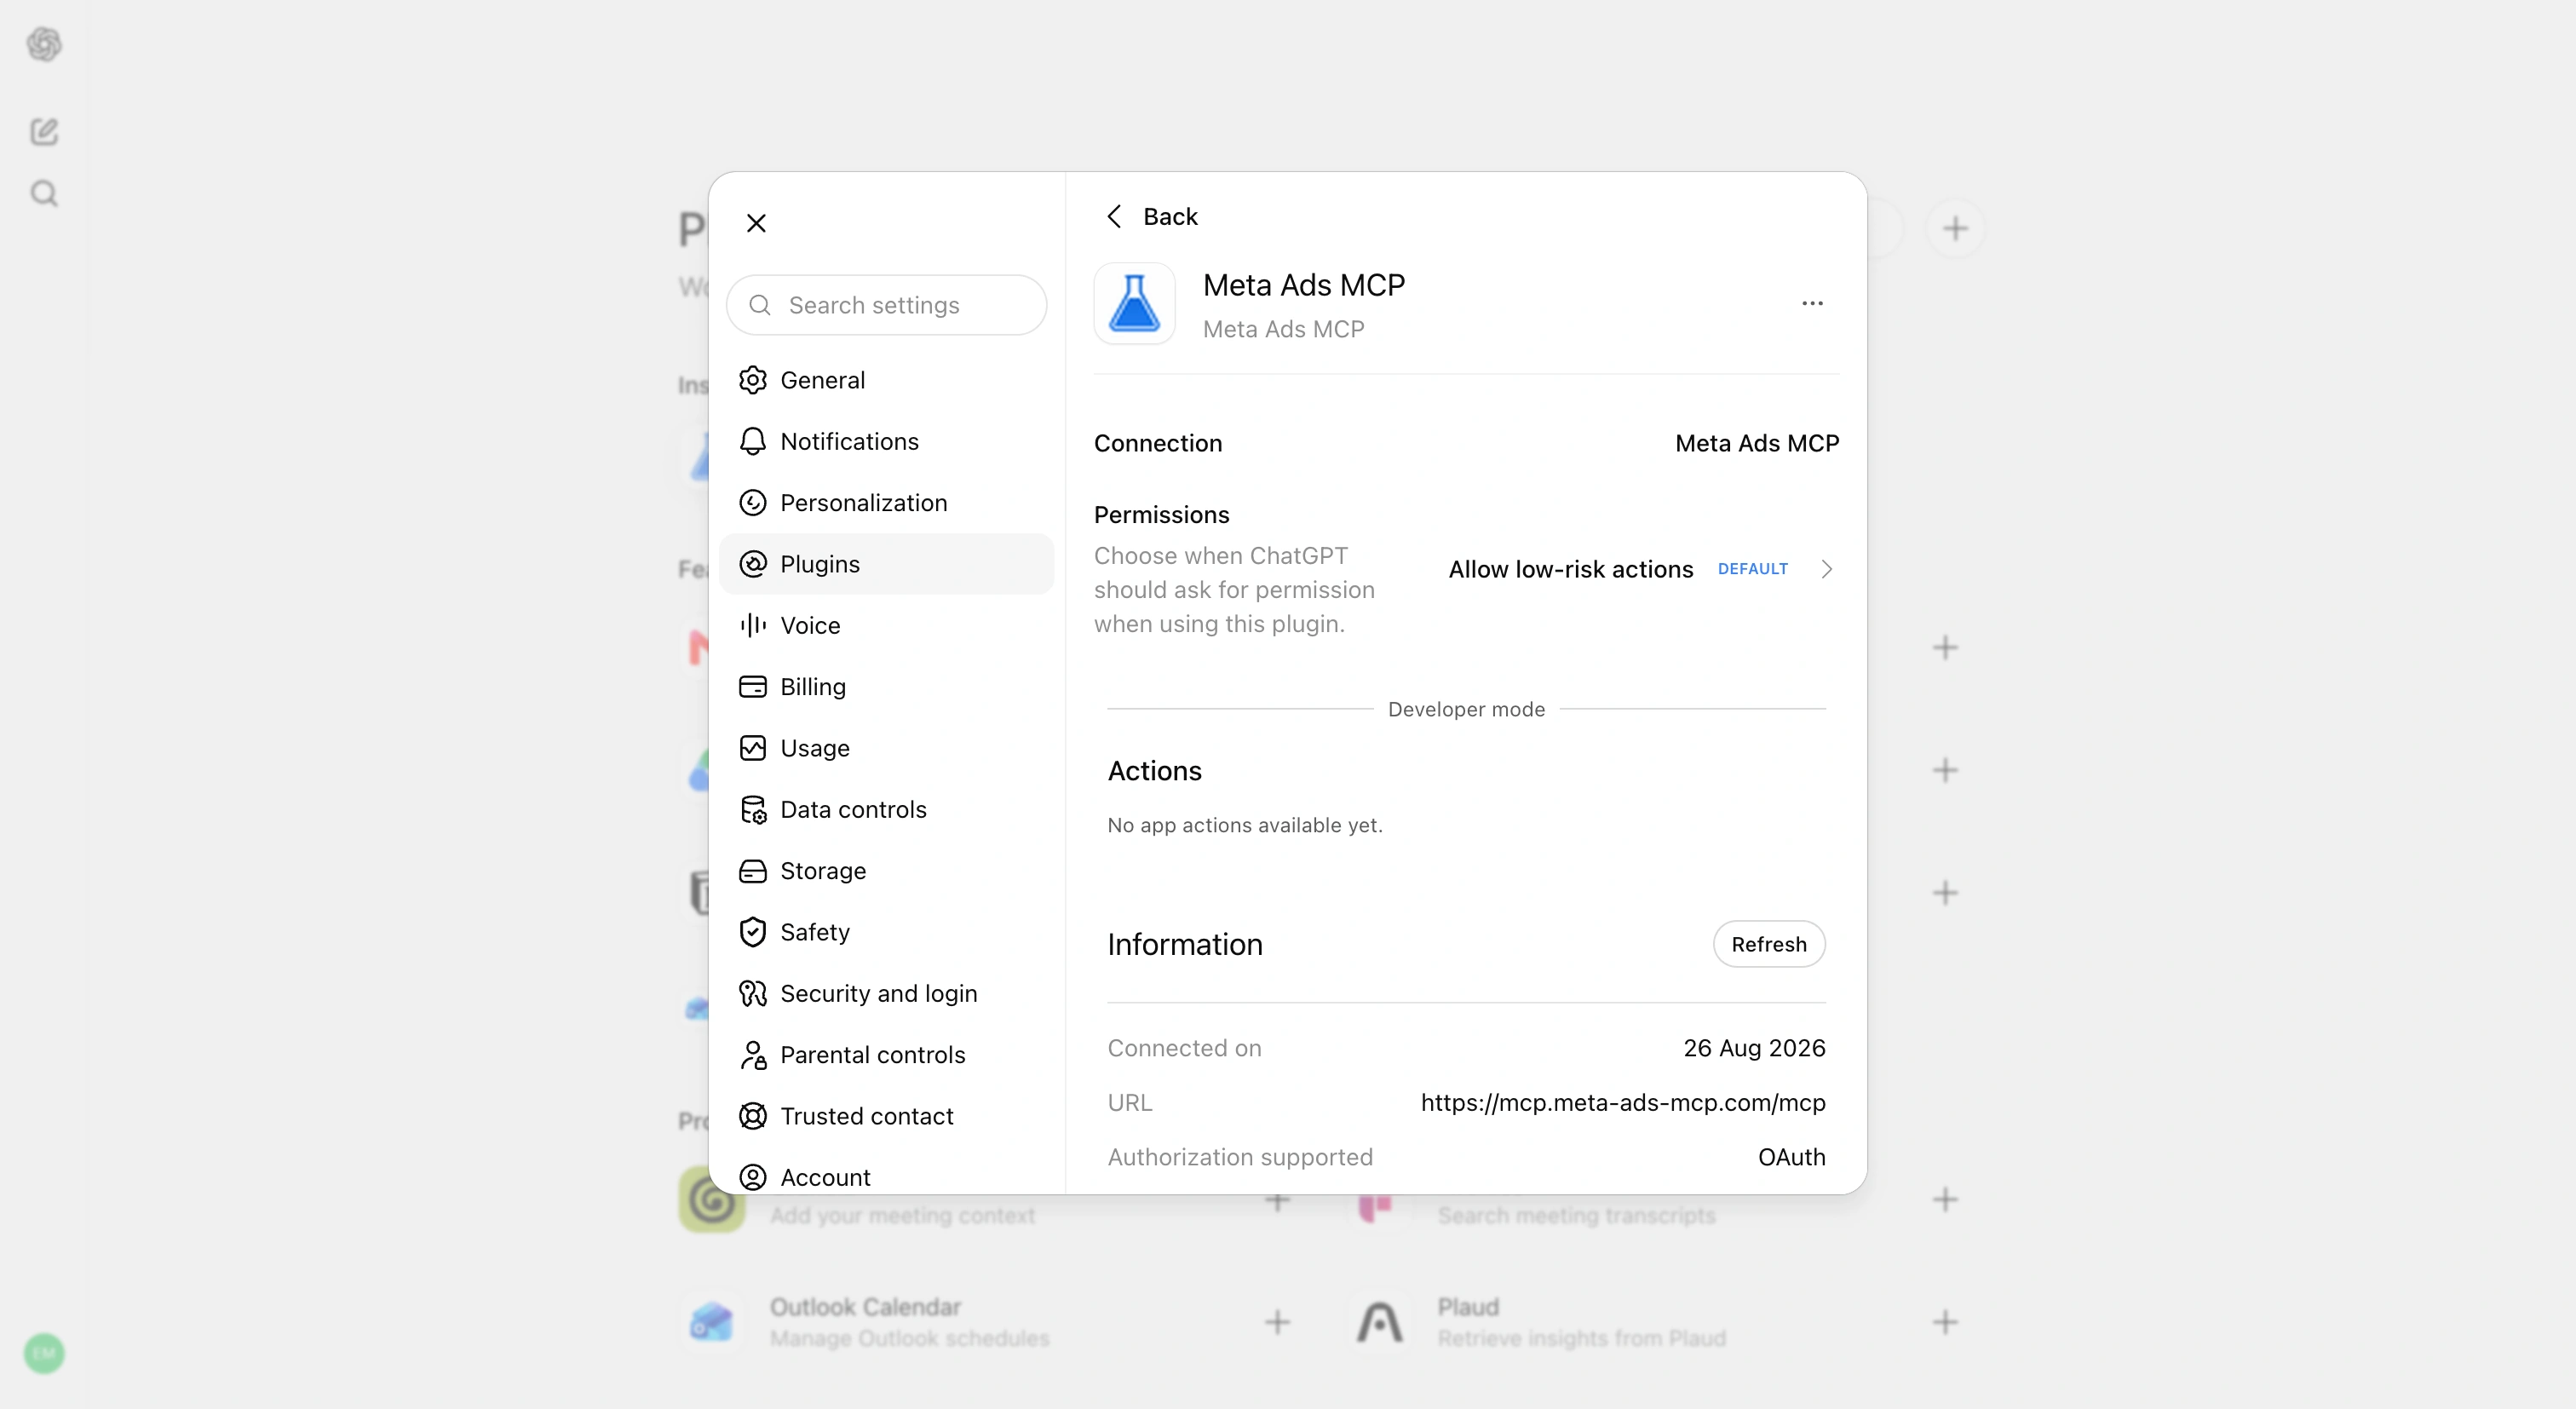
Check it is connected
Back in Settings, Plugins, Meta Ads MCP should show the MCP URL and Authorization supported: OAuth.
Step 6
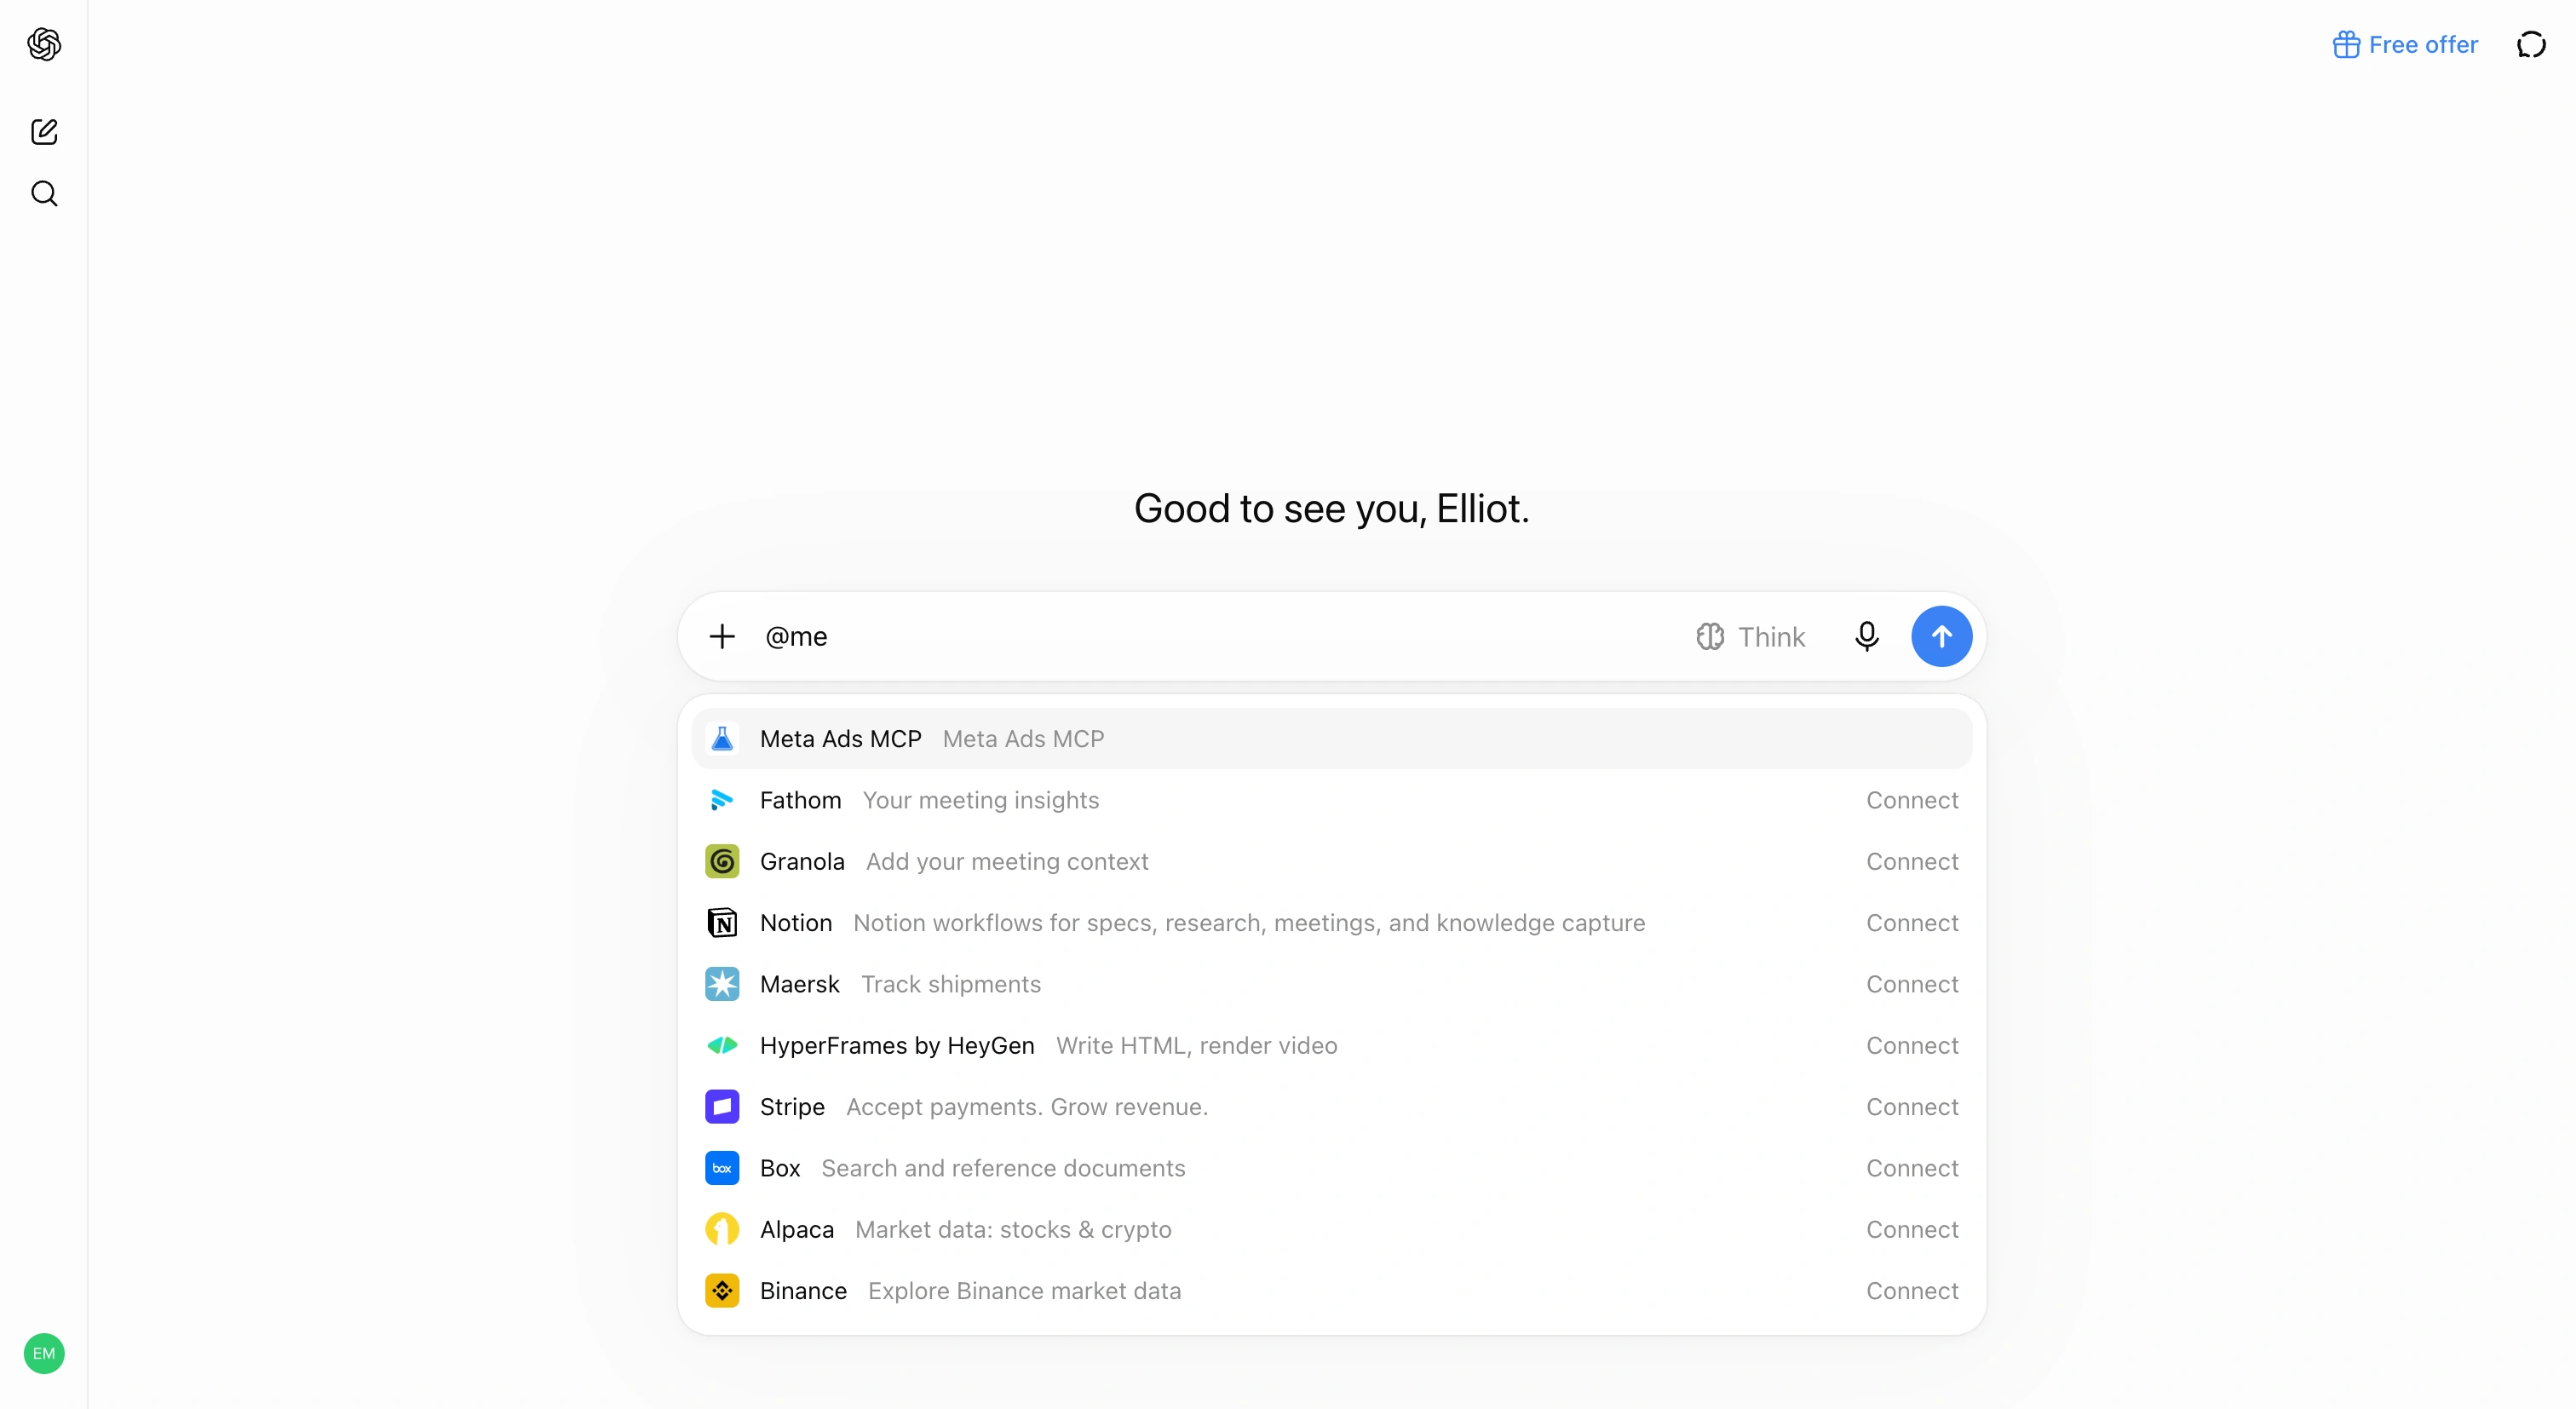
Type @ and pick Meta Ads MCP
Start a new chat. Type @ in the composer and select Meta Ads MCP from the list.
Step 7
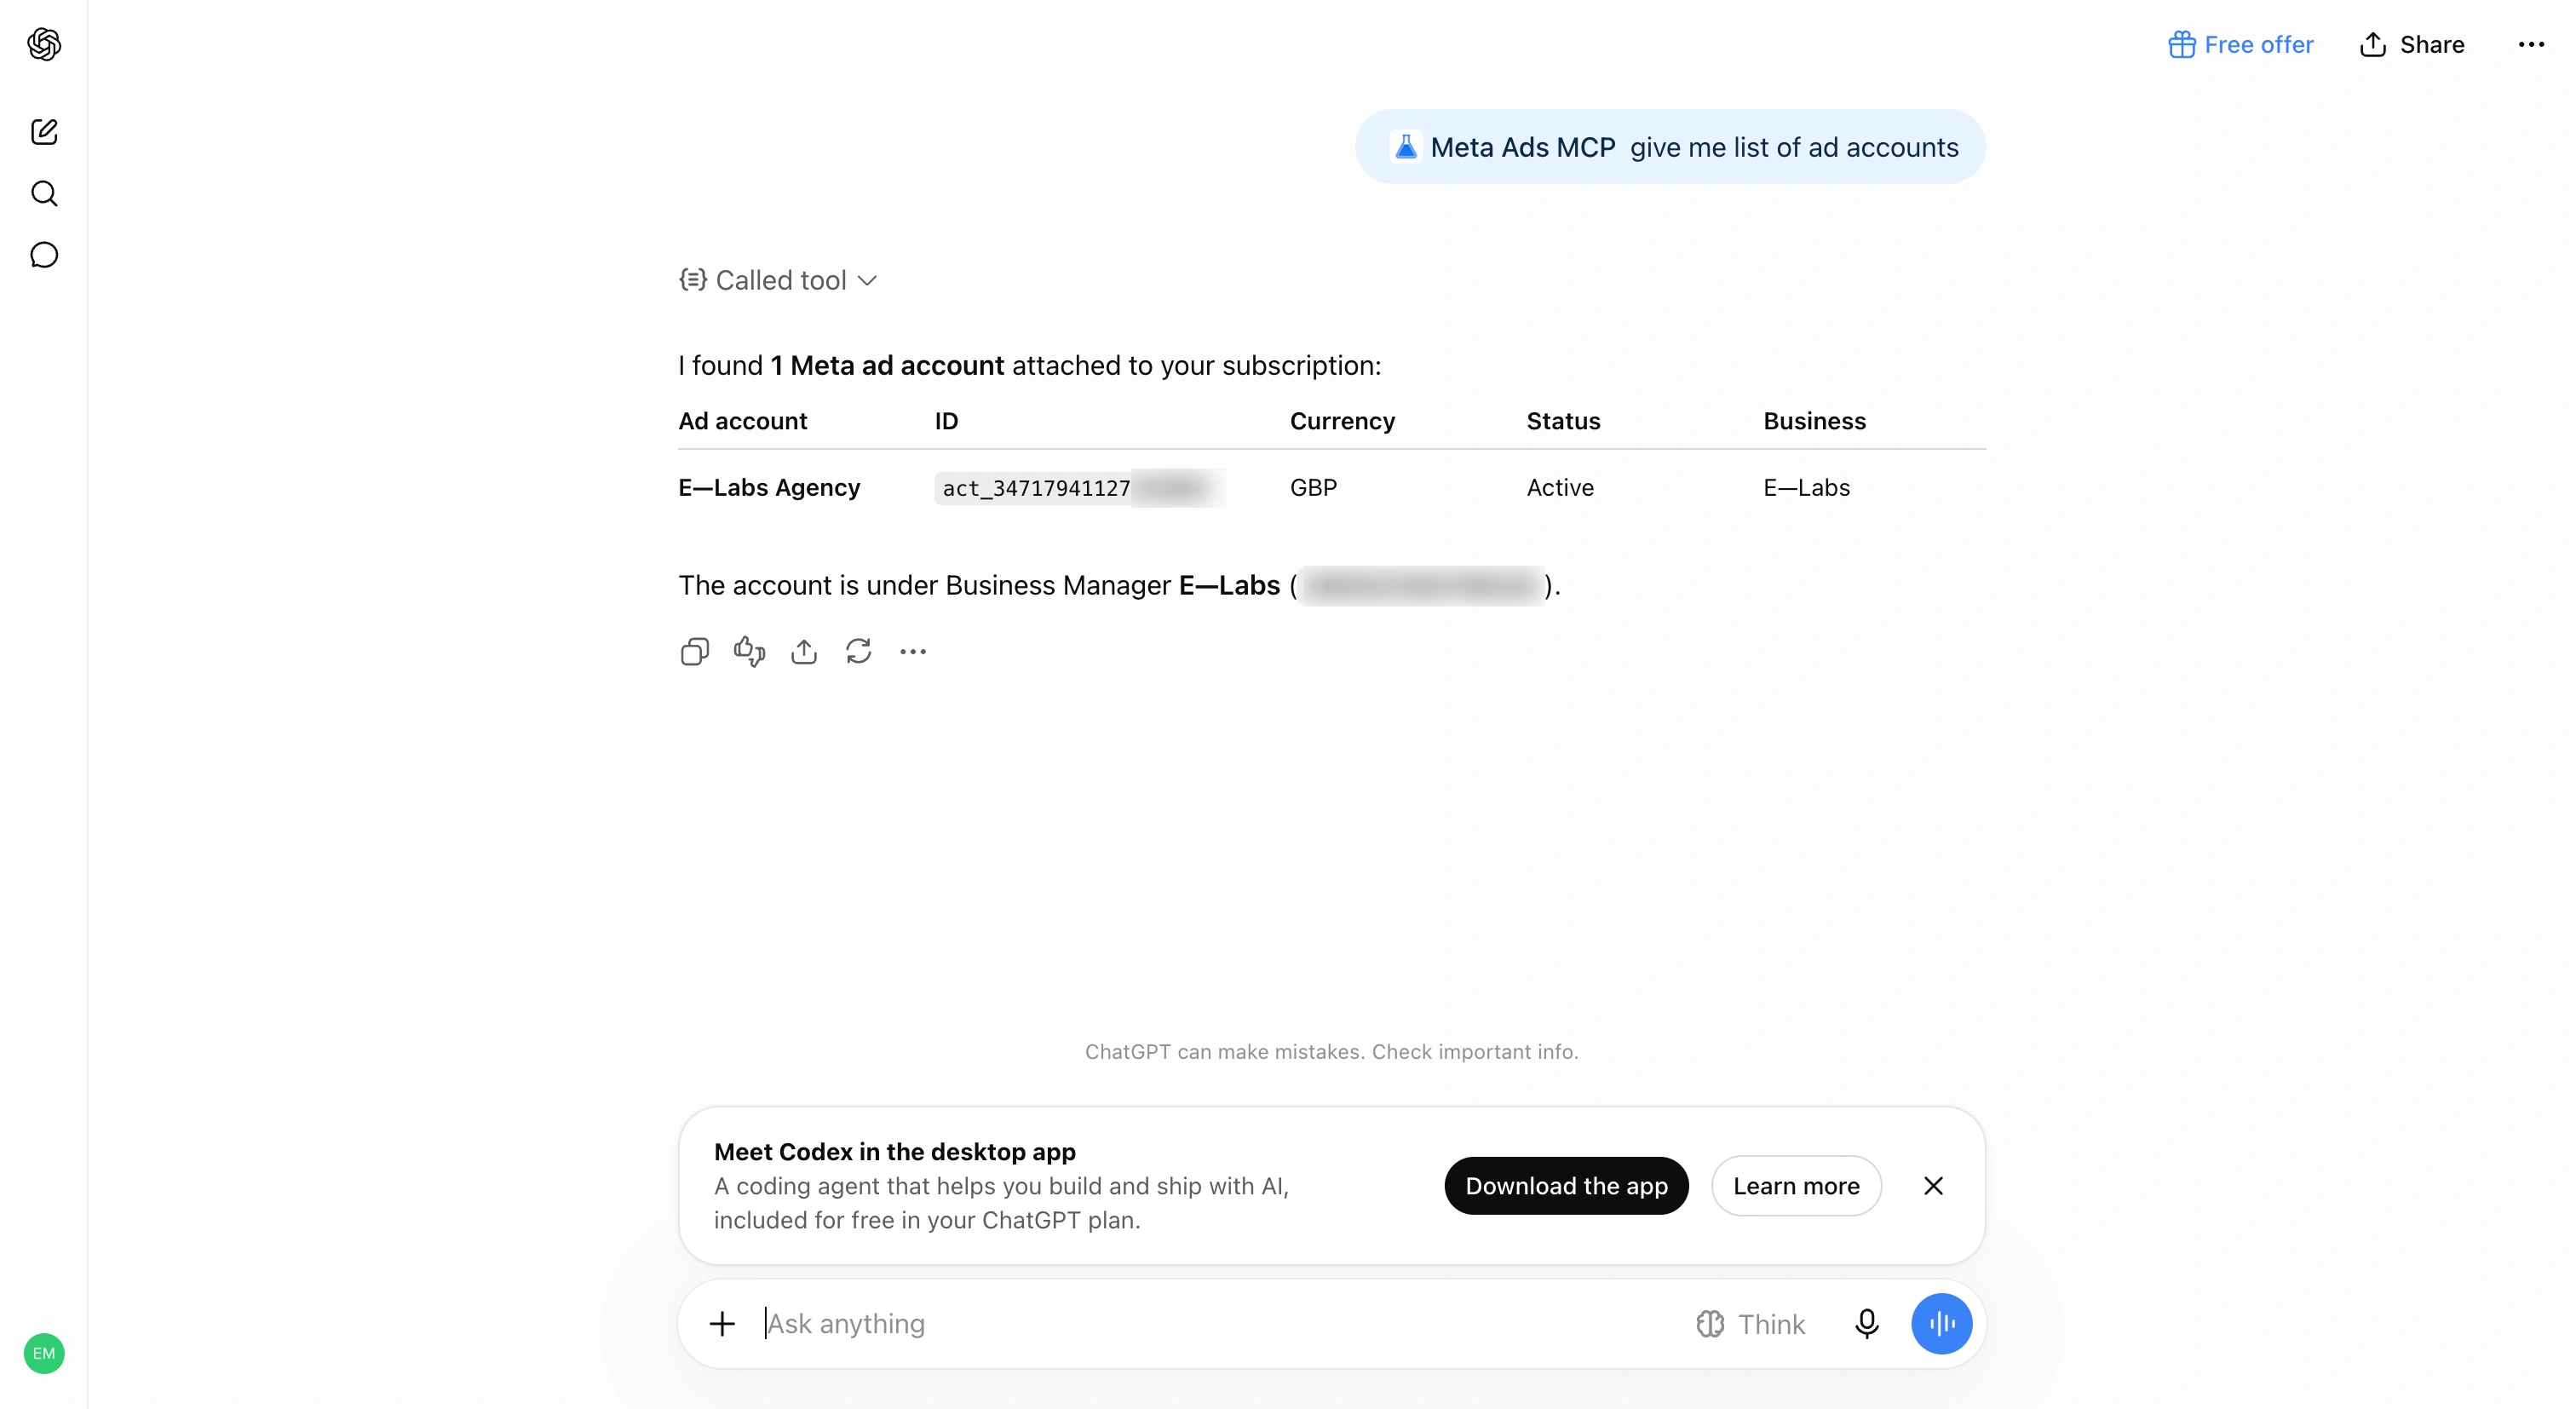
Ask for your ad accounts
Try: give me a list of ad accounts. You should see a Called tool line, then the accounts on your subscription.
ChatGPT desktop
Desktop uses Settings, Plugins, Add MCP server, Streamable HTTP. Same URL, same mam_live_ key.
Open the desktop screenshot guideClaude uses a custom connector instead. Authentication None, then an authorization header. Open the Claude guide.