 Meta Ads MCP
Setup guide
Claude custom connector
Four screens. Settings → Customize → Connectors. Authentication is None. Send your mam_live_ key as an authorization header. Connect your Facebook app first.
MCP URL
Paste this into URL, then Continue. Do not use OAuth.
Header
Name is authorization. Include the auth scheme in the value.
Step 1
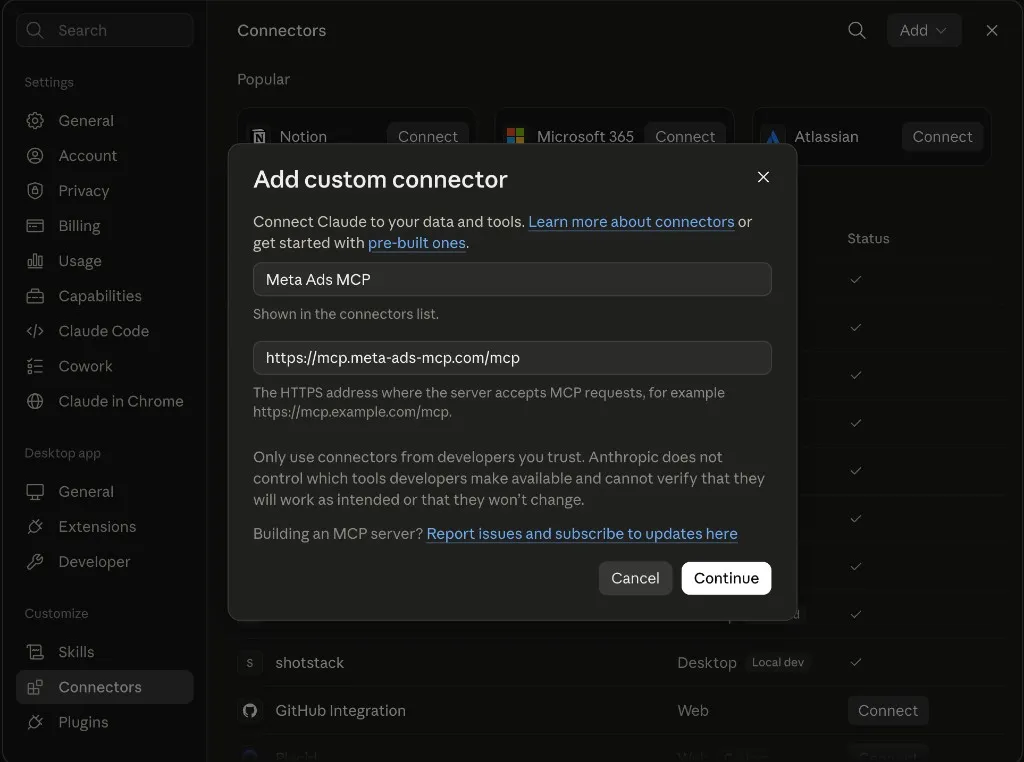
Name it Meta Ads MCP and paste the URL
In Claude, open Settings. Under Customize, click Connectors. Click Add, then Add custom connector. Name: Meta Ads MCP. URL: https://mcp.meta-ads-mcp.com/mcp. Click Continue. No Node, and no JSON config file.
Step 2
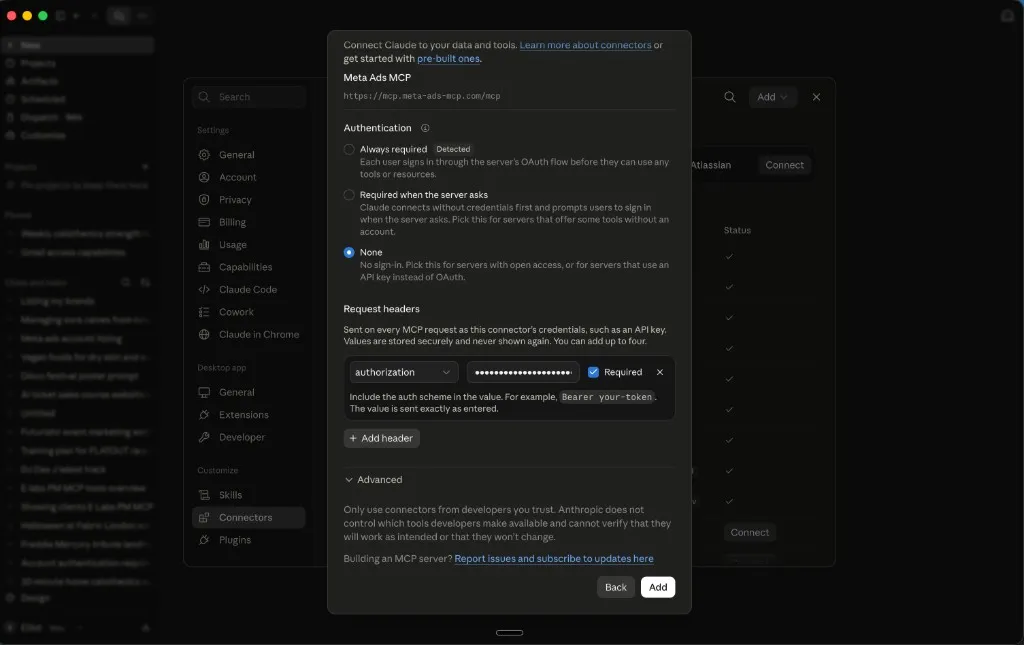
Authentication None, then add the API key header
Pick None. Claude may detect OAuth anyway. Override it. Under Request headers, choose authorization. Value is Bearer mam_live_YOUR_KEY. Tick Required, then Add.
Include the auth scheme in the value, exactly as Bearer mam_live_YOUR_KEY. Do not pick Always required.
Step 3
Check the tools are connected
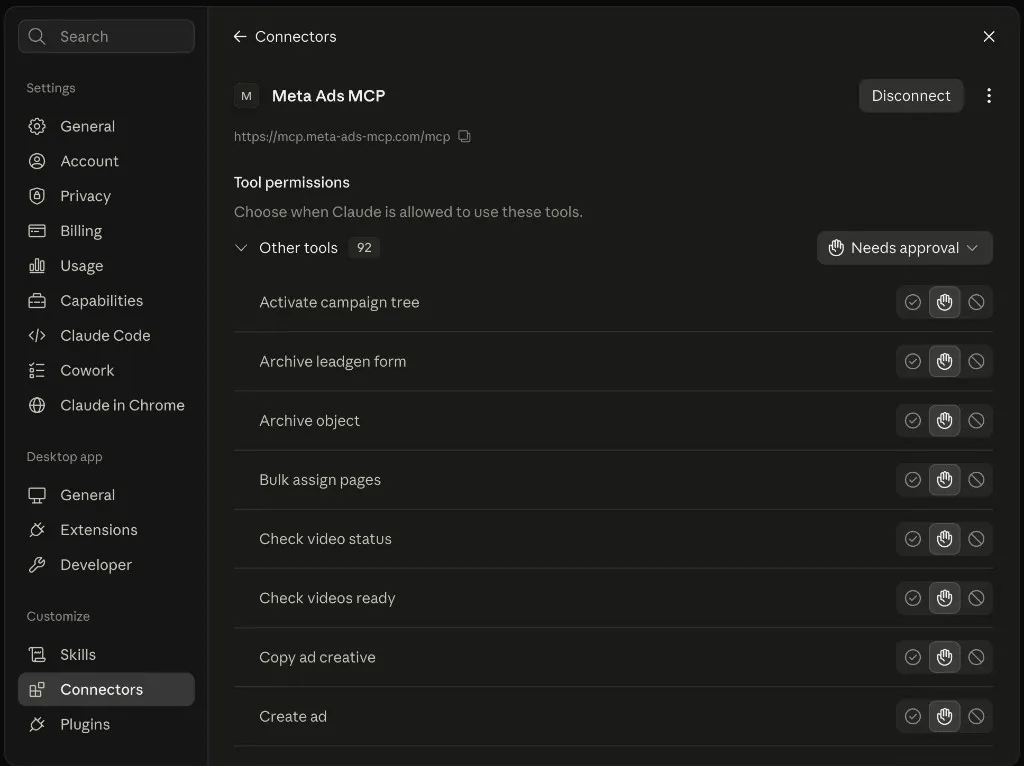
Meta Ads MCP should show as connected, with the MCP URL and 92 tools under Other tools. Needs approval is the default. Set Other tools to Always allow if you want Claude to run them without asking every time.
Step 4
Ask in a chat
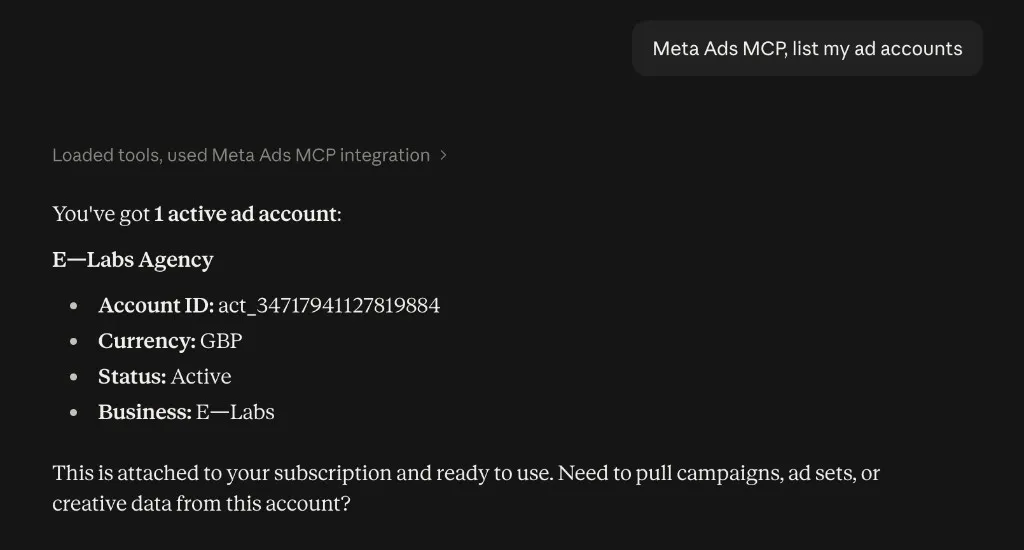
Start a new chat and try: Meta Ads MCP, list my ad accounts. You should see a tool call, then the accounts on your subscription.
ChatGPT on the web
Same URL, same mam_live_ key. ChatGPT uses OAuth, not this header. Do not mix STDIO and HTTP.
Open that screenshot guide