 Meta Ads MCP
Setup guide
Create a Facebook app
About 10 minutes. Stay in Development while you build it, then flip the app to Live at the end. You are the app admin, so ads permissions work without App Review. Use the Facebook user who actually runs the ads.
Copy these into the Facebook app
Always these production URLs. Even if you signed up on localhost.
Valid OAuth Redirect URIs
Allowed Domains for the JavaScript SDK
App Domains
Privacy policy URL
Terms of Service URL
Step 1
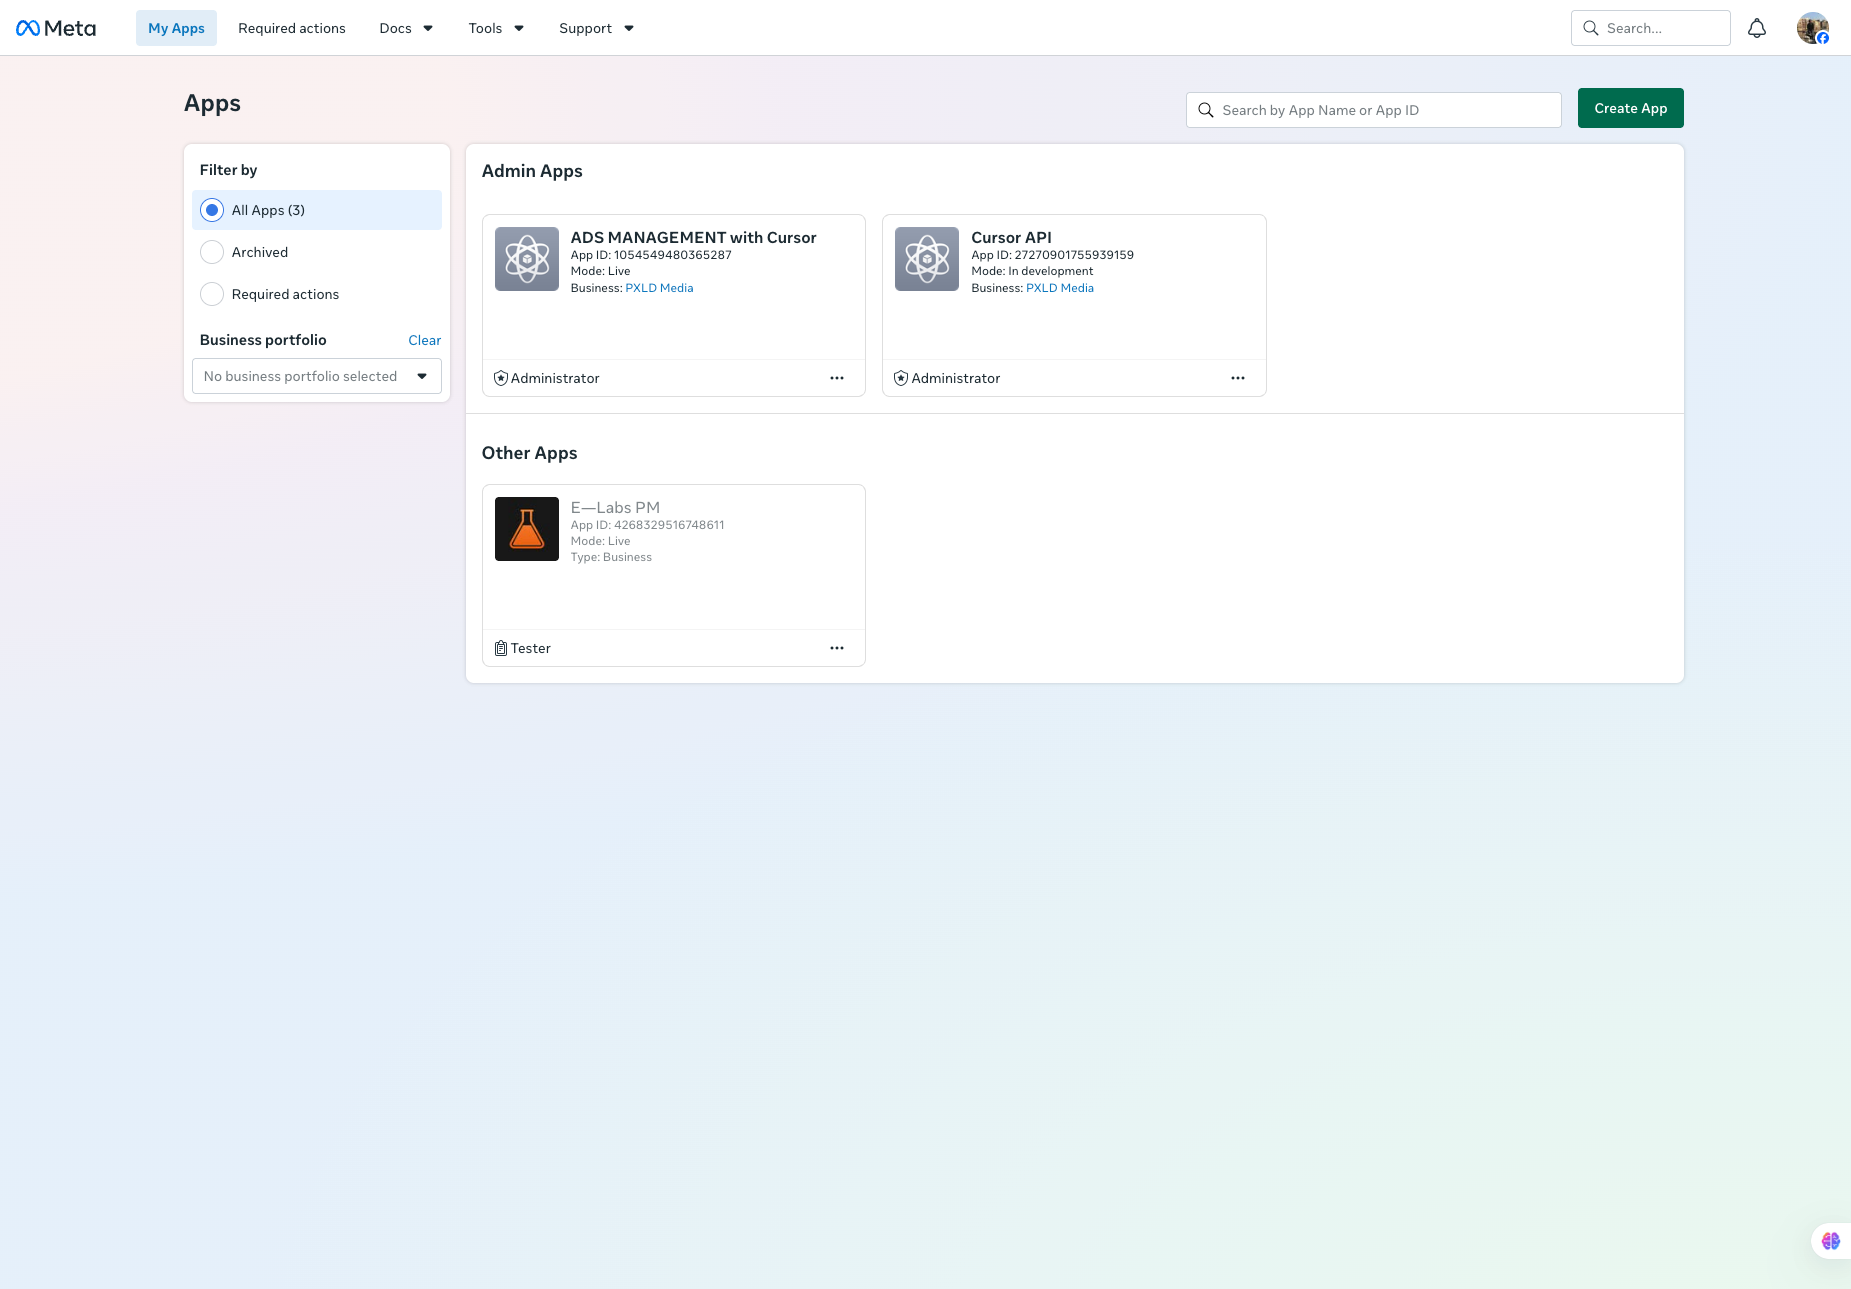
Open My Apps and click Create App
Log in at developers.facebook.com with the Facebook user who will admin the ads. Open My Apps, then click the green Create App button.
Step 2
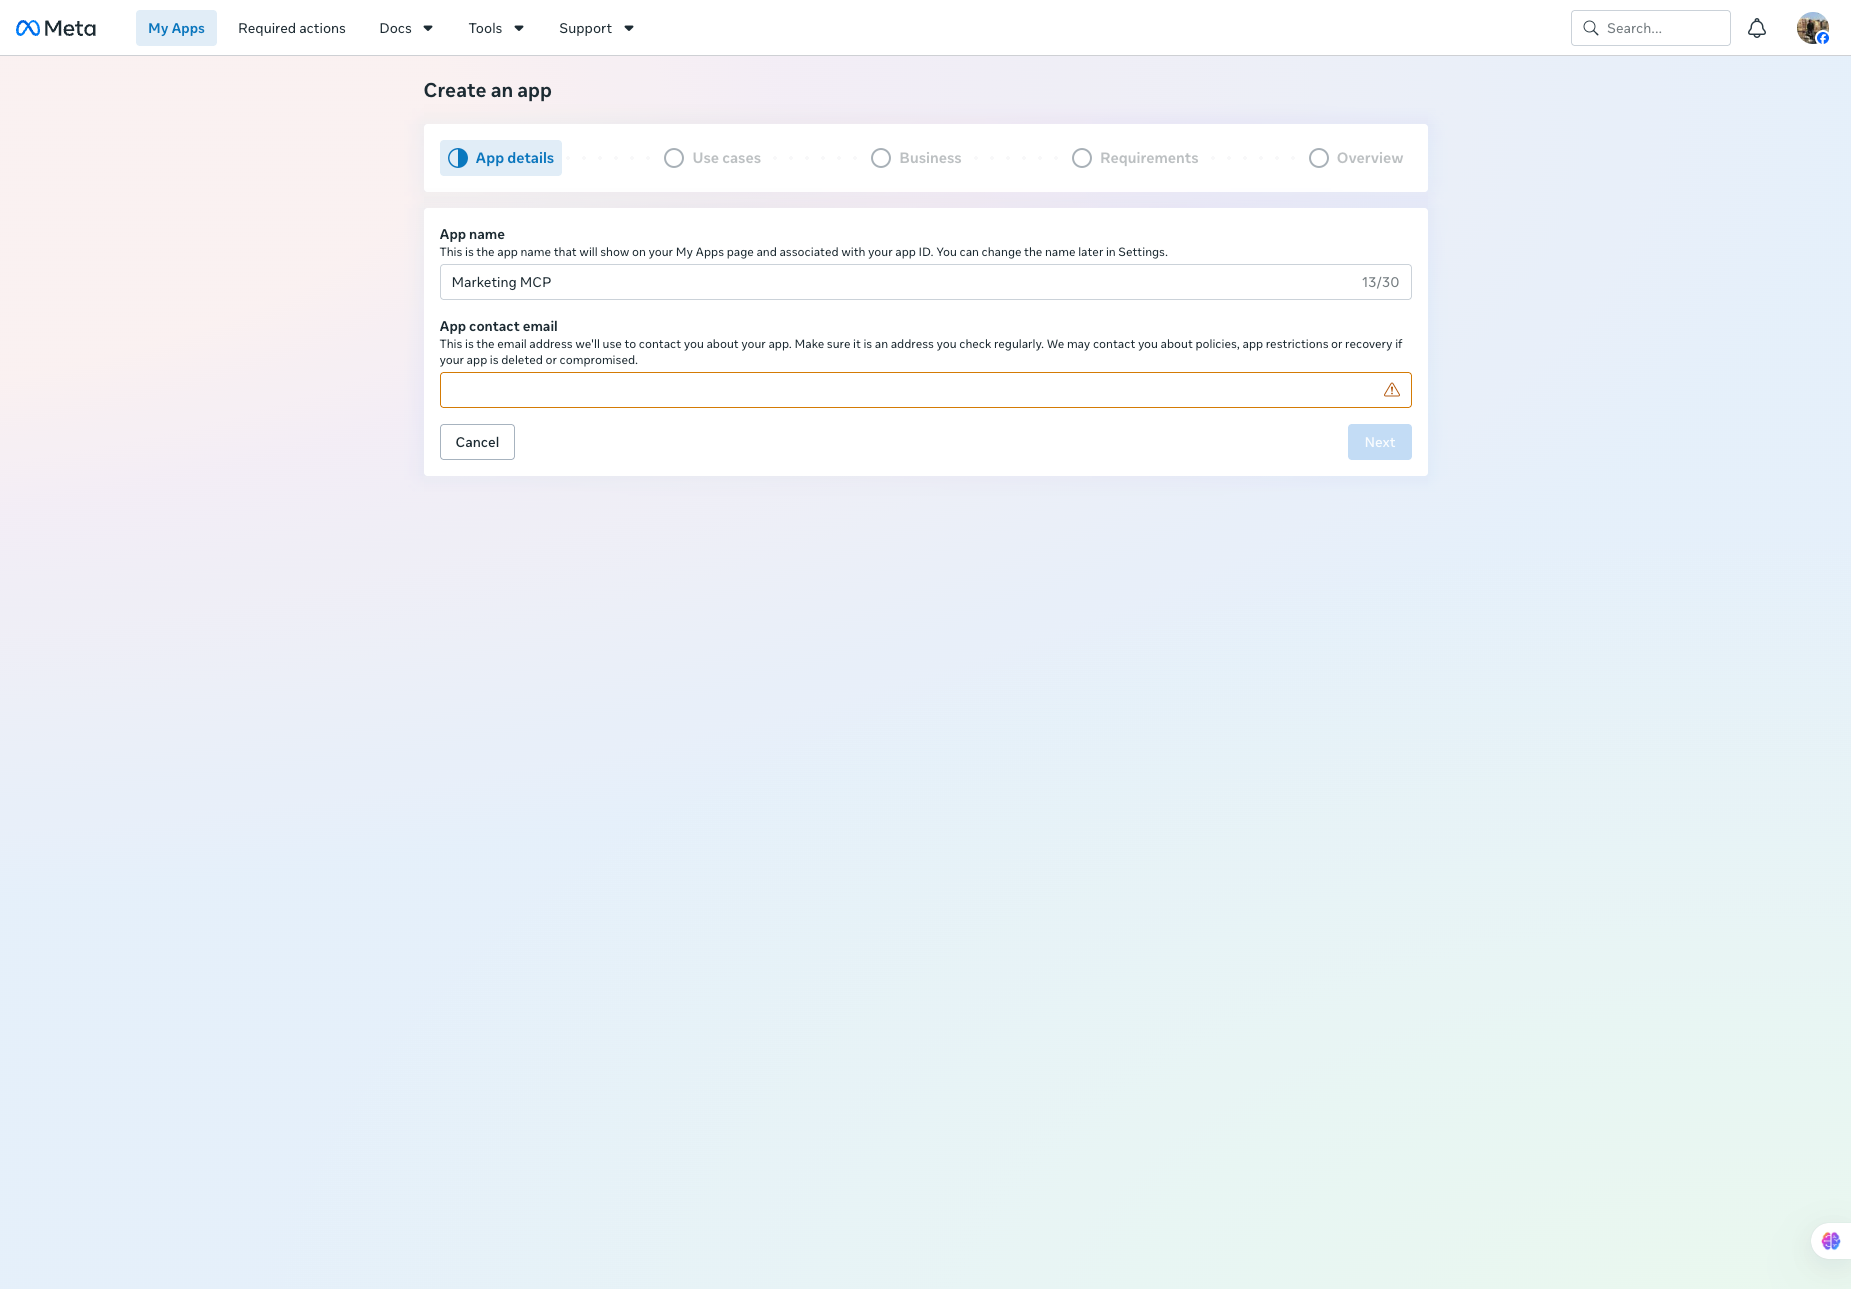
Name the app and add a contact email
Call it something like Marketing MCP. Fill both the app name and a contact email. Next stays grey until both are valid.
Step 3
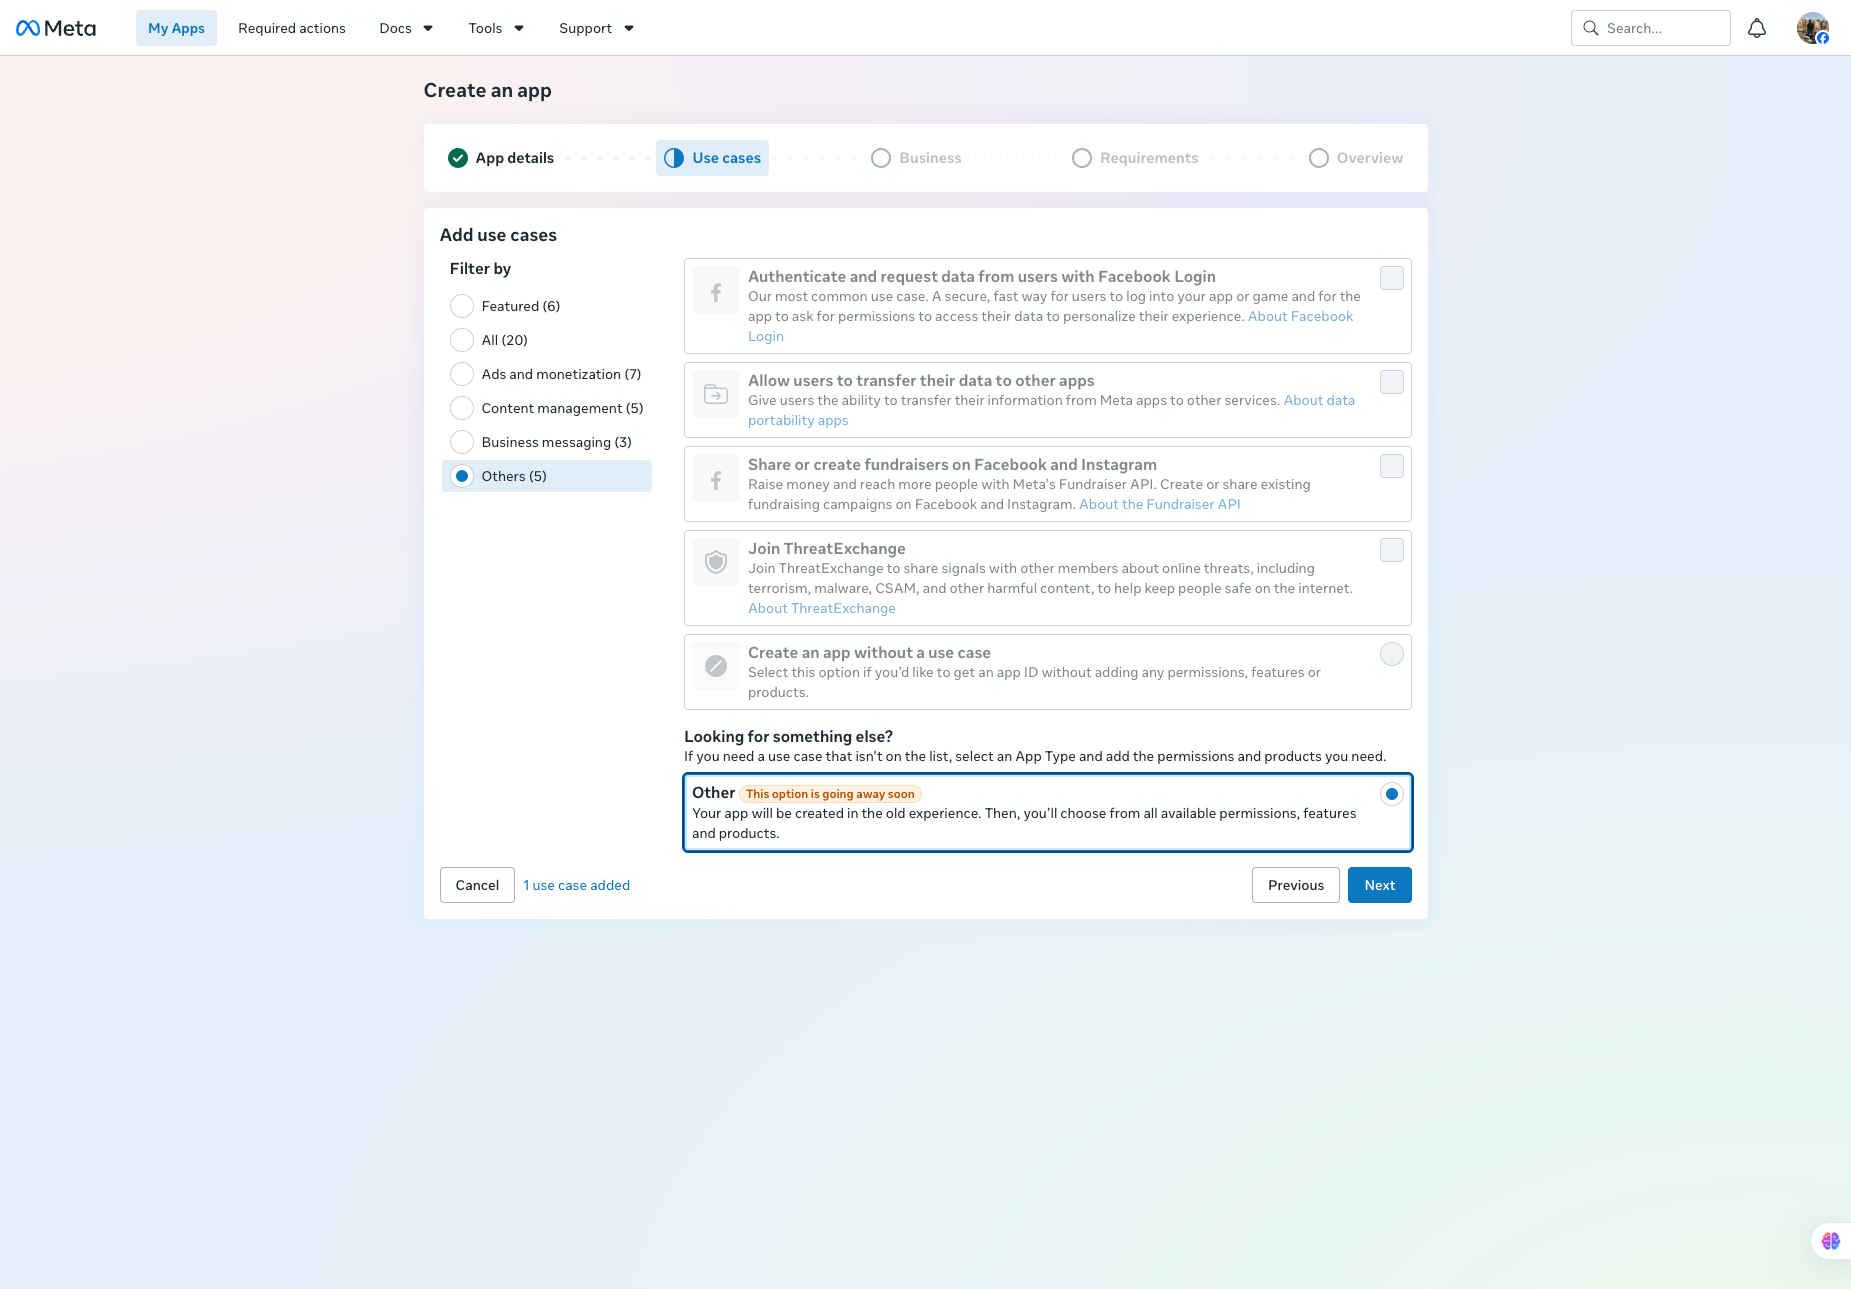
On Use cases, pick Other
This is the step people miss. Meta now starts you in a use-case wizard. That path locks the app and will not give you a Business type with Facebook Login for Business. On the left, click Others. At the bottom, choose Other. It says this option is going away soon. That is the one you want. It drops you into the old experience, where you can pick every product and permission.
Do not tick Facebook Login from the use case list. That is the consumer path.
Step 4
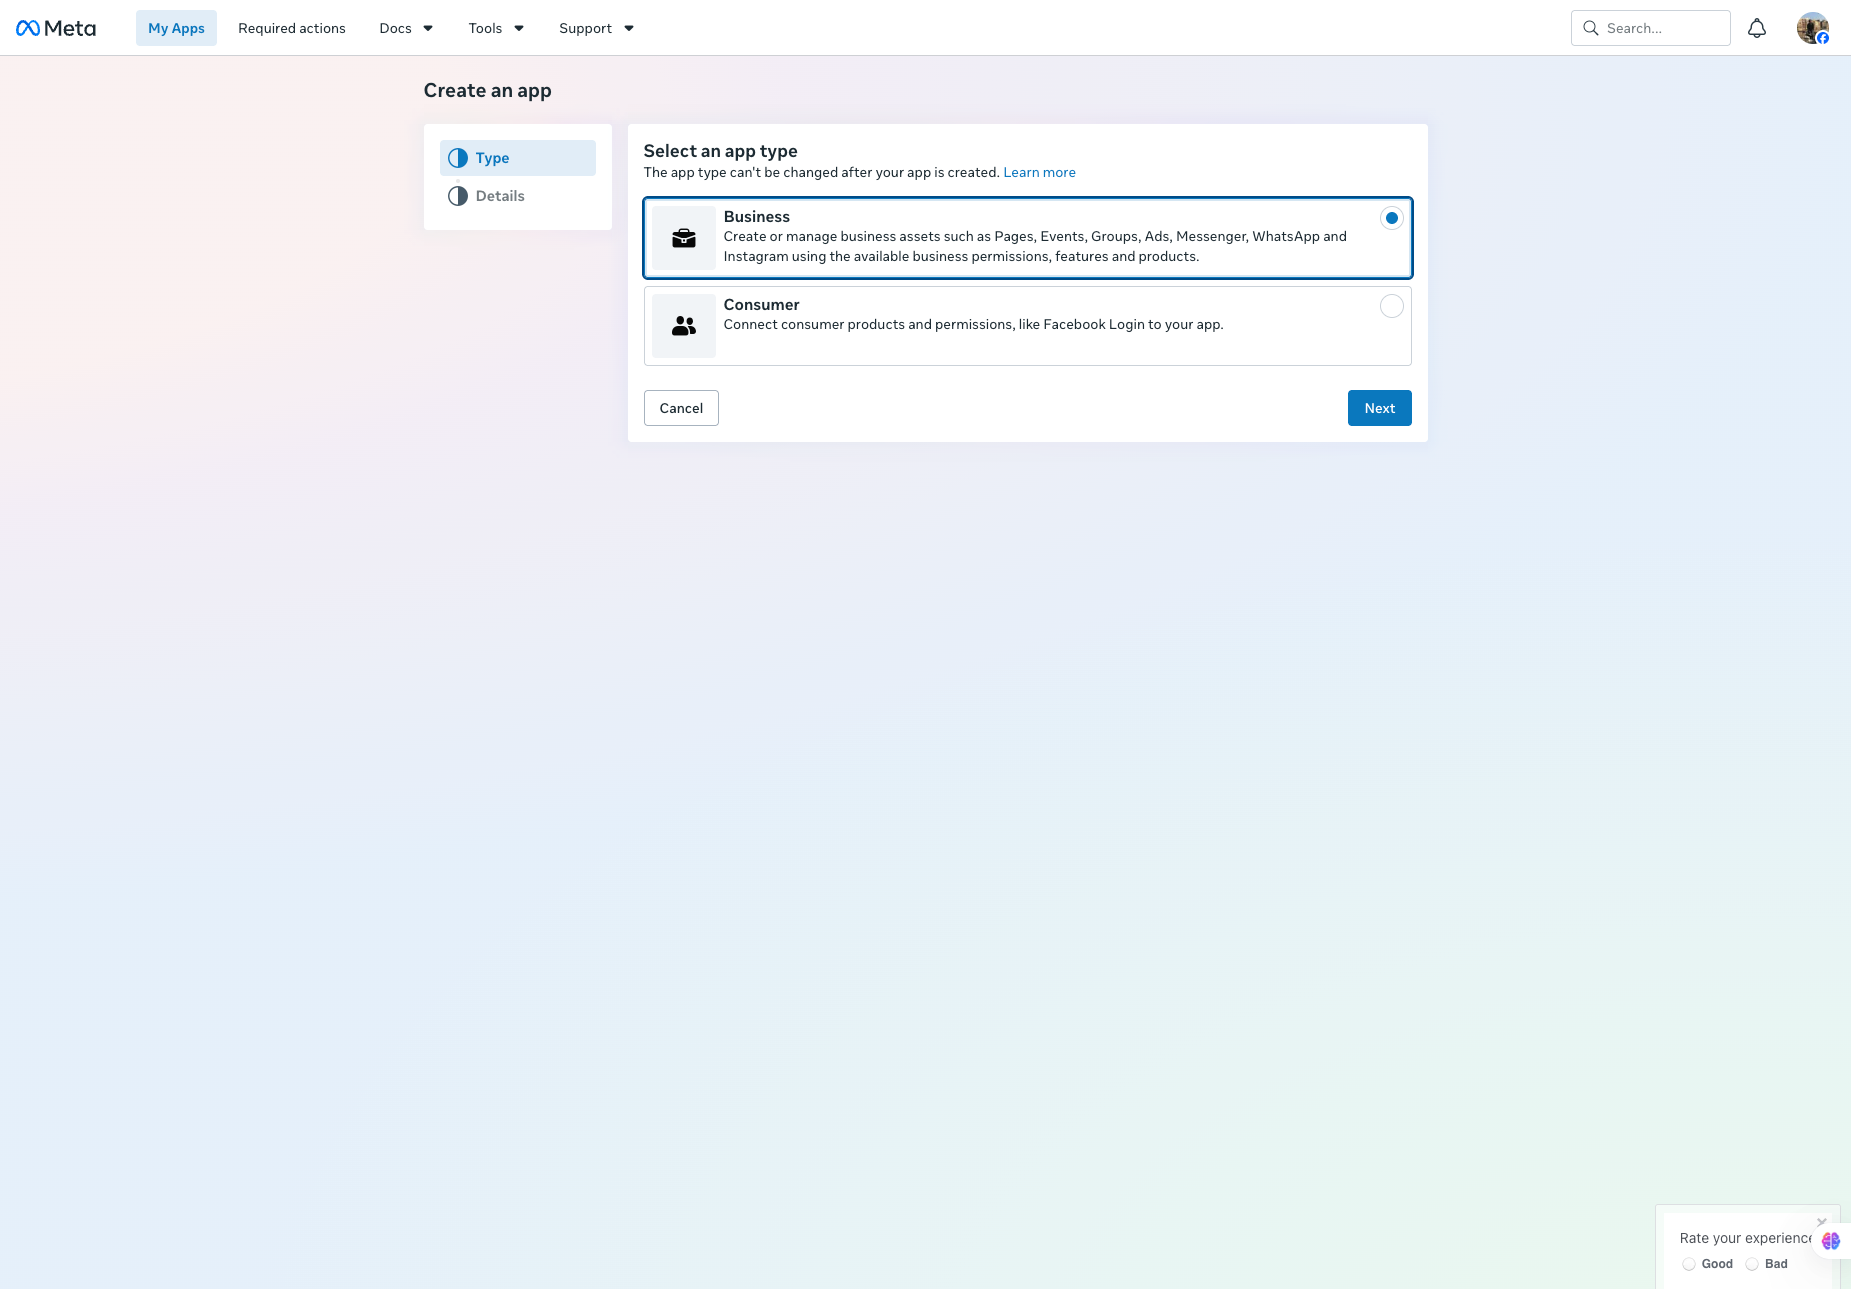
Choose Business, not Consumer
You cannot change the app type later. Pick Business. That is the type that can manage Pages, ads, and Instagram.
Step 5
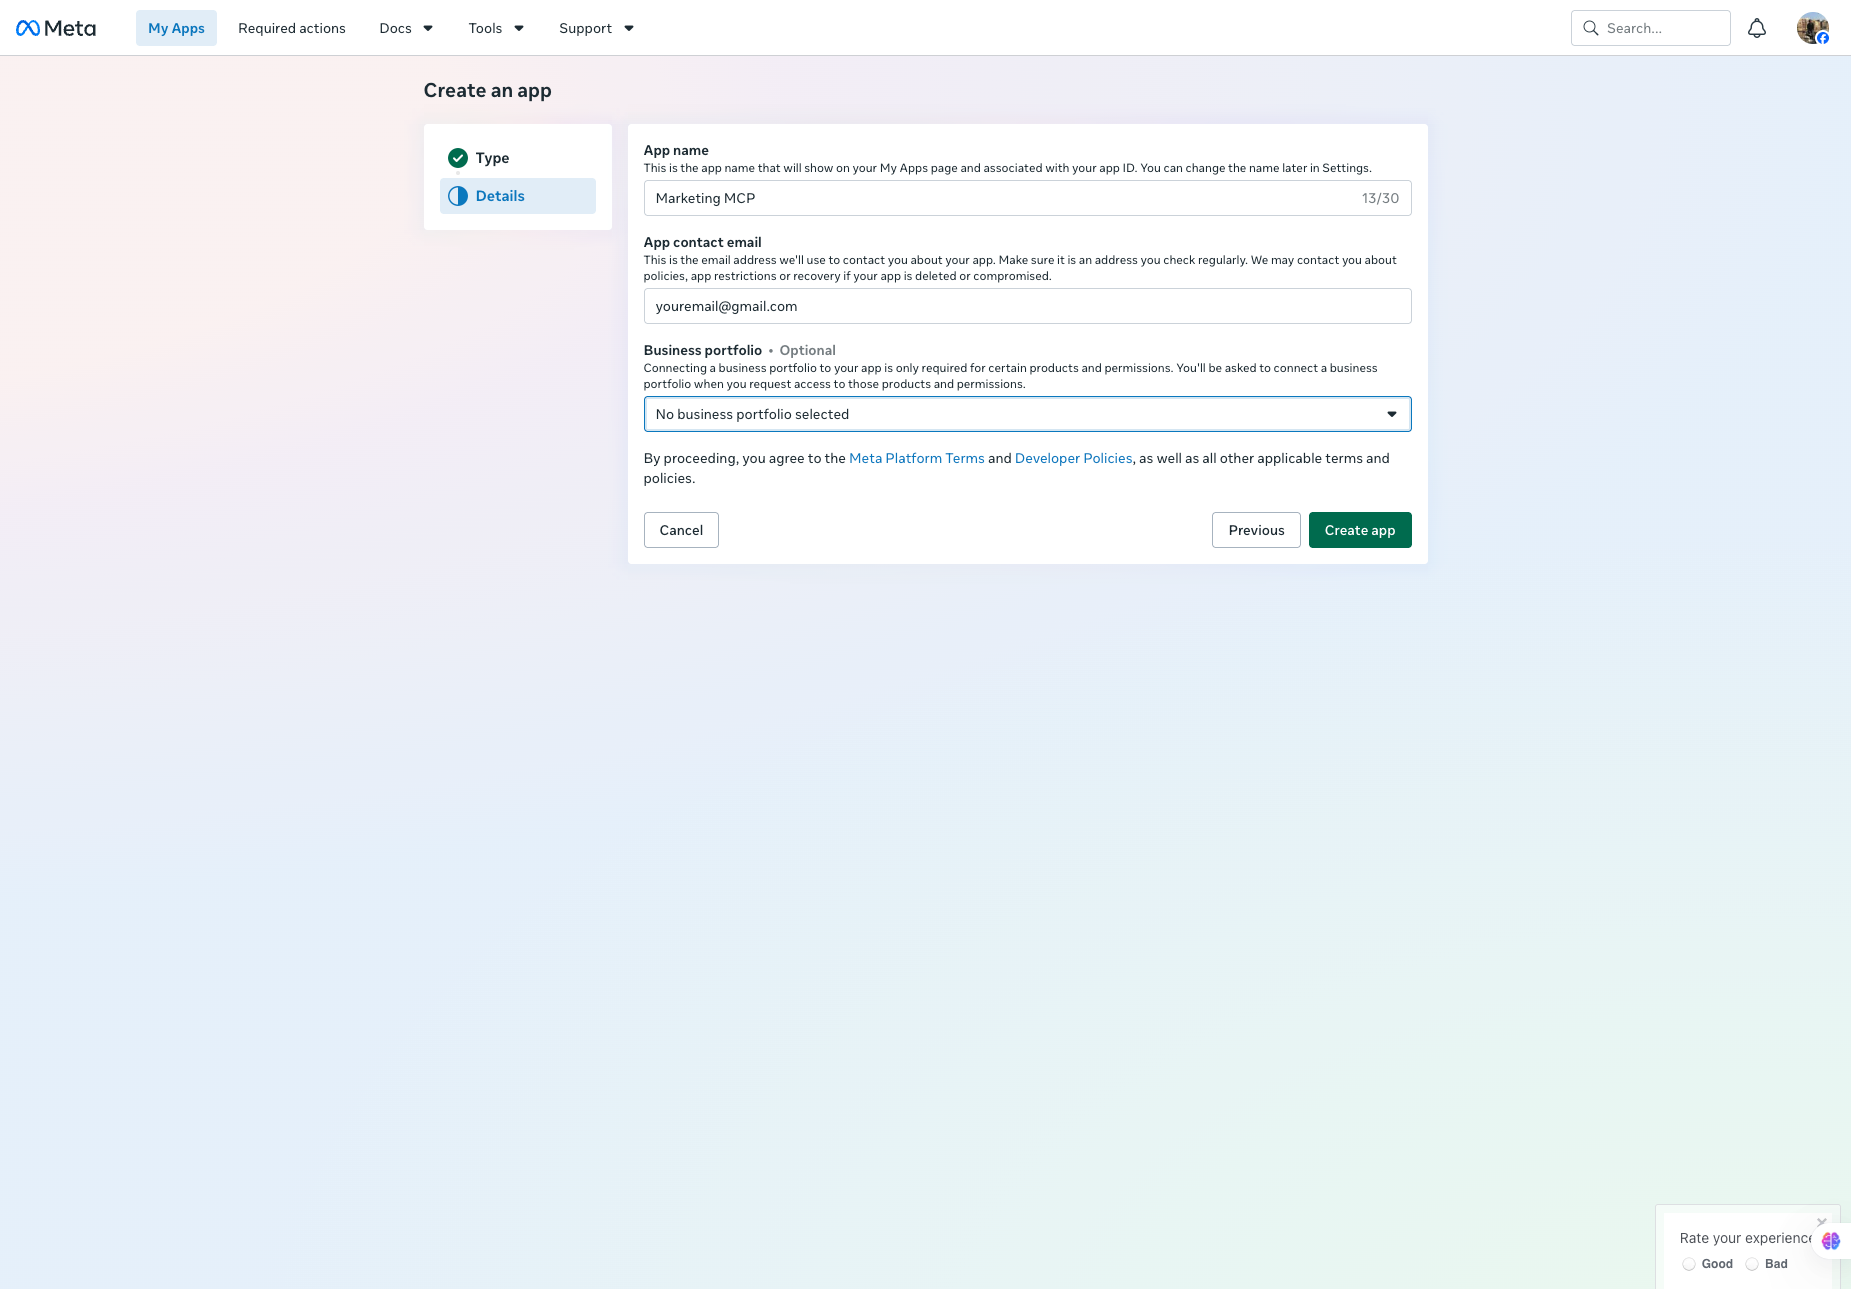
Confirm the details and create the app
Name and contact email again. Leave business portfolio on No business portfolio selected. You do not need one. Click the green Create app button. Facebook may ask for your password.
Step 6
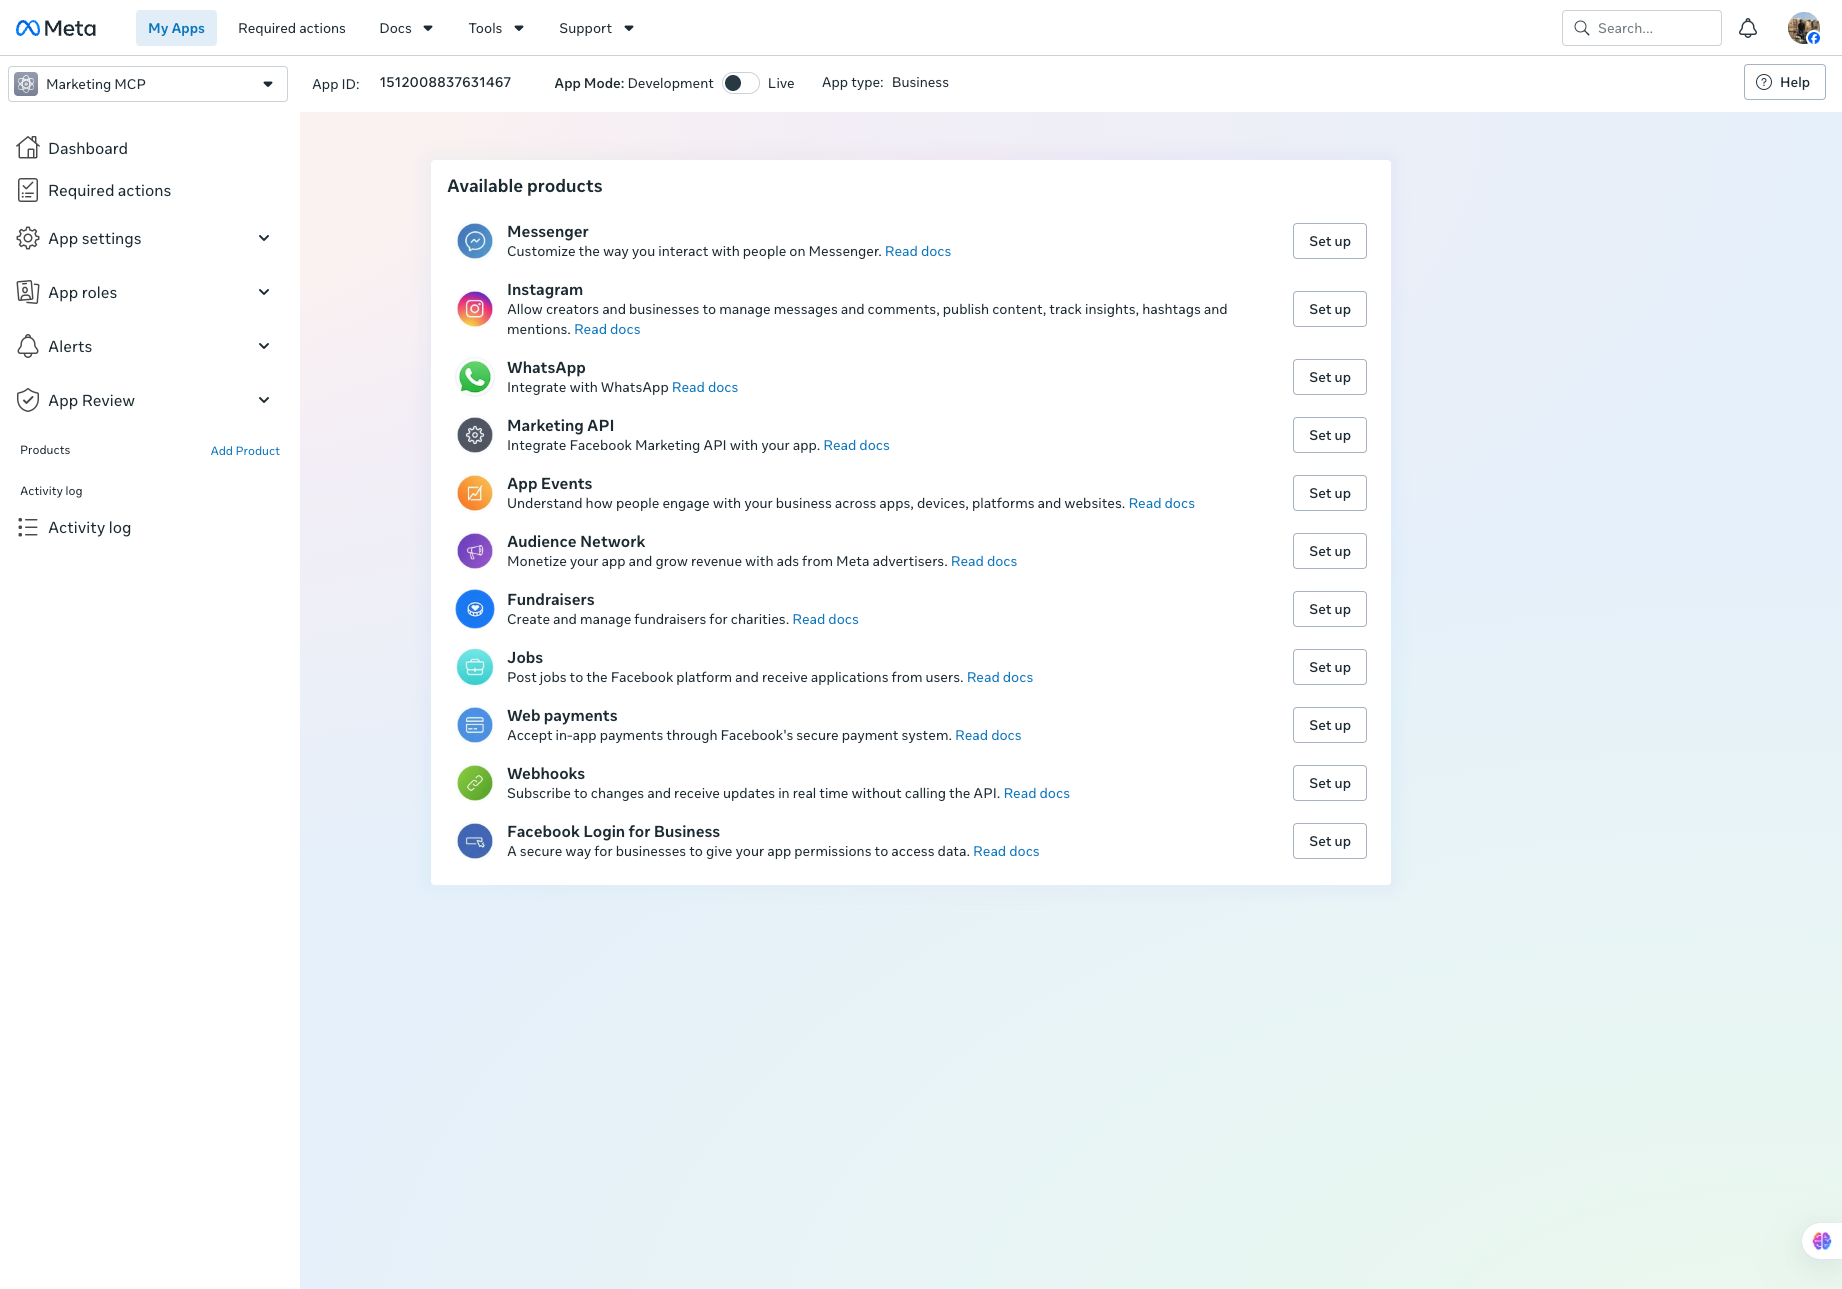
Add Facebook Login for Business
You land on the app dashboard. Leave the mode on Development. Scroll the product list and click Set up on Facebook Login for Business, the one at the bottom. Not the consumer Facebook Login.
You do not need to add Marketing API as a product. Ads permissions come through Login.
Step 7
Paste the OAuth redirect URL
Open Facebook Login for Business, Settings. Leave Client OAuth login, Web OAuth login, Enforce HTTPS, and Strict Mode on. Paste this exact URL into Valid OAuth Redirect URIs. Use this even if you are testing on localhost.
Ignore the yellow banner about public_profile advanced access. In Development, you are the app admin, so login still works. Stay in Development until the last step.
Valid OAuth Redirect URIs
https://meta-ads-mcp.com/auth/meta/callback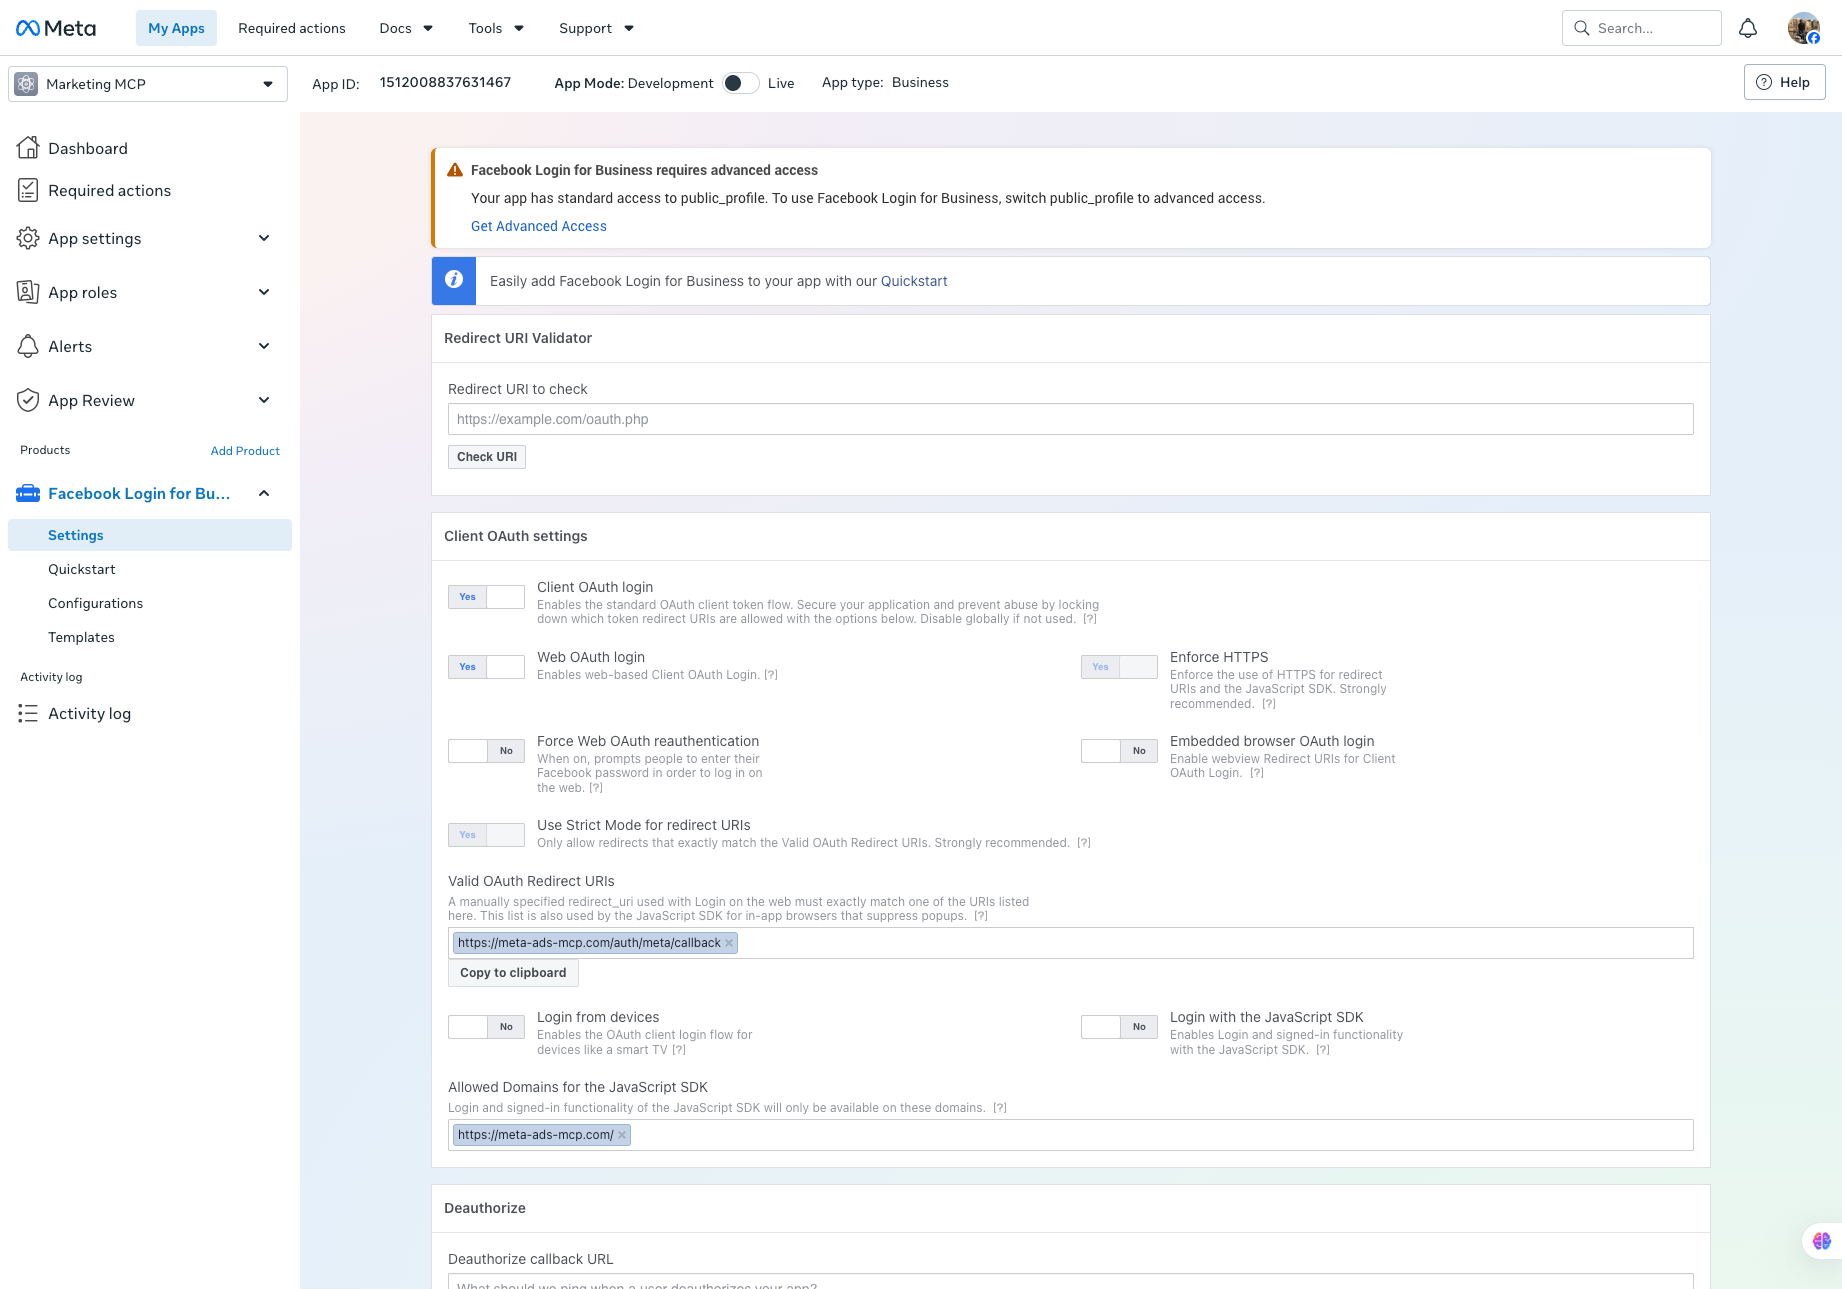
Step 8
Add the JavaScript SDK domain and save
On the same page, put this domain in Allowed Domains for the JavaScript SDK. Deauthorize and data deletion URLs can stay empty. Scroll to the bottom and click Save Changes.
Allowed Domains for the JavaScript SDK
https://meta-ads-mcp.com/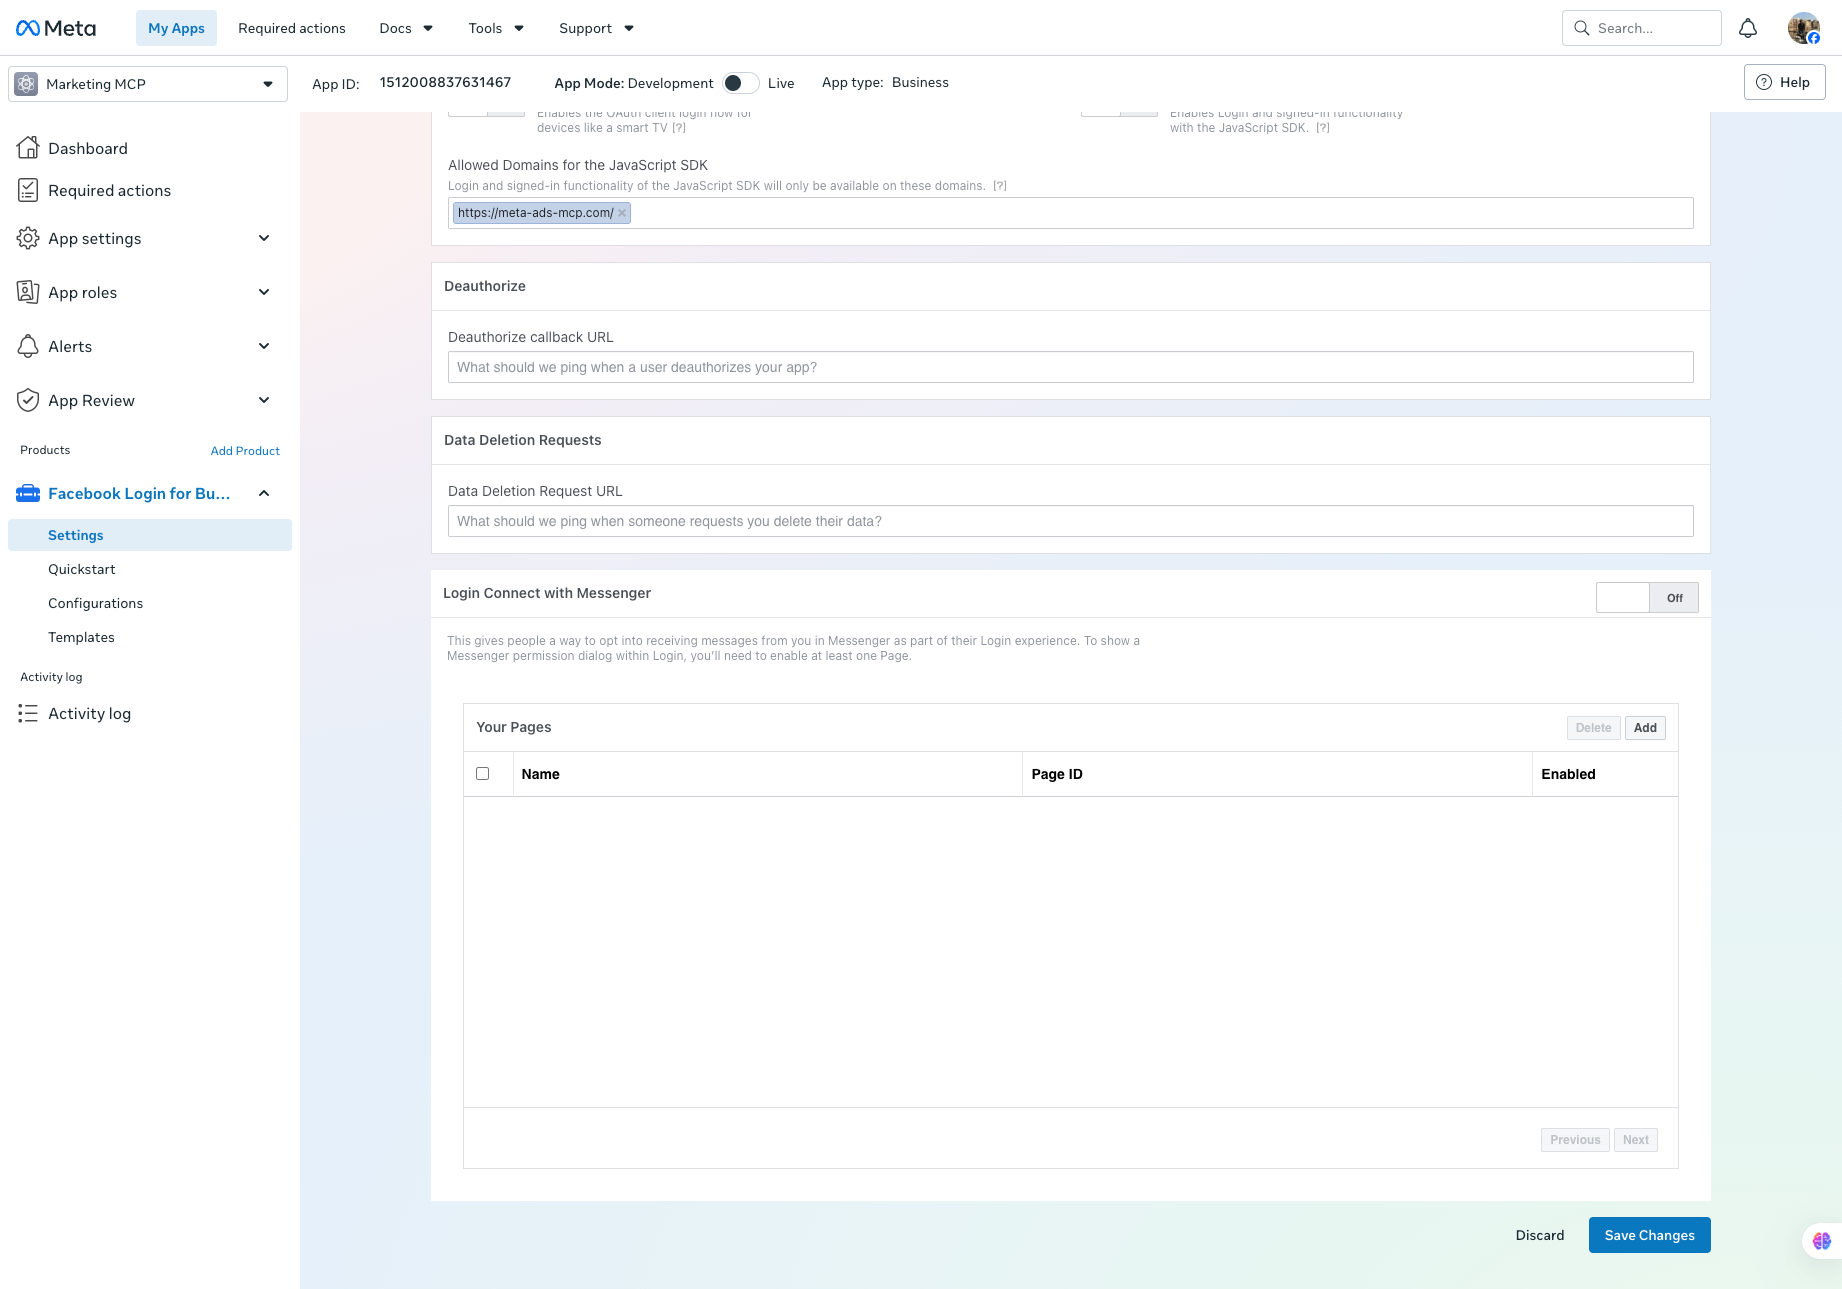
Step 9
Copy the App ID and App Secret
Top left, App settings, Basic. Copy the App ID. Click Show on App Secret and copy that too. Add App Domains as the root domain below. Keep the app in Development for now.
App Domains
meta-ads-mcp.com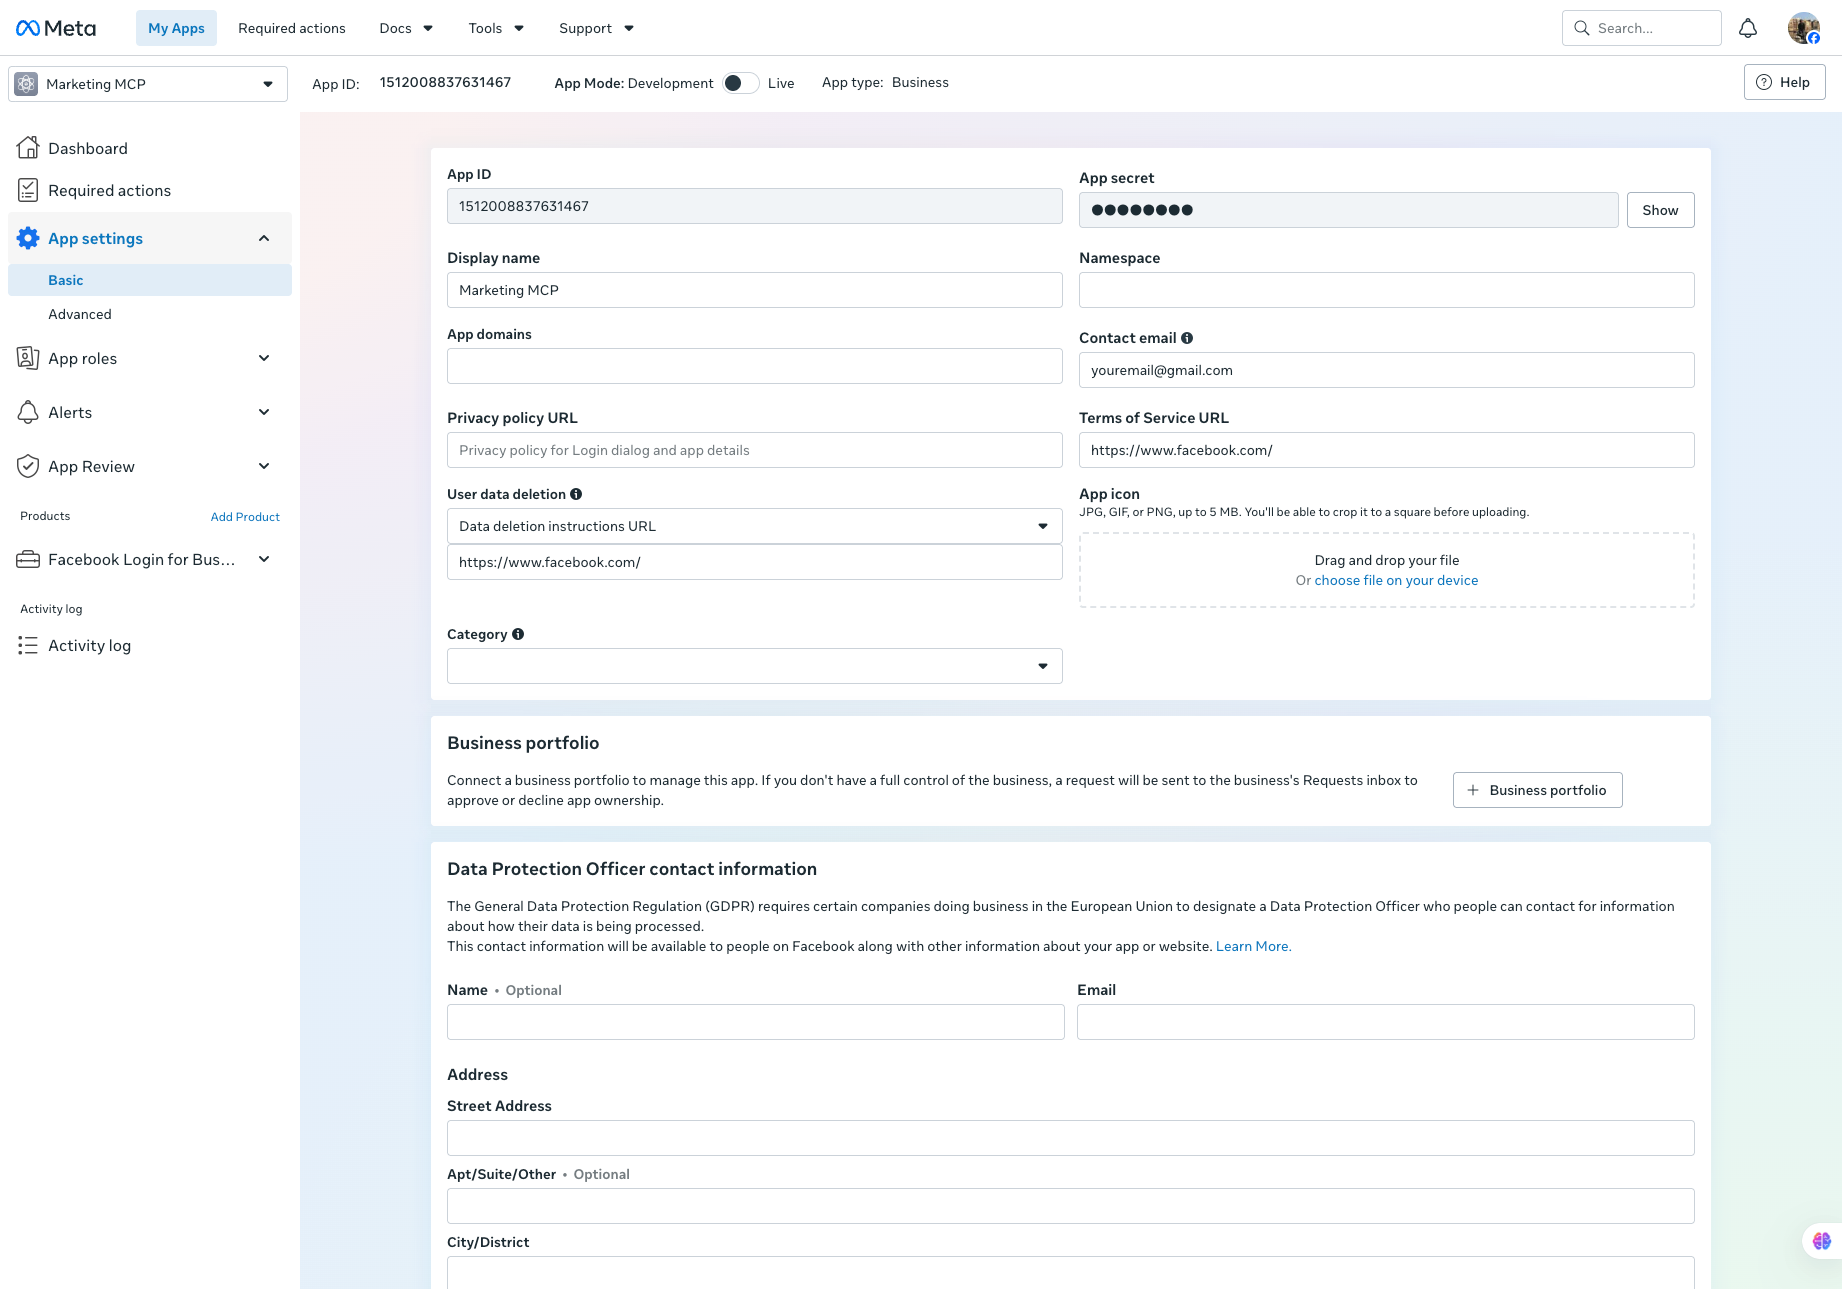
Step 10
Paste the credentials and log in
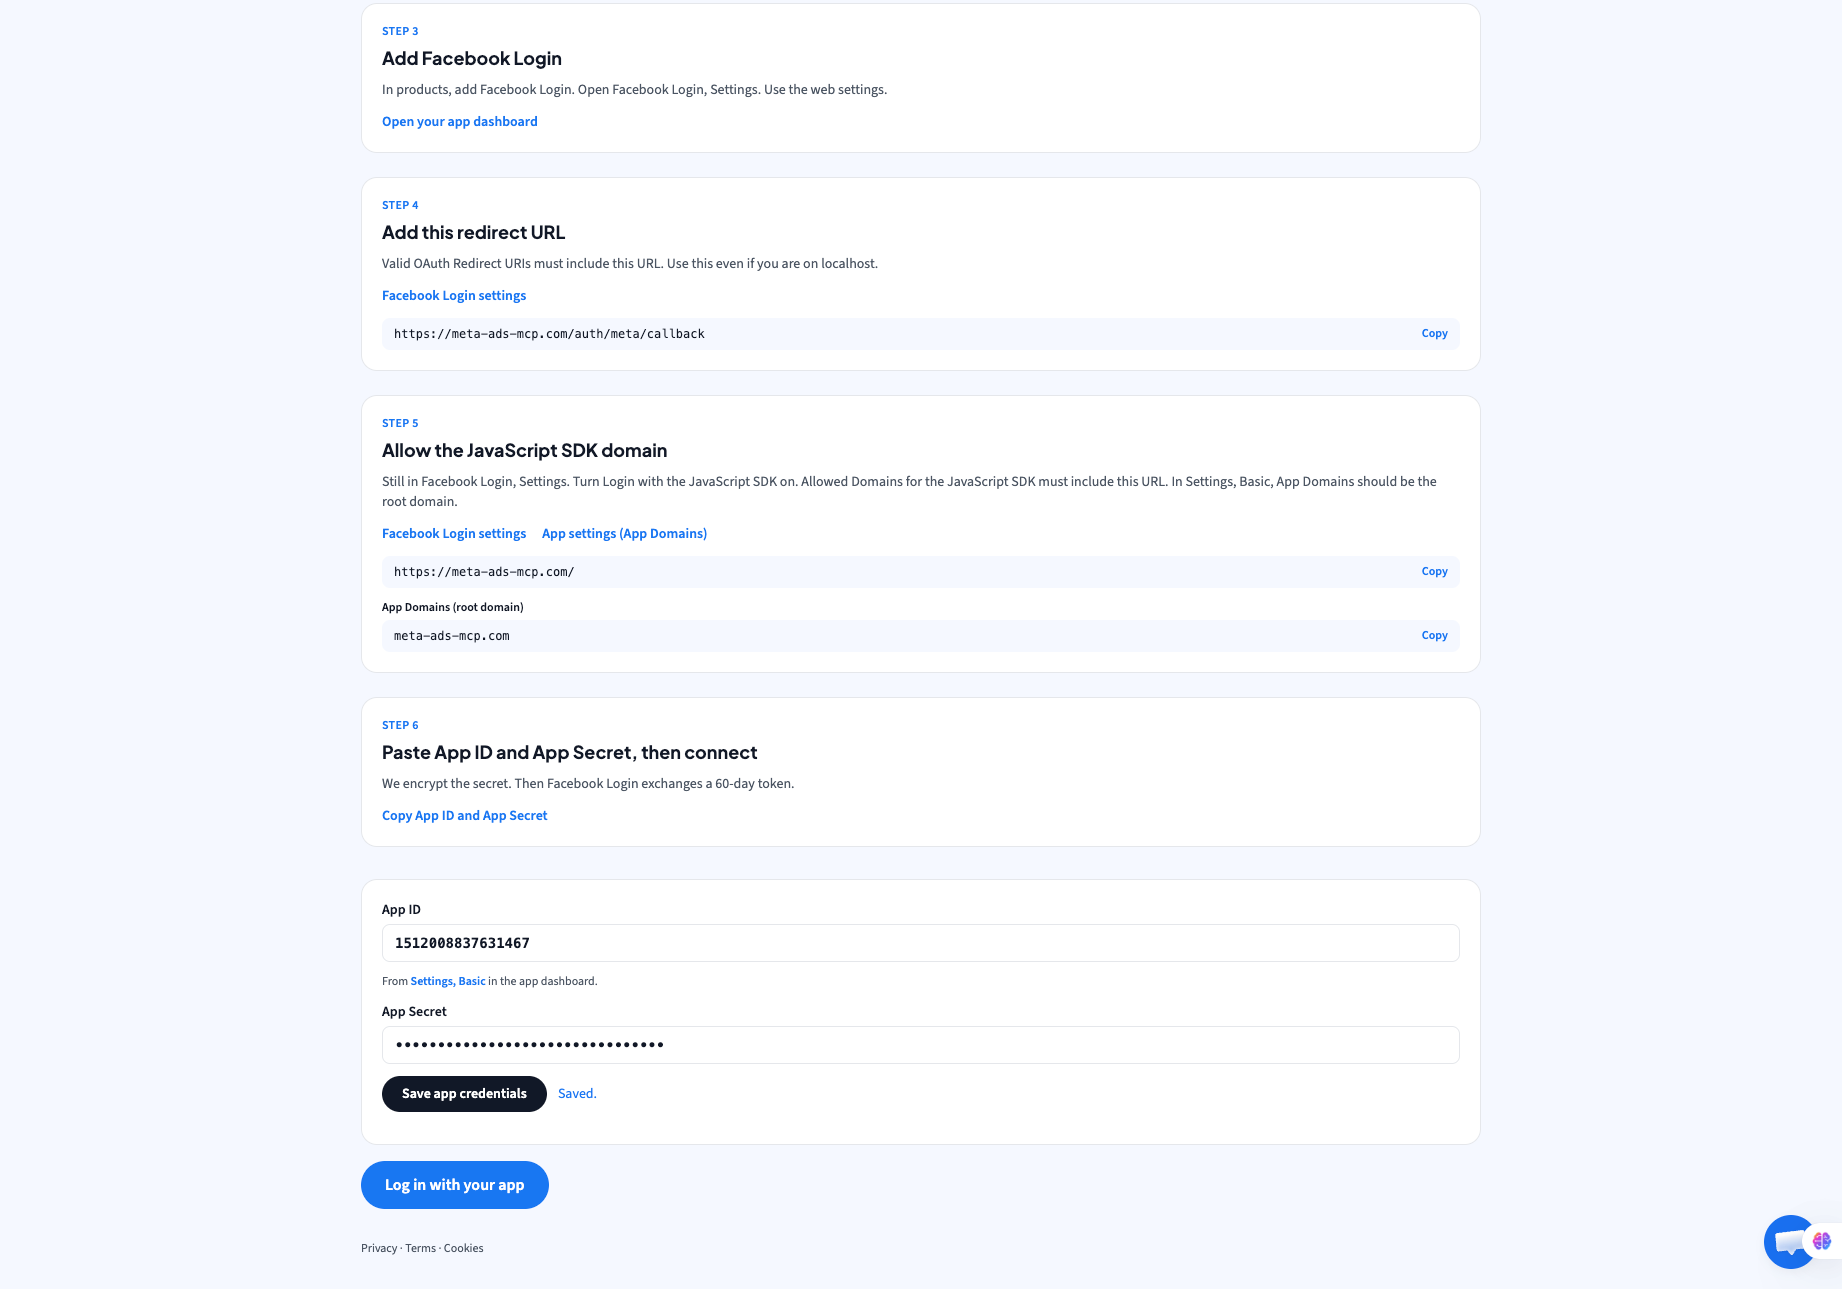
Back on Meta Ads MCP, paste the App ID and App Secret, click Save app credentials, then Log in with Facebook. We encrypt the secret. Facebook then issues a token that lasts about 60 days.
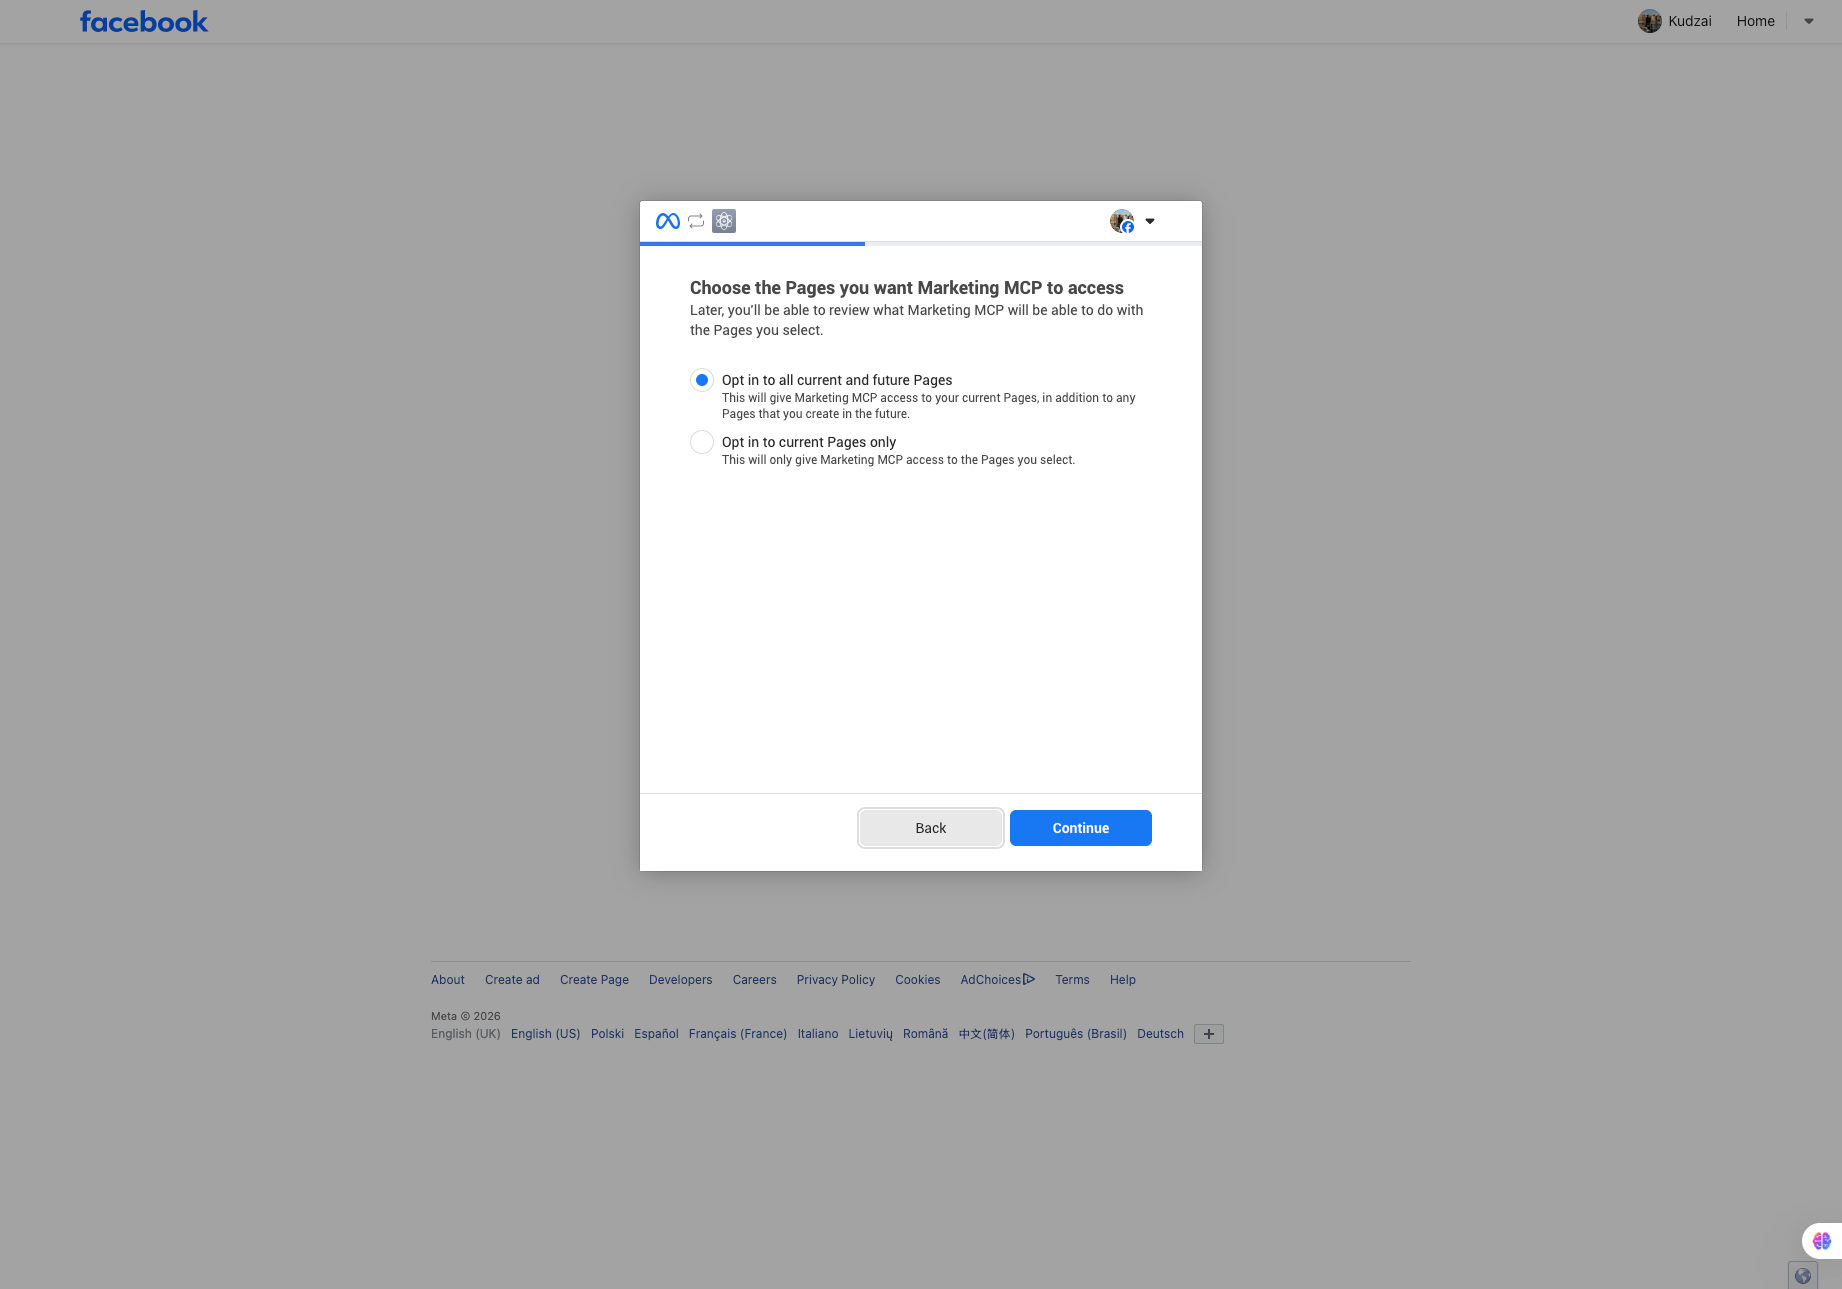
Step 11
Opt in to all current and future Pages
Facebook asks which Pages the app can use. Pick Opt in to all current and future Pages. If you pick current only, you will have to log in again every time you add a Page.
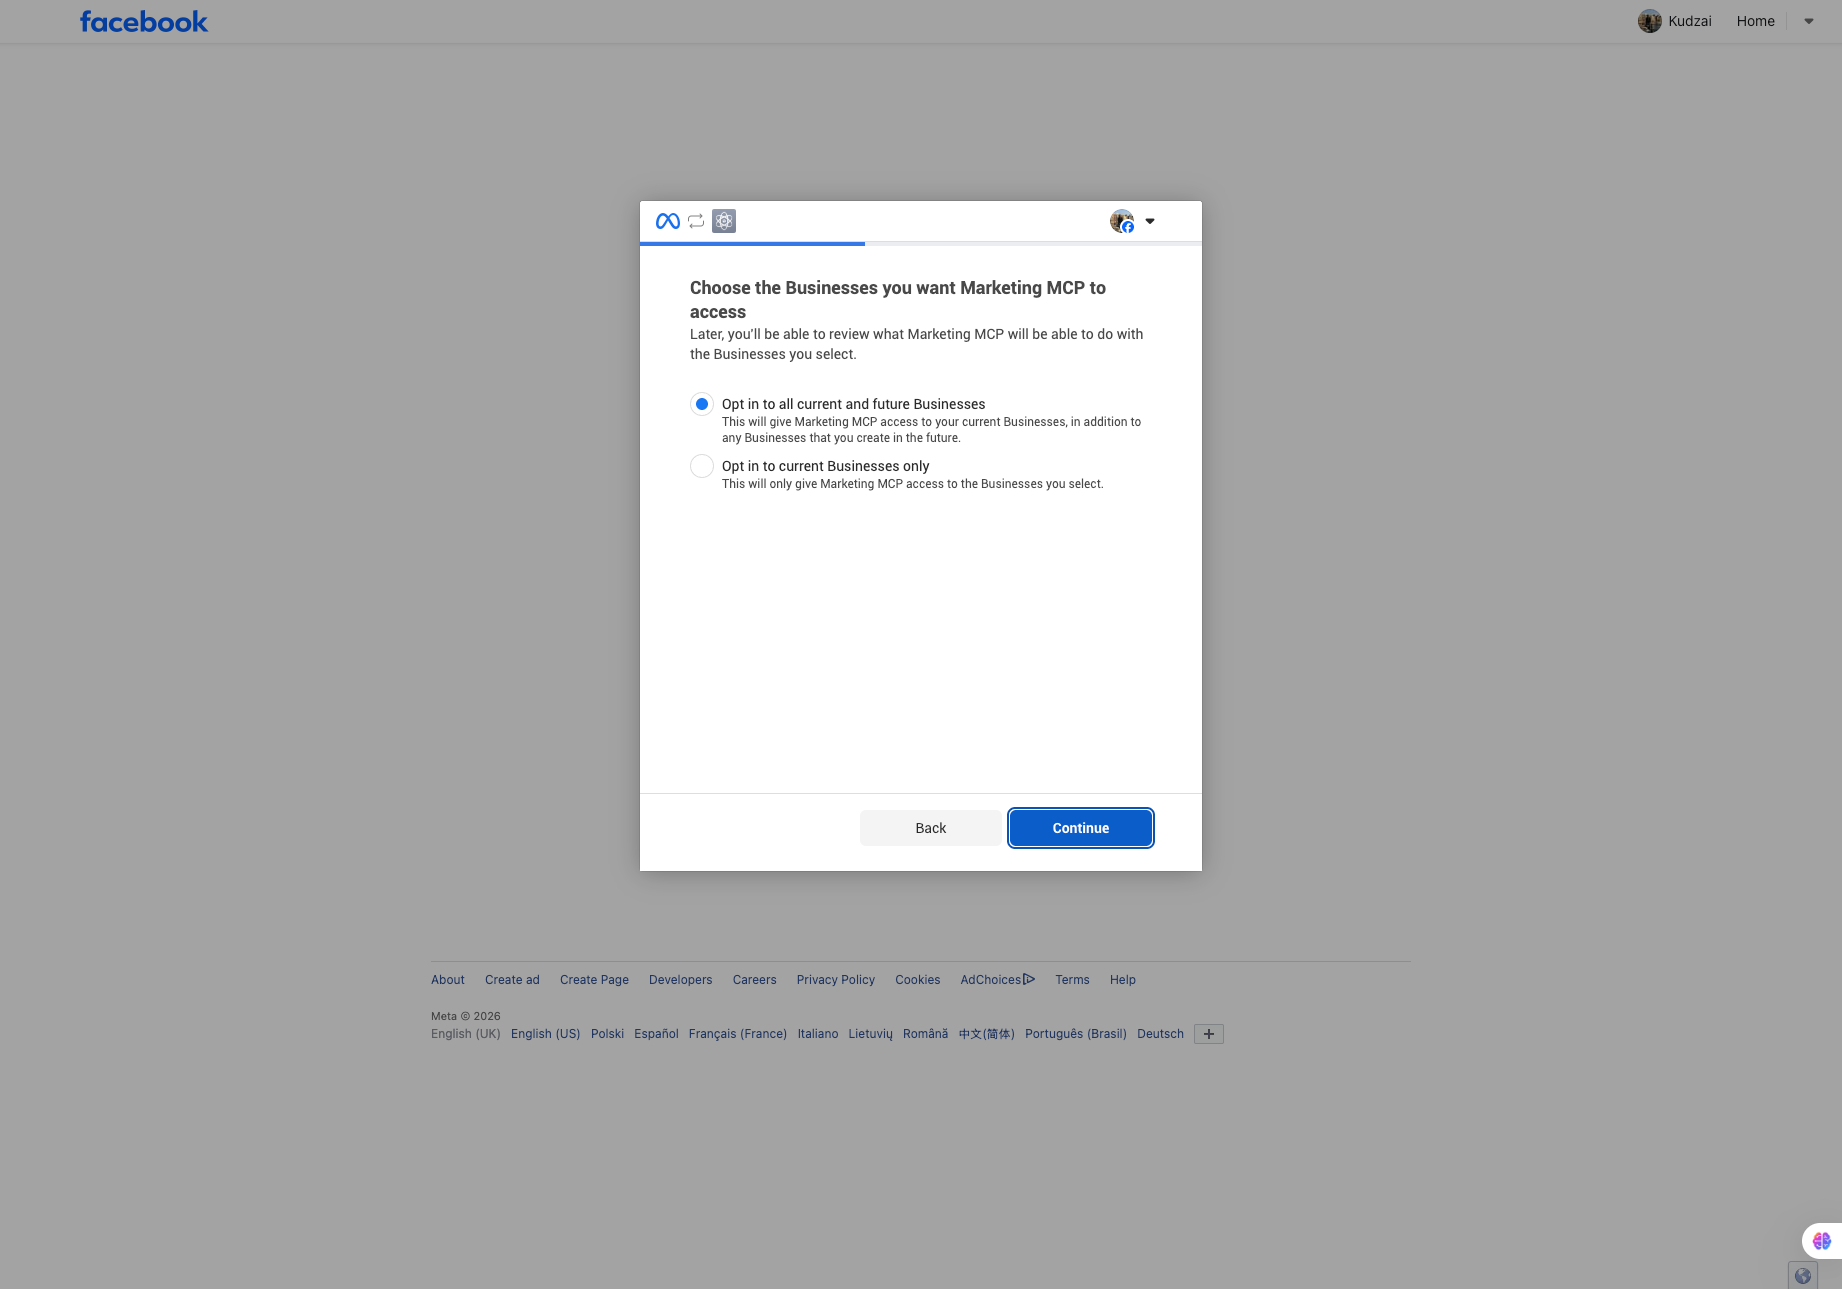
Step 12
Same for Businesses
Pick Opt in to all current and future Businesses, then Continue.
Step 13
Same for Instagram
Pick Opt in to all current and future Instagram accounts, then Continue.
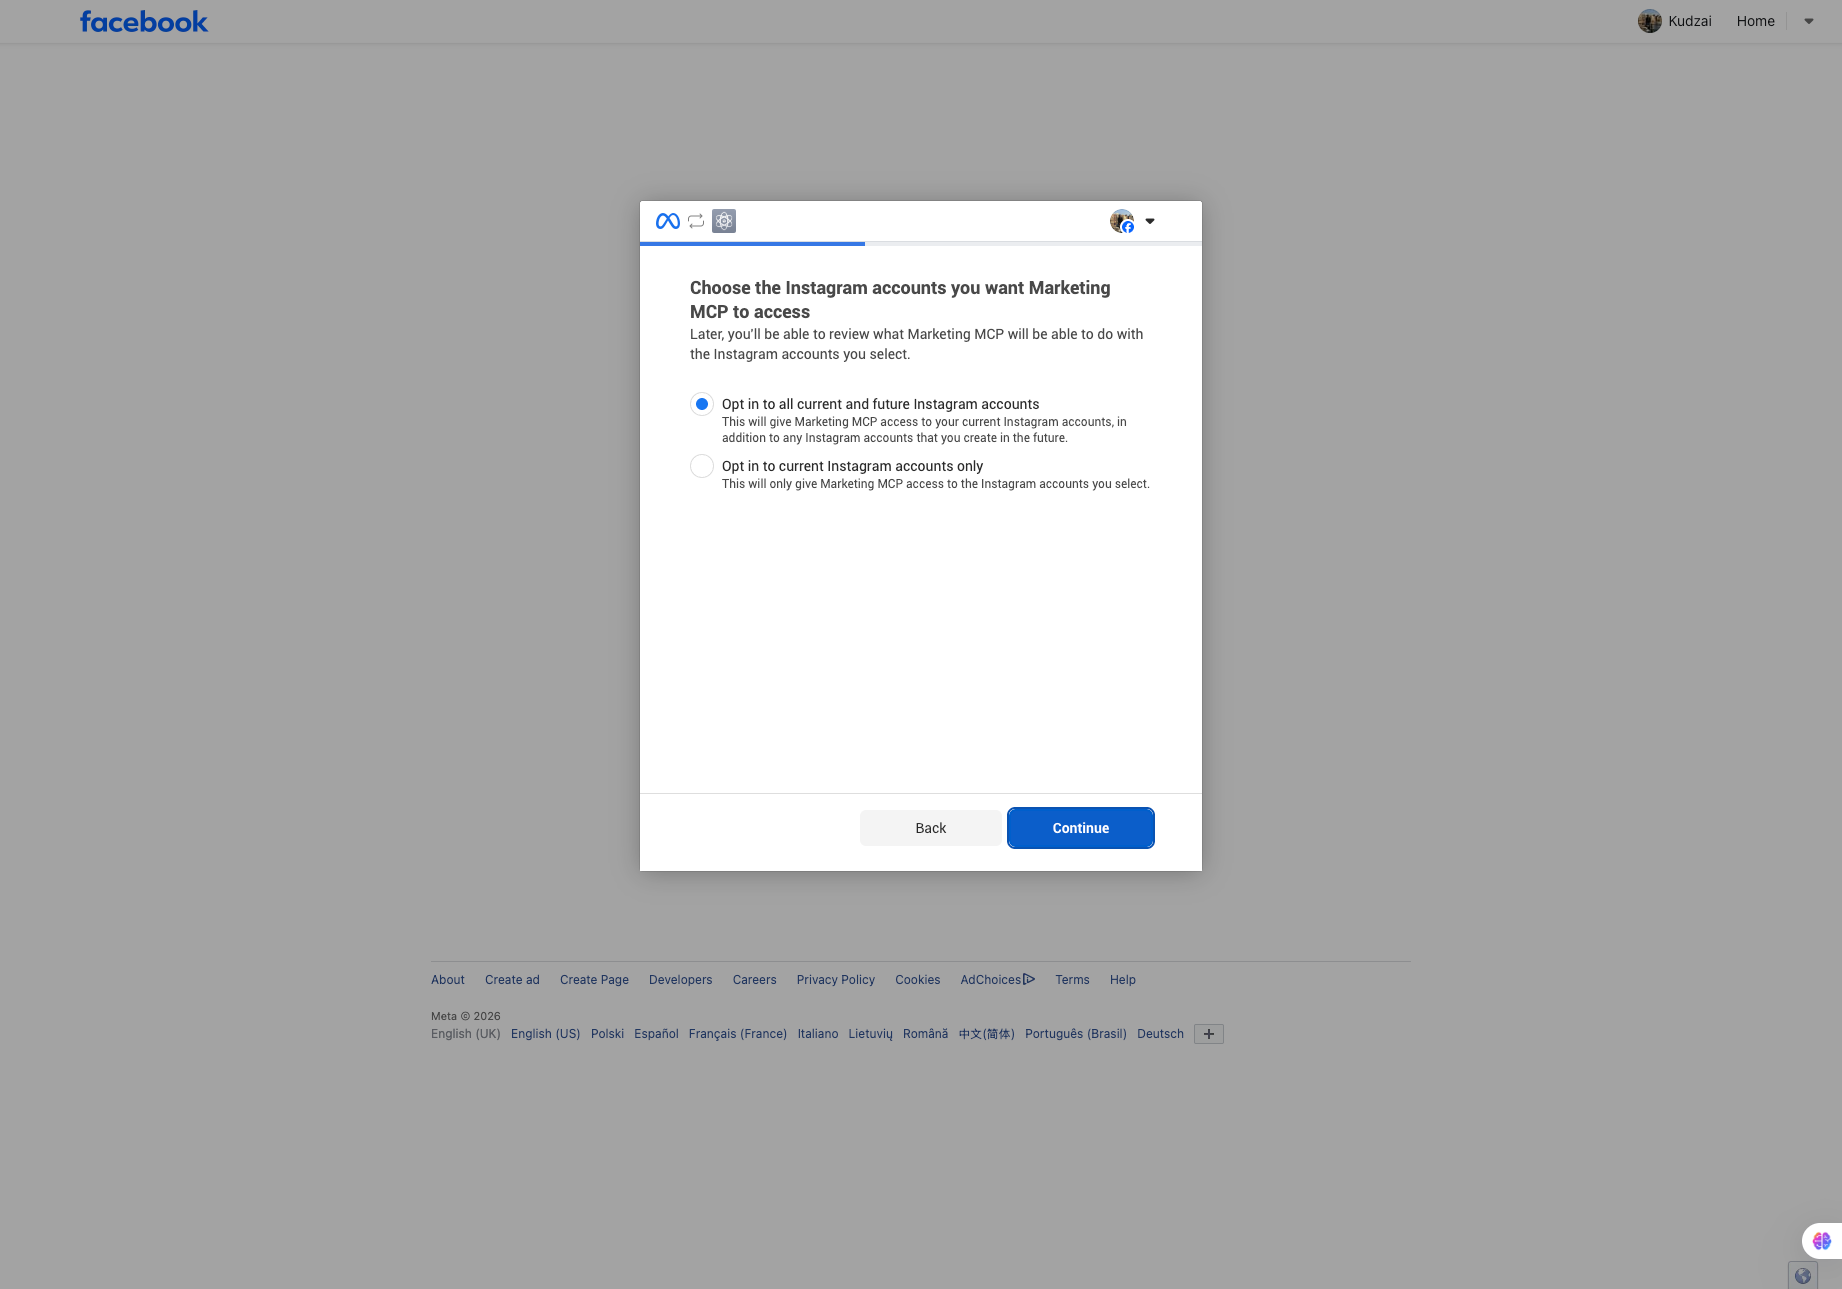
Step 14
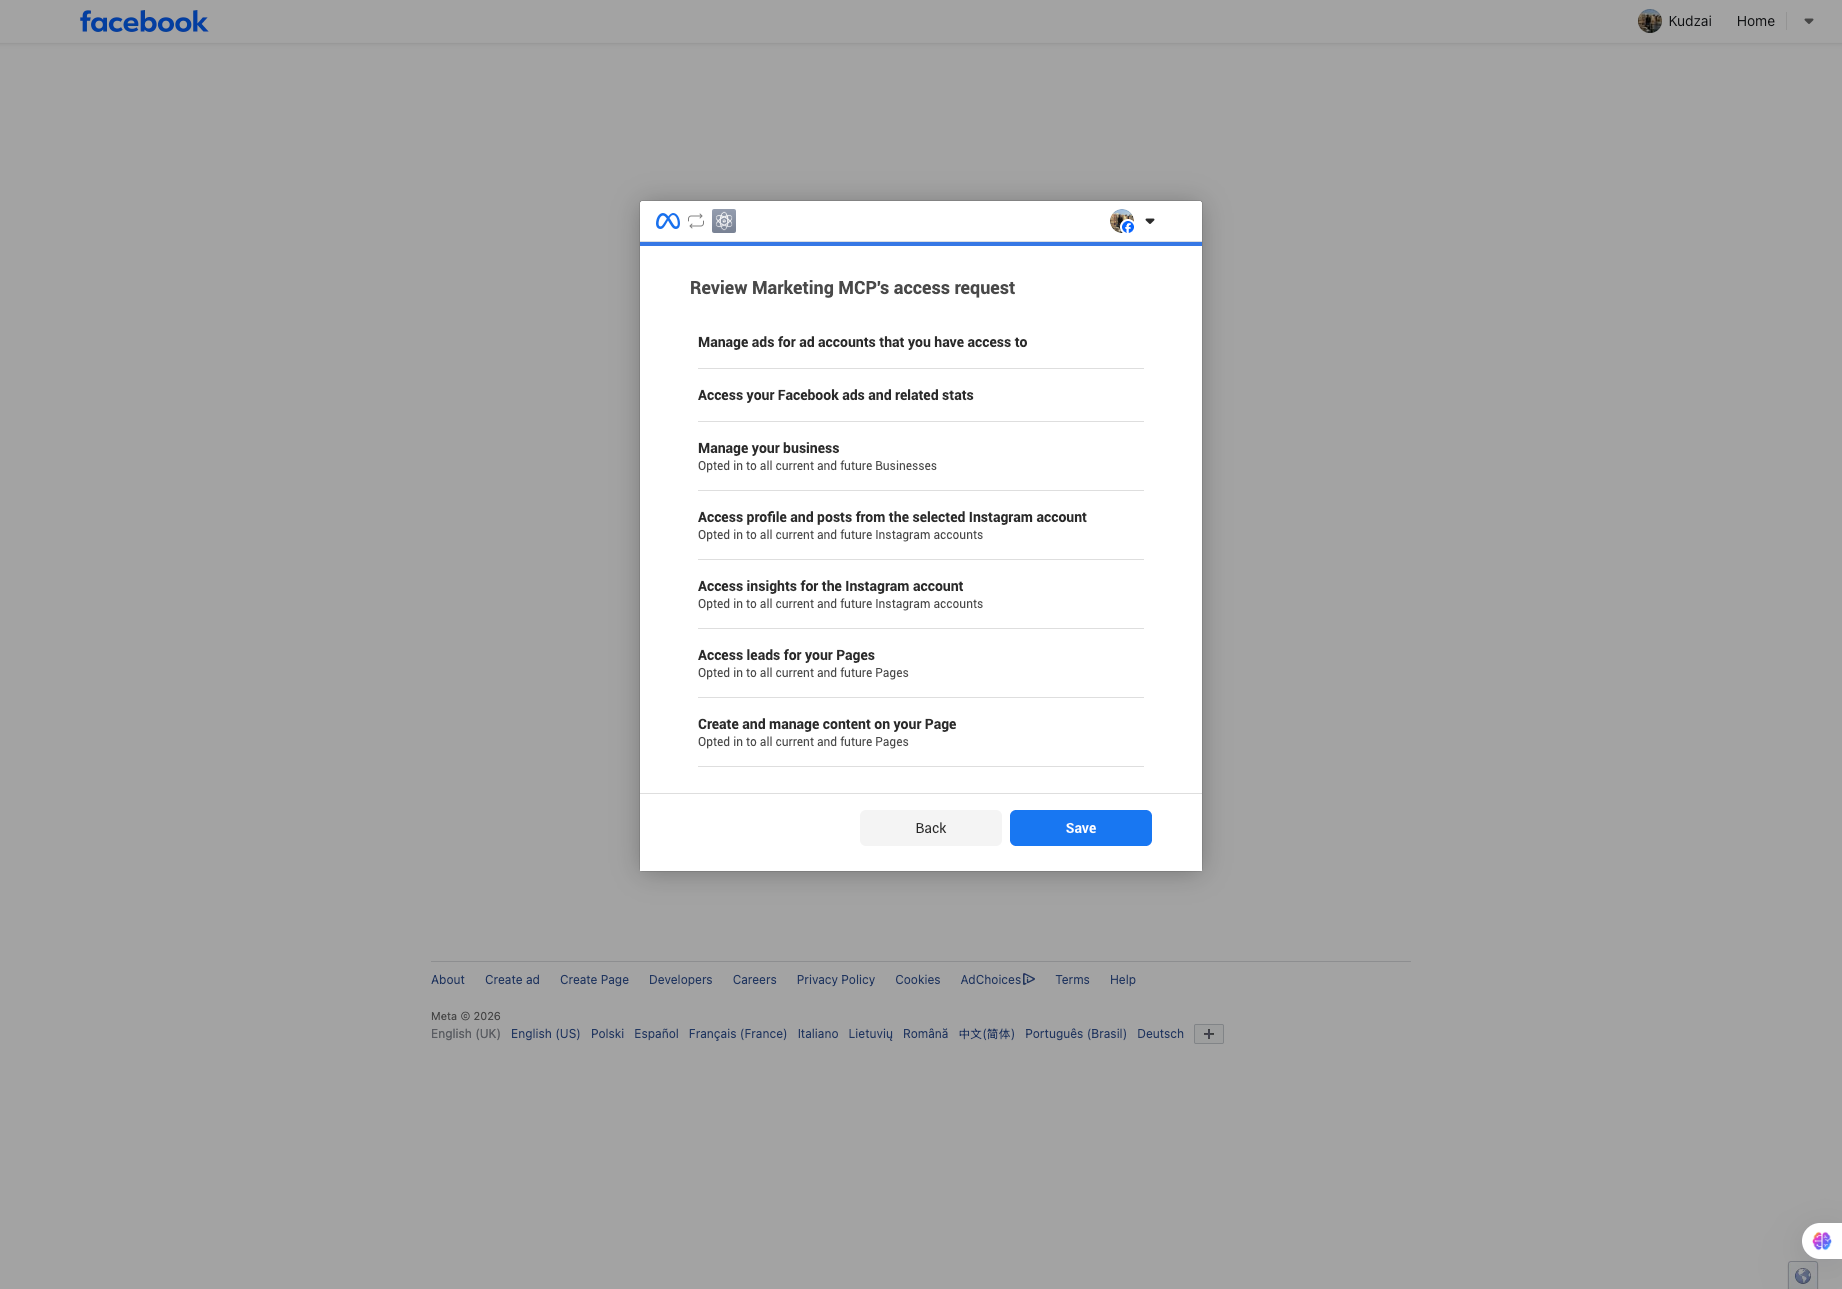
Review the permissions and Save
You should see manage ads, ads stats, manage business, Instagram profile and insights, Page leads, and create or manage Page content. Click Save. One last Facebook step: put the app Live.
Step 15
Switch App Mode to Live
Back in App settings, Basic. Paste the privacy policy and terms URLs if those fields are empty. At the top, flip App Mode from Development to Live. Click Save Changes at the bottom. The toggle sits next to the App ID.
You still skip App Review. You are the app admin. Live just means the app is published, not that Meta has to approve ads permissions.
Privacy policy URL
https://meta-ads-mcp.com/privacyTerms of Service URL
https://meta-ads-mcp.com/terms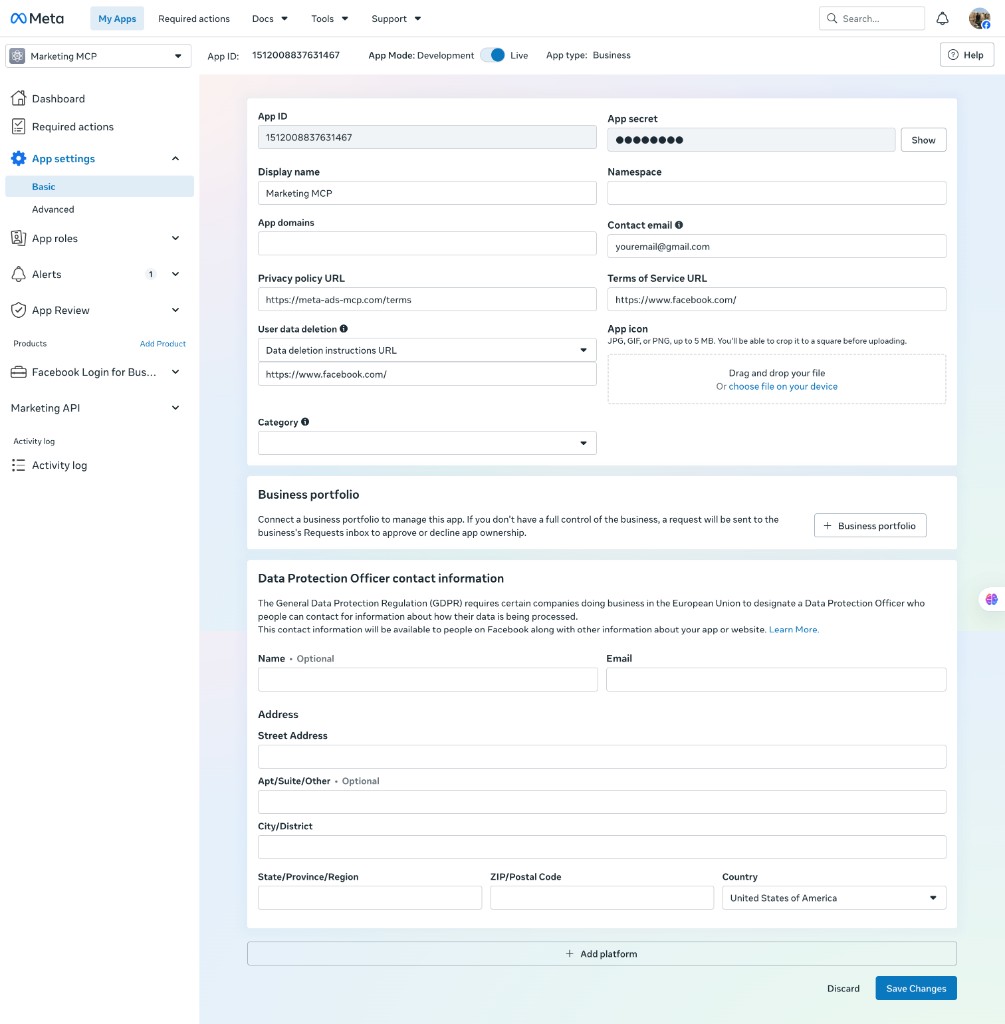
What to do after Save
- Attach an ad account in Ad accounts.
- Create a key in API keys.
- Add it in MCP setup. Cursor and Claude get a JSON config. ChatGPT uses OAuth and a login page.
Stuck? Email hello@meta-ads-mcp.com.